3D printers have come down in price in recent years, and there are many affordable options on the market today. I am not going to tell you which machine to buy because each person's needs and budget will differ, but if you love making things like I do, and have some aptitude (and patience) for learning new computer software, AND, if you've been contemplating adding a 3D printer to your arsenal, I strongly urge you to take the leap. As one member on the RPF forums told me, a 3D printer is like the internet: if you have it, it's impossible not to use it. This website is an awesome source of information on various machines, and comparisons of features between them.
(NOTE: when choosing a printer, do not base your decision predominantly on print speed. No matter what the manufacturer says it can handle, you should not be printing at maximum speed, as doing so will send your printer to an untimely grave. Printing slow is ALWAYS the way to go for great-looking prints, and is the best way to prolong the life of your robot.)
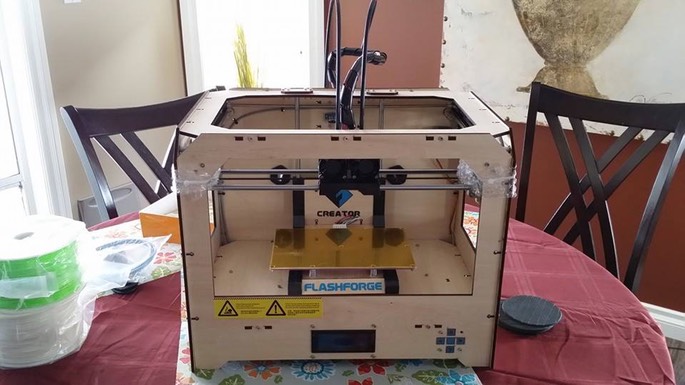
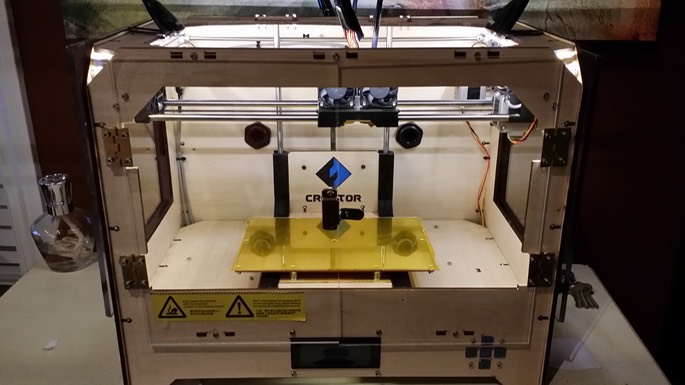
After much research, I decided to go with the FlashForge Creator Dual extrusion printer. It is made by a Chinese manufacturer and is based on the extremely popular open source Makerbot Replicator 1 design. Before you cringe at the "made in China" sticker, at the time of purchase on Amazon, this printer had 92 positive customer reviews, 5/5 star rating, and a price tag of $1199. With two extruders (to print in two colours), ability to print in both PLA and ABS plastics (good source of information on this here), a heated build plate (HBP), two spools of ABS plastic, and a pile of spare parts included with the printer, this was the perfect choice for yours truly.
I received my printer from a US distributor within days of placing my order. The printer came packaged in a box within a box, with form fitted foam and cardboard supporting all the structures on the inside. Some minor assembly was required to get it going (attaching the extruder heads and spool holders on the back using the included tools and hardware), but this took 15-20 minutes.
Shortly thereafter I printed my very first object: a whistle, which was included with the software that came with the printer (preloaded onto an SD card).
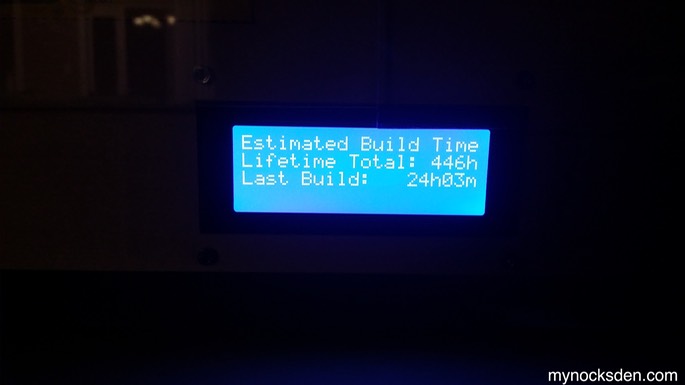
At the time of writing this, seven months and 1,565 hours of total print time later, I am happy to report that I have had no issues with the little robot at all. Oh, don't get me wrong, I've had some failed prints, but most of those were due to my own inexperience with the technology, and not at all the fault of FlashForge or their product.
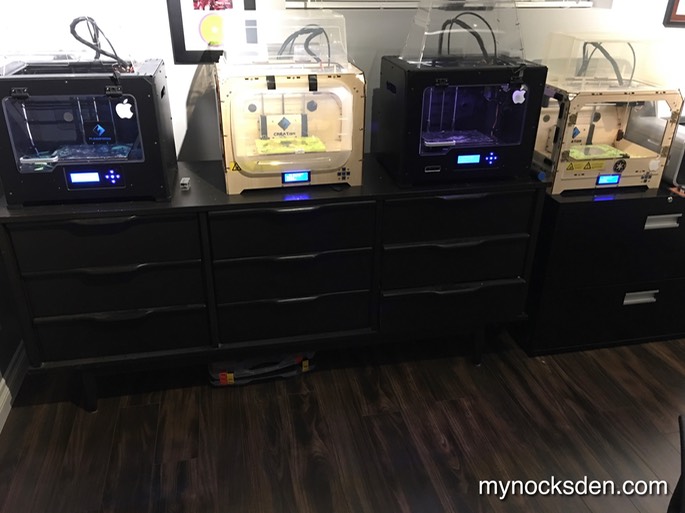
A year and a bit later, I have four 3D printers: two Flashrofge Creators, and two Flashforge Creator Pros. I could not imagine my prop-making without these awesome machines.
* * * * * * *
3D Printing Lessons I've Learned So Far...
Most people seem to have a love-hate relationship with their 3D printers. When things work, life is great. When things don't work, life is miserable and you wish you'd taken up knitting instead. Imagine, you've been printing something for 4 hours, watching it every step of the way, and in the last hour of the print, this starts to happen:
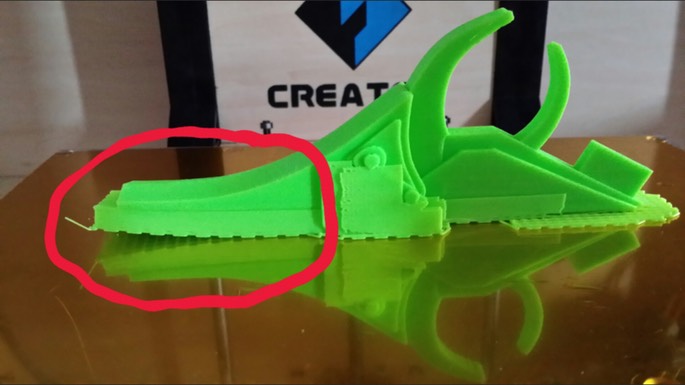
You peel the part off the build plate, bathe it in tears, and throw it in the garbage. That's 4 hours of life you'll never get back, 4 hours of wear and tear on the printer, and a whole lot of FAIL to show for it.
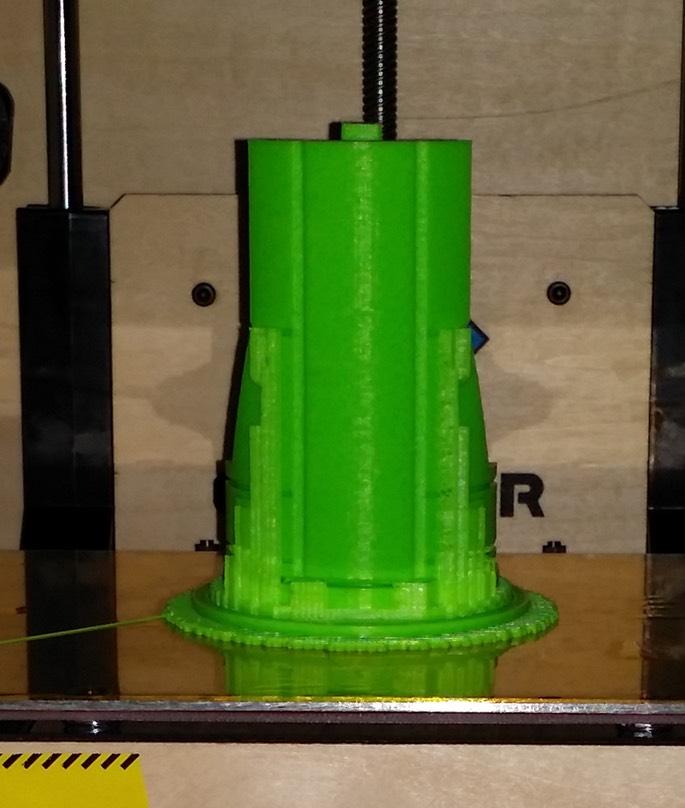
Curling or lifting as shown above for instance, is very common in 3D printing, and happens when large temperature differentials exist across layers of printed plastic. Lifting can happen if the build plate isn't hot enough, level enough, or if the kapton tape (gold film covering the surface of the HBP) is getting too old; it can happen if the printer is exposed to drafts caused by open doors or windows, or even something so innocent as people walking around near it! With a little bit of maintenance, software tweaking, and some very simple printer modification, most 3D printing issues can be resolved. Here are some basic tips for getting the most out of your printer.
Use Acetone/ABS sludge (BEST CURLING PREVENTION METHOD. PERIOD.)
I bought some pure acetone nail polish remover, and threw some pieces of ABS filament into the bottle. After a few hours the acetone will dissolve the ABS completely, turning the solution the colour of the plastic.
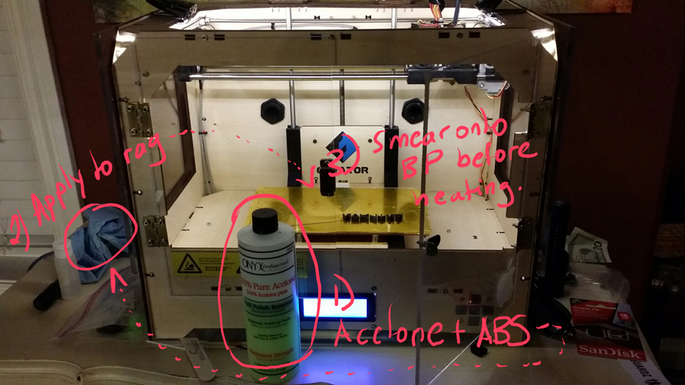
When I'm about to print something, I simply take a shop towel, dip it into the acetone+ABS solution, and smear it onto the build plate. (NOTE: I do this while the plate is cold, as acetone tends to evaporate almost instantly when the plate is at 110 degrees C; this causes the cloth/lint to stick to and burn onto the plate, which is bad).
Once the plate starts warming up, the acetone will evaporate, leaving a thin film of ABS behind. That film will hold anything you print down, no matter how big the object. In fact, you have to be careful when printing raftless this way because it holds so strong that sometimes it’s very difficult to peel the object off. I’ve come close to damaging the BP trying to twist the print off, and torn the kapton tape more times than I care to remember trying to pry the print with a knife. But, the fact is that using ABS slush reduces curling to virtually zero.
Also, when you print this way, be sure to leave the object on the BP until it cools completely. If the BP is still warm, the print WILL want to bend up as as soon as you peel it off. Letting it cool completely will allow the plastic to set straight, giving you the best possible print.
Keep Your Build Plate Level
Your printer will come with a software utility and a specific set of instructions for levelling your build plate. For the FlashForge Creator, the basic principle is to play around with the 4 knobs at the bottom of the build plate (next photo) while the printer positions the extruder assembly at various spots above the BP. The idea is to tighten (lower the BP) or looser (raise the BP) the screws until you can slide a business card between the BP and the extruder nozzle, which should scrape the paper ever so slightly at all pre-programmed positions during the calibration process.
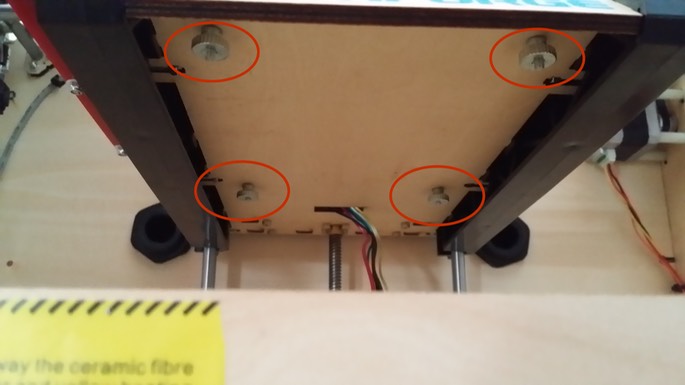
Doing this regularly will keep the extruder nozzles equidistant from the build plate throughout the build surface, ensuring an even print. I run through the levelling procedure 2-3 times to get it perfect before each print. Poor levelling can cause lifting, uneven layering during the build, or extruder nozzle dragging on the printed plastic.
Reinforce Your Build Plate Arms (MakerBot Replicator and FlashForge Printers)
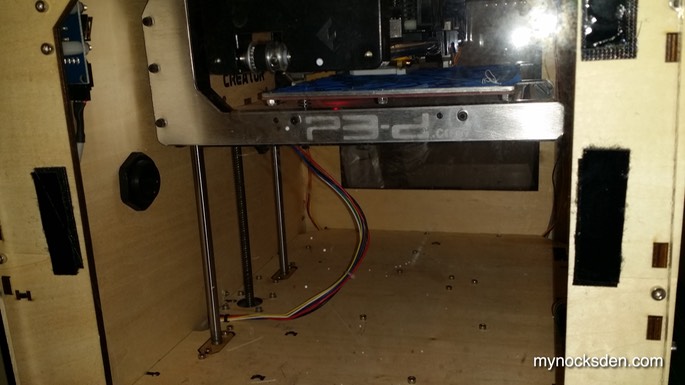
Recently, I started experiencing issues with leveling, and noticed that the build plate platform was sagging a bit toward the front. I did some research, and decided to get aluminum arm stiffeners from a www.p3-d.com. After following the video on their website, I installed the brackets in minutes and noticed a significant reduction in vertical play. This in turned allowed the build plate to maintain its leveling calibration much longer than before.

Keep Your Build Plate Free of Dust
Clean your BP with acetone, using a clean, lint free cloth. This will ensure maximum adhesion, and help prevent lifting. A clean, even BP will also ensure a smooth printed surface on your model.
Tighten All Screws!
Your printer shakes and vibrates as it prints, and some screws WILL come loose and fall out. After every few prints, go over your printer and tighten any screws that may have loosened. Do not over-tighten! If your printer wall panels are made of wood, over-tightening will gradually soften the wood, and result in warping and alignment/levelling issues.
Clean and Lubricate Moving Parts and Belts
If your printer has an open-top design, dust particles will get inside the moving parts and over time degrade performance. I use a vacuum cleaner with a hose attachment and an air compressor to clean the printer: I give a burst of air with the compressor, and immediately follow up with the vacuum hose to keep the airborne dust from falling back in.
Some people use graphite lube on all of the metal axis rods to keep the sliding smooth, but low viscosity wet lubricants such as silicone lube designed for Airsoft gas guns (which is what I use) also work. Make sure to clean and re-lubricate the metal axis rods often.

Also, if your machine develops squeeks and squaks that correspond with the movement of the axes, it’s probably because one (or all) of the belts is/are rubbing against the sides of the metal gears that drive them. Very likely, you will also notice black powdery residue on the gears, as well as the printer floor directly below. This is flakes of rubber from the belts grinding against the metal. Therefore, lubricate the belts to stop them from squaking and wearing out.
Keep 3D Printer Dry
Do not keep your printer in a place that is overly humid, especially if it is constructed from wood. Wood will swell up over time, and cause alignment/levelling issues.
Print SLOW!
Printing at maximum speeds will have a significant impact on the life of your robot. Printing at slower speeds (I print at 40ms FEED / 70ms TRAVEL rates) will give highest quality prints and keep your printer going for a long time. Patience is a virtue.
One Extruder at a Time
If you have a dual extruder system, but have no need to print in two colours, consider using the same extruder for every print. Doing so will keep the second extruder in reserve should the first one ever fail. Replacing extruder nozzles is a real pain as reported by those who have done it (thankfully, I have not), and to replace whole assemblies can be very expensive. Having a fresh working backup will ensure you can continue working while waiting/saving up for a replacement.
Enclose Your Printer
Drafts can severely impact the quality of your prints. If your printer is an open design, closing off the sides and top will help eliminate any temperature gradients across the build plate. I closed off the sides of my Creator by attaching plexi glass sheets to the wooden frame with velcro; for the front, I built a set of doors also out of plexi glass. For the top, I used a 17x11x7” tupperware container from Walmart ($6), which fits the top perfectly.
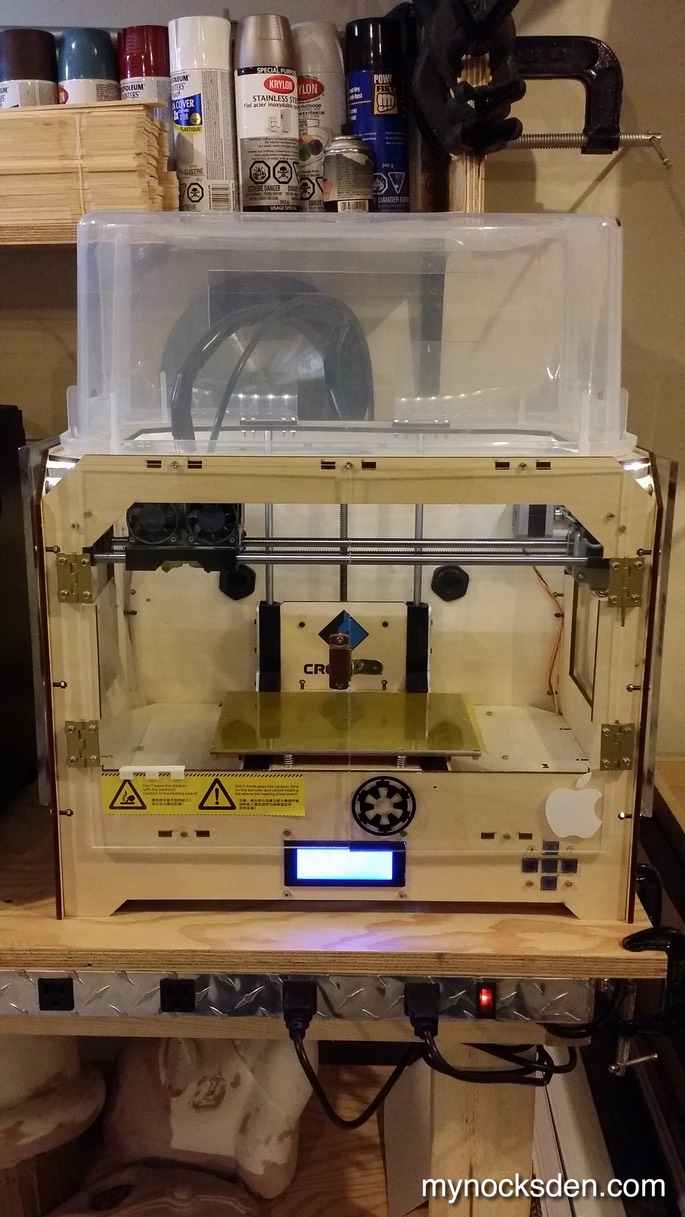
I cut out a T in the back wall of the container to allow the extruder cables to move.
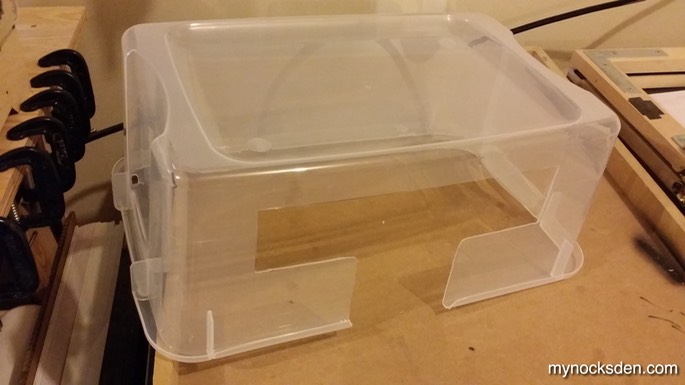
Since doing this very basic, very cheap (under $40) modification, the quality of my prints has improved drastically, and lifting/curling has ceased to be an issue.
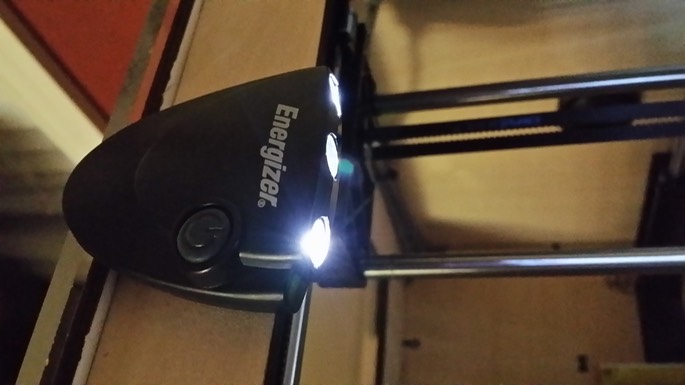
Add an Independent Lighting Source
If your printer does not come with a built-in source of illumination for the build plate, the simplest way to light things up is to attach one or two battery operated LED lights somewhere on the frame. I used two little trail lights - the kind that clip onto a ball cap - that I got on sale for $4 each. They pivot up and down, clip onto the frame perfectly with enough clearance to not interfere with the extruders; and, since I use them sporadically, they batteries in them should last forever.
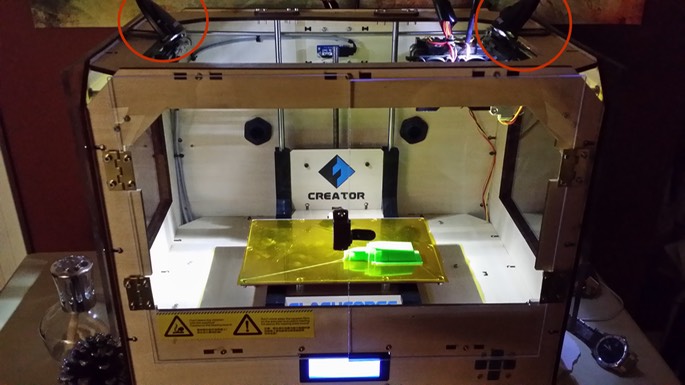
For best illumination results, however, purchase a battery operated LED strip with an adhesive backing, like this...
...and affix the strip to the inside of the wall panels at the top of the printer.
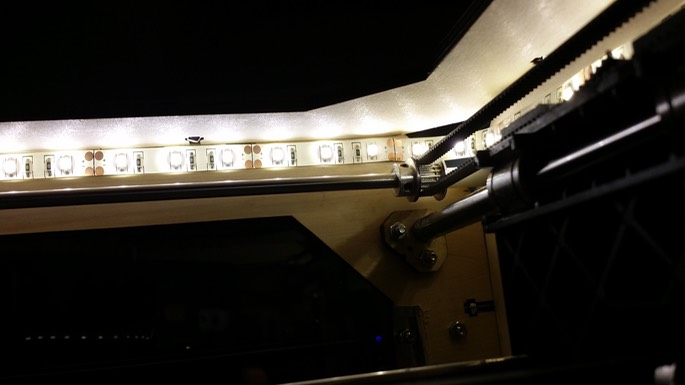
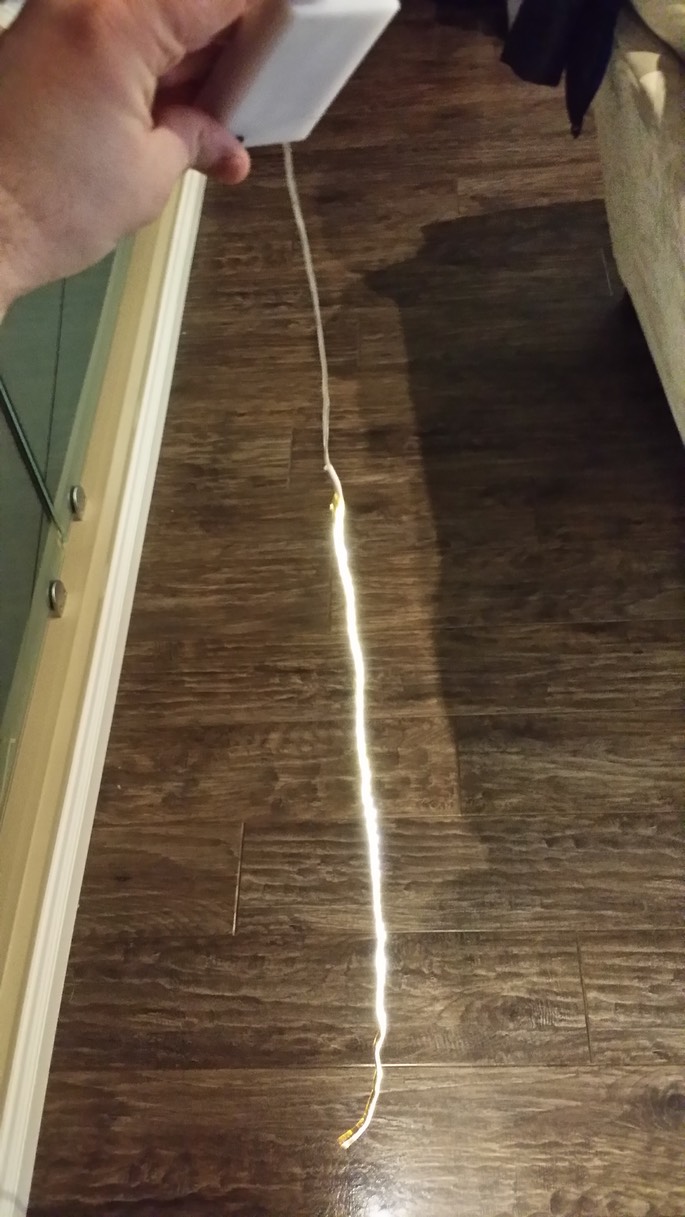
This creates an even illumination inside the printer (notice no shadows in the photo below) that can be turned on with a flick of a single switch. I would suggest adding dabs of superglue several inches apart on the sticky side when attaching to panels made of wood. The superglue will insure a firm hold, and prevent the LED strip from detaching and potentially damaging your print/printer. You can then mount the battery box on the outside of the printer using velcro for easy removal/battery replacement. This lighting solution costs $10 (with free shipping) on eBay, and despite involving a little more work than the previous method, will improve your printing experience.
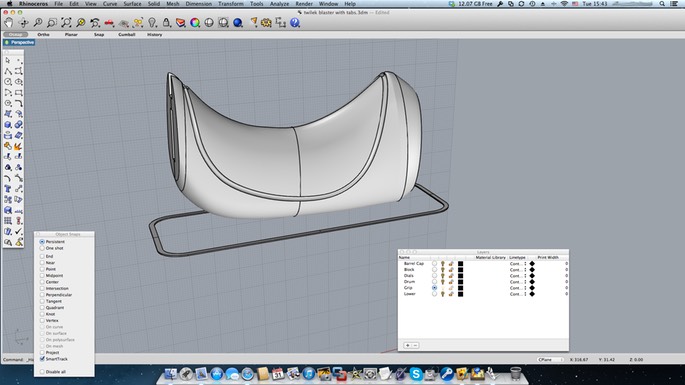
Create a Base with Rounded Corners for Your 3D Model
If you experience plastic adhesion issues (curling or lifting of corners), consider altering the base layer of your 3D model in such a way so that when your slicing software generates a raft, it will be much wider in diameter than the part, and have rounded corners. In the example below, the rectangular perimeter on the bottom is modelled around the base of the blaster grip, and the whole thing exported as one STL file. When the model is printed, the corners of the raft become rounded, which helps the object stick to the HBP.
Print with a Thick Raft
Using ReplicatorG, I edited the slicing profile for my printer to increase the base layer of the raft to the maximum 0.9, leaving the upper infill layer setting as is to keep raft removal easy. A dense, solid base layer ensures maximum adhesion to the HBP, and prevents warping.
Change the Kapton Tape on the Build Plate
Purchase a roll of kapton tape (30 meter/100ft roll for $45 from Amazon - which will last you forever), and replace the build plate tape whenever you begin developing print adhesion issues that aren't solved by any of the above methods. It is a lot easier to peel or reposition the tape when the build plate is warm, so it's a good idea to preheat your printer prior to attempting this. Applying new tape can be tricky, however, so be sure to use a credit card or another wide and flat non-abrasive object to push the bubbles out as you stick the tape on. If small bubbles end up being trapped, use a pin or a needle to pop them; the surrounding tape should shrink down and flatten itself agains the build plate underneath.
Print Several Pieces at Once to Save Time
Say you have two pieces that are mirror images of each other, and say each one takes 4 hours to print by itself. If you position the two models closely side by side on the build plate, both pieces will print in 5-6 hours (instead of taking a total of 8 hours separately). This has to do with the distance the extruder nozzle needs to travel to get to its next depositing position; rather than having to travel to that spot on a separate run, it saves itself time by taking a few extra seconds to deposit more material if it's already in the vicinity. I learned this while printing my Shae Vizla helmet, and in the end saved myself quite a bit of time by printing multiple pieces at once.
Watertight Model
One of the most important things in 3D printing is having a 100% watertight model; that is, all surfaces must be closed, without any gaps or exposed edges showing. Failing to properly close the model can result in ruined prints and loss of detail.
Before exporting an STL file, I usually check the selected object details in Rhino to make sure the model is watertight; if Rhino says “valid polysurface” AND “close solid polysurface”, the model is ready to be prototyped (see next photo).
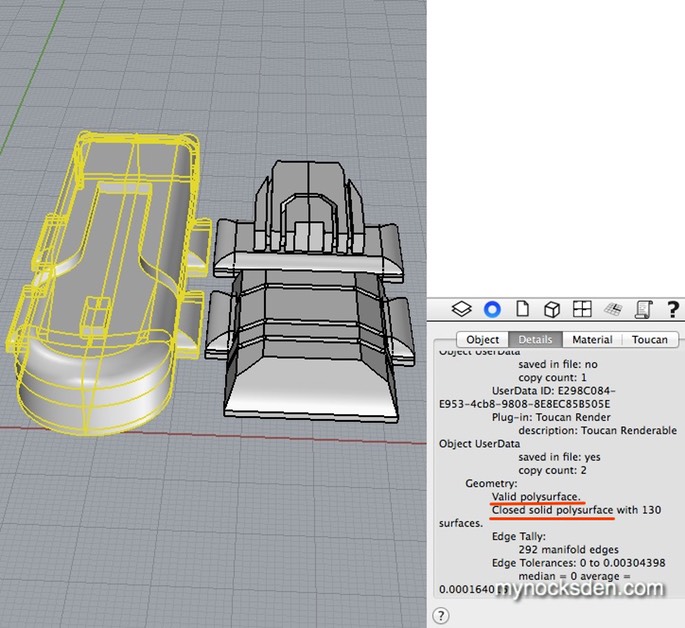
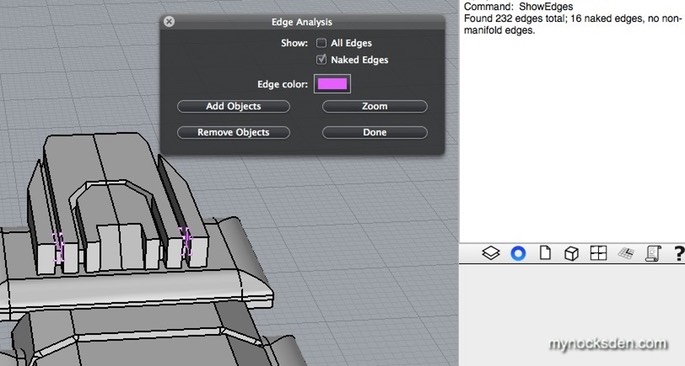
If “closed solid polysurface” is missing from the Geometry details section, the model contains geometric issues that need to be addressed.
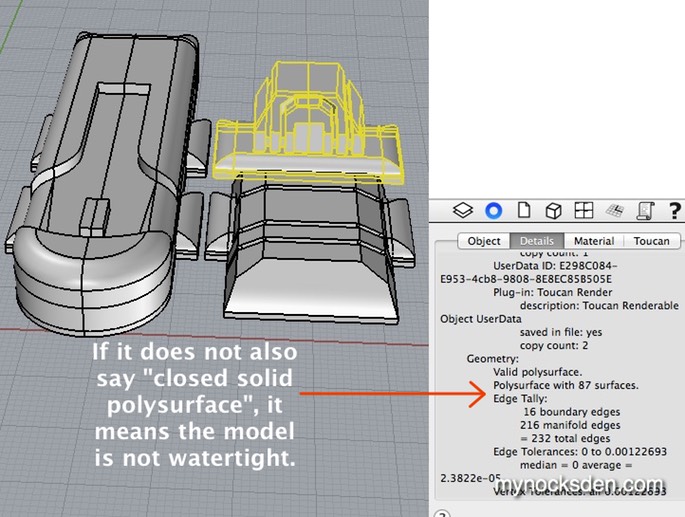
In the above example, a few overlapping surfaces (outlined in purple in the next photo) resulted in an open model, unsuitable for 3D printing.
* * * * * * *
Computer Assisted Design (CAD) Software
- 3D Printing