As a thank you to the community for all the amazing support over the years, I have made the STL file of the blaster available as a free download. You may use it royalty-free. If you decide to use it for profit, however, please do me the courtesy of publicly crediting me as the file’s creator.
DOWNLOAD THE BLASTER STL FILE HERE
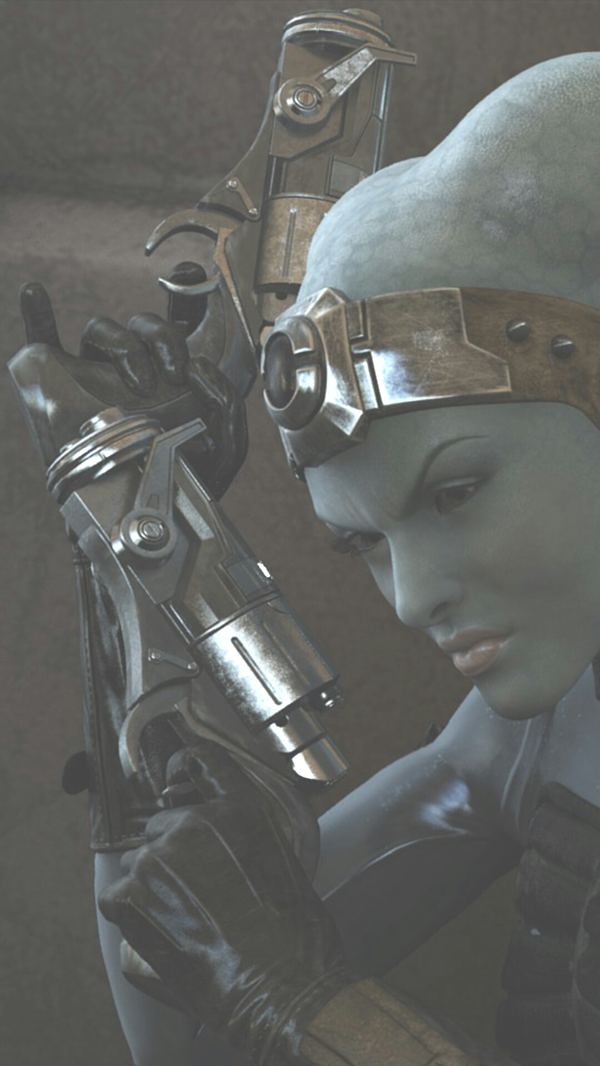
With my main character in Star Wars the Old Republic being an armed-to-the-teeth Bounty Hunter, I wanted to make myself something bounty hunter-ish. And, what better bounty hunter-ish thing to make than a blaster? To help decide which blaster to tackle however, I once again turned to the Star Wars the Old Republic trailers.
In addition to everyone's favourites - the Sith Acolytes, Darth Malgus, and the Mandalorian Shae Vizla in "Deceived", we also see an awesome gunslinger Twi'lek named Eleena Daru, who just happens to sport the very same set of blasters as my BH character in game!
Boom! Fate.
So, I began gathering all the reference material on the blaster I could find.

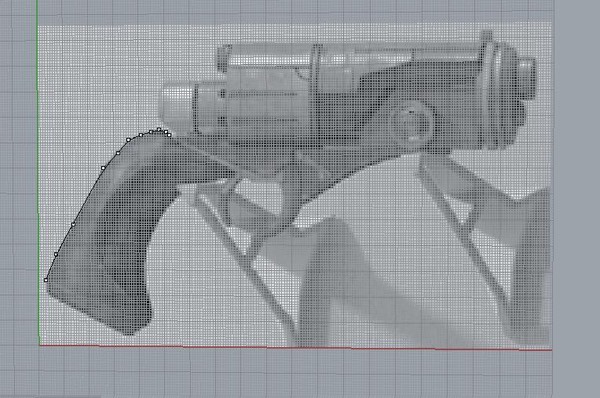
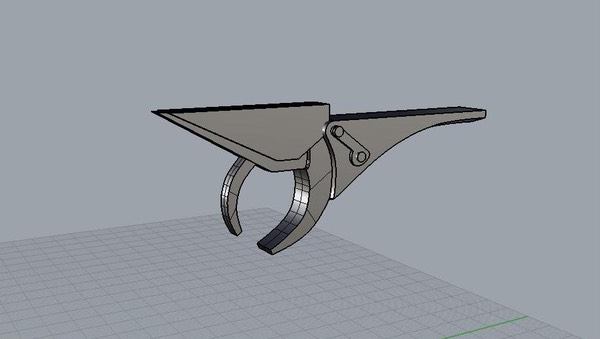
I started the build process by importing a photo of the blaster into Rhino and tracing the outline.
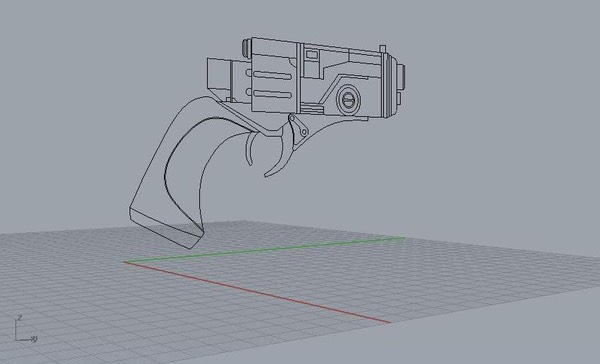
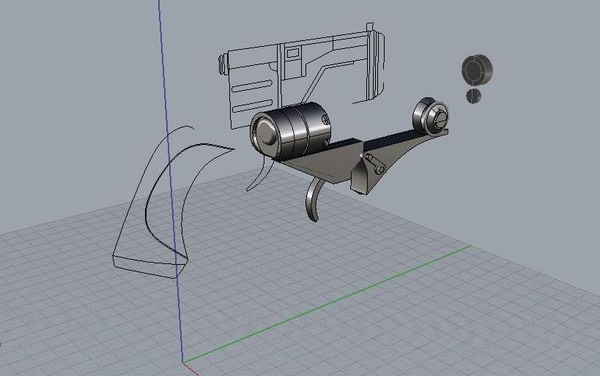
After tracing all of the visible detailing, I began to painstakingly pull all major parts out into 3D, meticulously building the shapes.

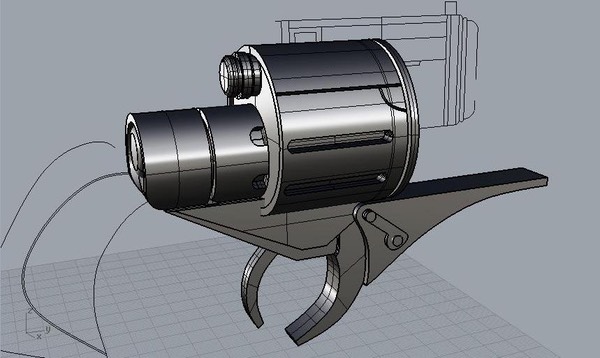
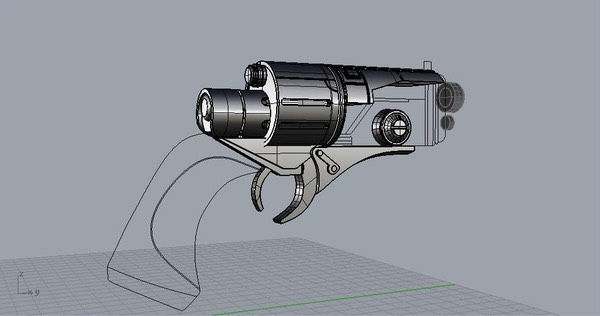
Fast forward a few weeks to a completed blaster model.
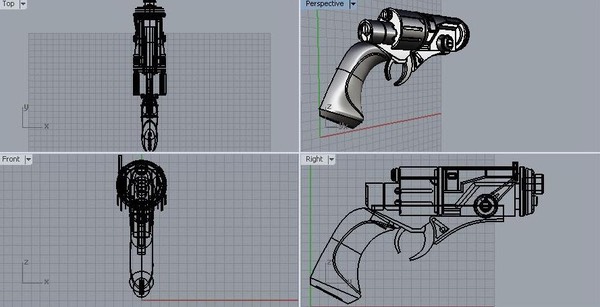
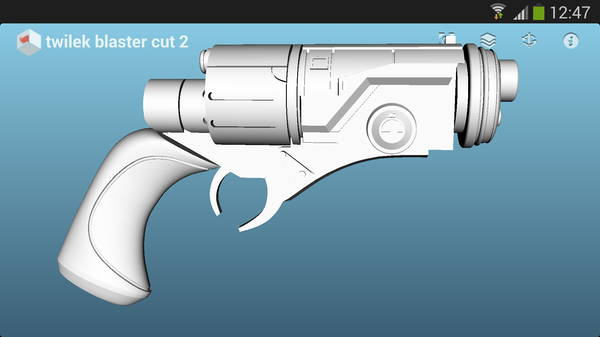
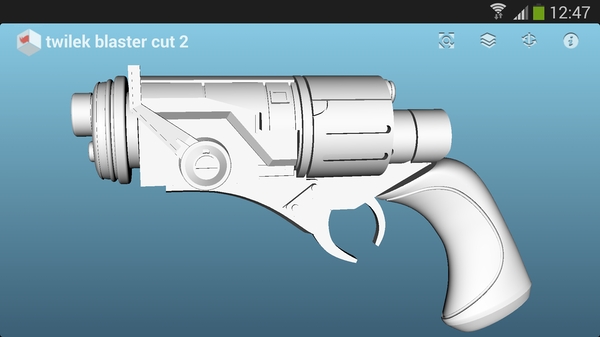
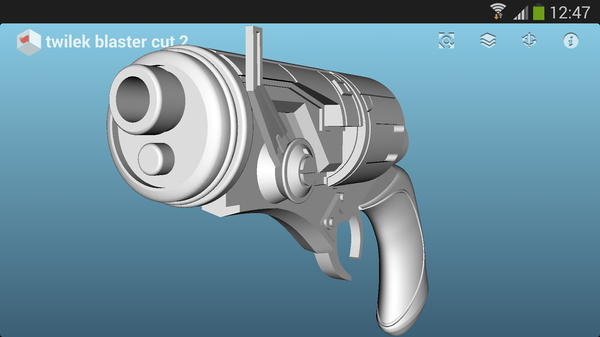
To complete the blaster 3D model took about 40 hours. While this may seem like a lot, it is the total time spent not only building the model, but learning the software as well. This became yet another milestone in my prop-making journey: it proved that I can model complex objects using CAD software, paving the way for all kinds of prop making possibilities!
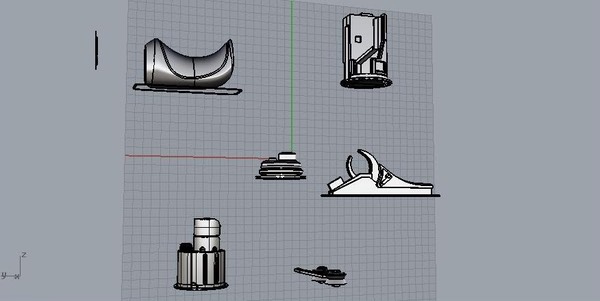
Next, I needed to prepare the model for 3D printing. The gun would not fit on the build plate as a single object. Given the complex shapes, undercuts and grooves, even if printed in two pieces, the stress on the 3D printer as well as cleanup (sanding) problems would be substantial. Therefore, printing in several smaller pieces would be the best way to go.
I took the time to modify each piece so that the printed pieces would snap together like a model kit without the need to glue anything.
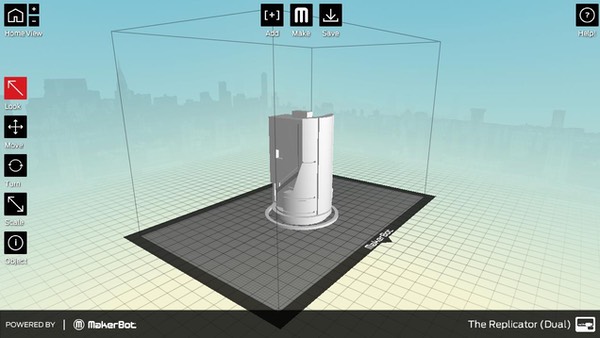
Once each piece was prepared and exported as an STL file, I imported it into Makerware, positioned it on the virtual build plate, and saved the STL file again.
Then, using a program called ReplicatorG, I generated the G-Code (a set of instructions the printer understands) for each piece, and loaded them onto an SD card.
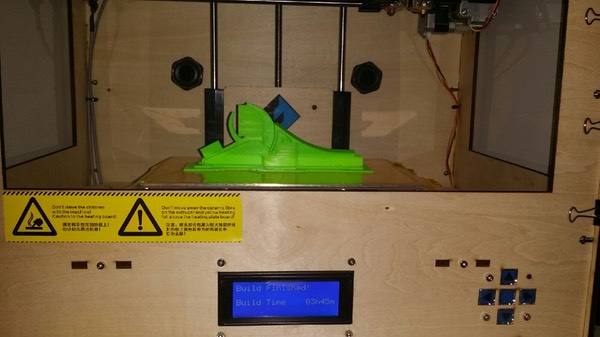
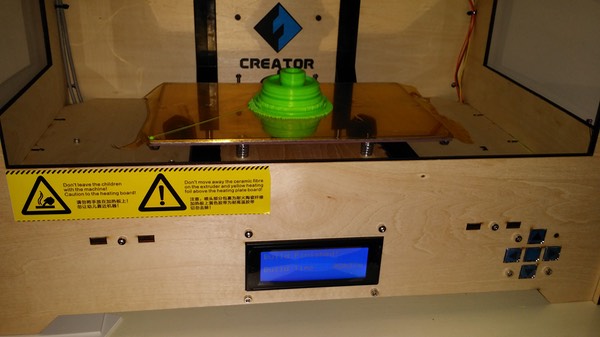
Over the course of about a week, I printed each piece several times, experimenting with different printer settings and model configurations. I had a helluva time with curling or lifting as shown in the next photo, which resulted in a lot of wasted time, plastic, and hair-tearing frustration on my part.
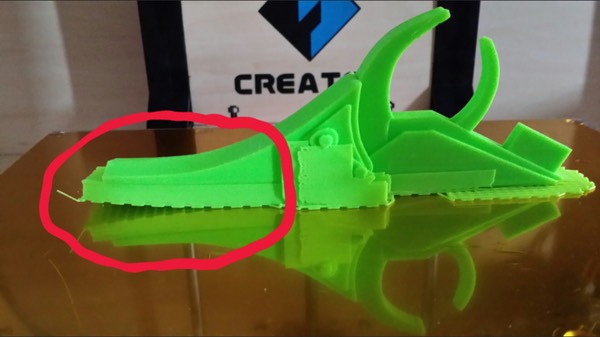
Curling is a very common issue in 3D printing; it arises when large temperature differentials exist across layers of printed plastic. There are several suggested ways of combating this, including covering the build plate in liquid ABS (ABS plastic dissolved in acetone) or hair spray. In the end, I ended up completely eliminating curling by enclosing three of the 4 sides of my robot, and increasing my raft base layer density settings to maximum.
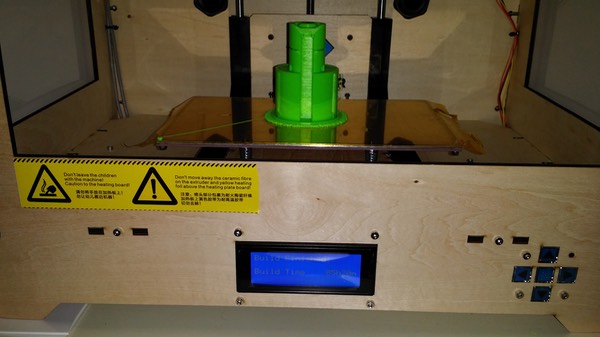

The total print time for all pieces of the blaster was 23.38 hours (not including the failed attempts, which took just as long.)
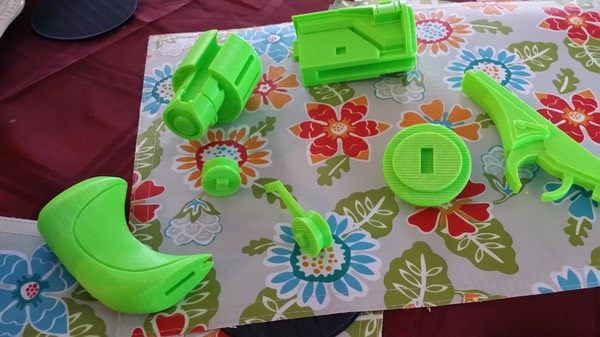
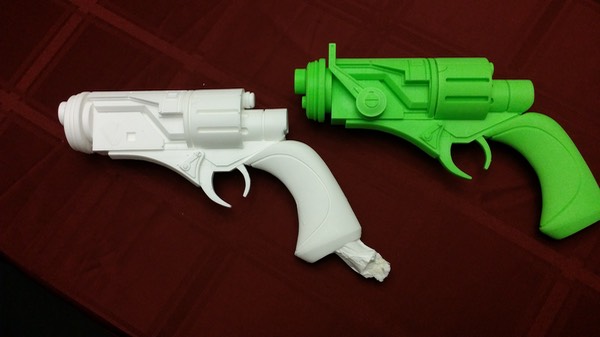
After all the pieces were printed and the raft material removed, I had 7 pieces of the blaster "kit" to sand and prepare for molding.
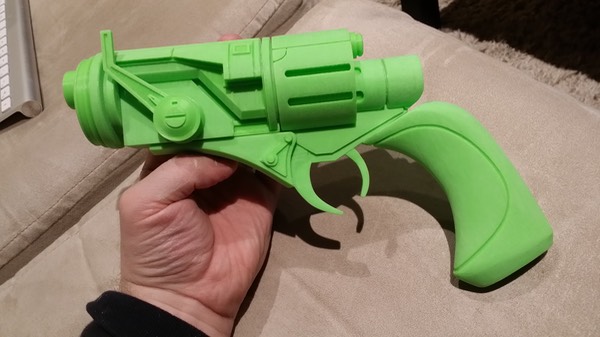
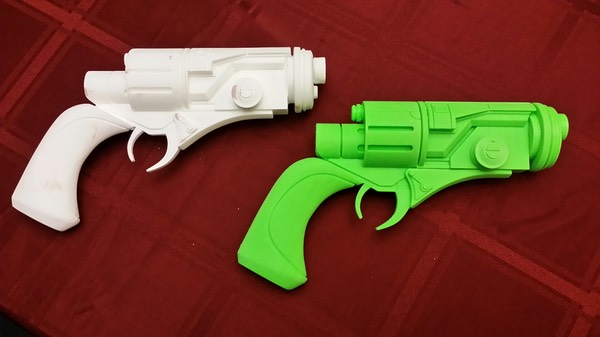
After sanding, and fitting all the pieces together, we have a SWTOR Bounty Hunter blaster master!
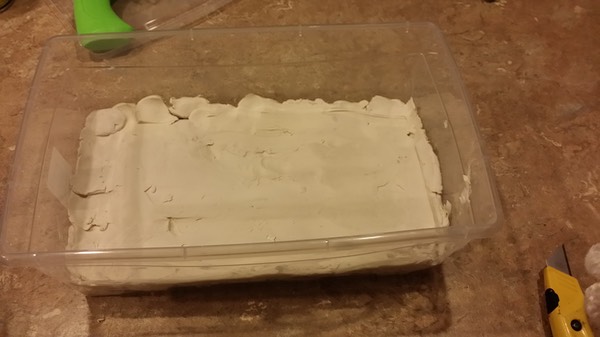
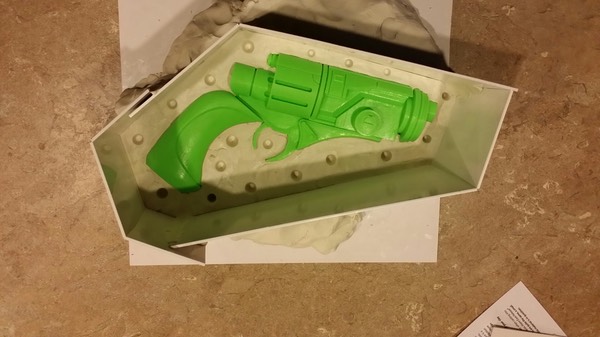
Next came molding. I have never molded anything in halves before, so this would be another first. I began by setting up a plasticine bed inside a clear plastic container.
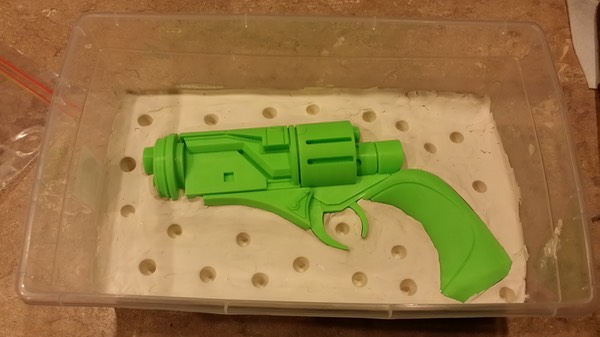
I put the blaster on top and traced the outline onto the plasticine with a sculpting tool. I then cut the shape out using a utility knife, soaked the blaster with mold release to prevent plasticine from sticking to it (otherwise it's a NIGHTMARE to clean off), put the blaster in, and sealed up the gaps with more plasticine. I smoothed the surrounding surface out with sculpting tools as best I could, and poked some holes (that would later act as registration keys) with a sharpie.
I decided to remove the lever on the left side of the blaster and tackle it separately, while leaving the lever-less dial/button/screw thingy on the right side attached.
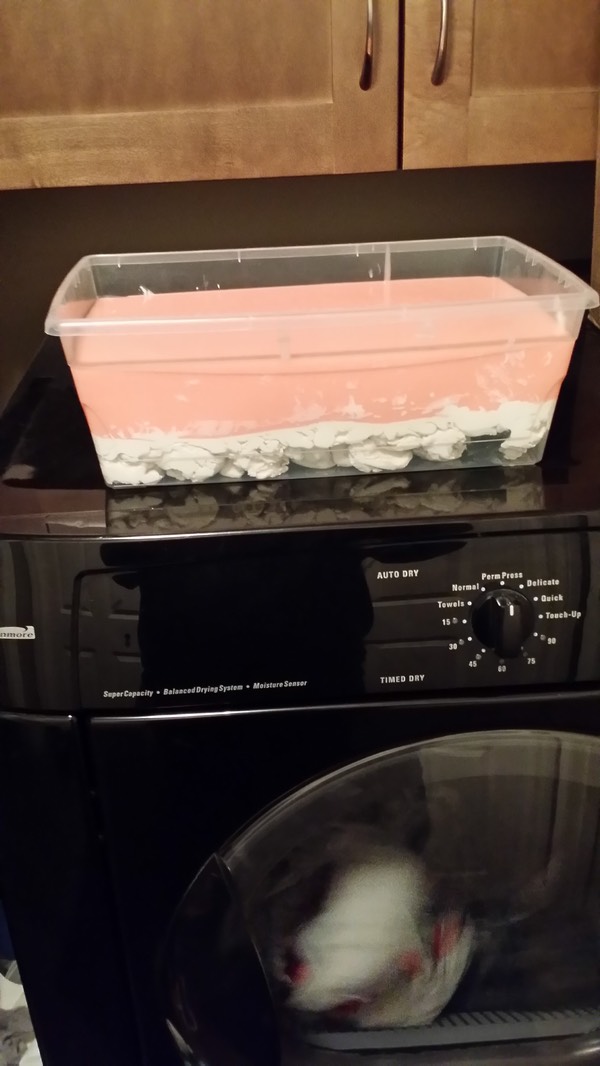
Next, I sprayed the inside of the contained with more mold release, and filled it with enough Rebound 25 to effectively submerge the tallest point on the blaster by about 1cm.
I then placed the whole thing on top of the dryer; the shaking of the machine would help dislodge any bubbles that might be trapped on the surface.
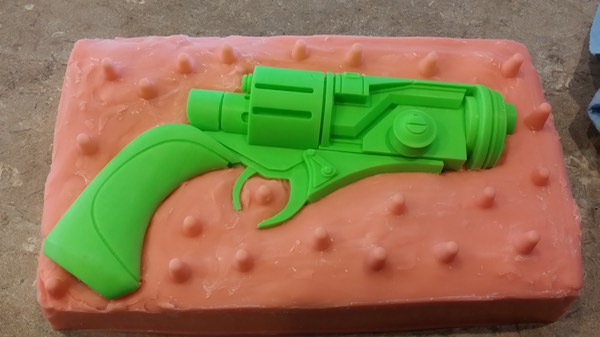
After the silicone cured (overnight), I removed the mold from the container, and cleaned off the plasticine. At this point I realized that I would not have enough silicone to complete the second half of the mold. What a buzzkill! And since we are two days away from New Year's eve, I would not be getting my next batch of silicone until next year… which is an extremely long time to wait.
C'est la vie.
To be continued when the new batch of silicone arrives…
….Picking this up a week later.
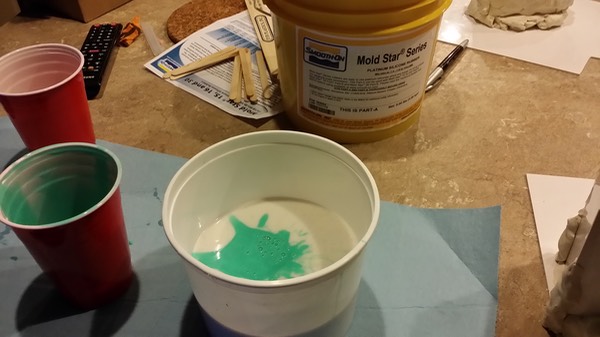
After doing some research, I went ahead and ordered a gallon kit of Mold Star 15, a pourable Smooth-On silicone with a 4 hour demold time. Due to the tensile differences between Rebound 25 and Mold Star (which is a bit softer), I realized I would be unable to use the Rebound 25 half-mold, and would therefore have to mold from scratch. *Sigh*. All that silicone …. haste really does make waste.
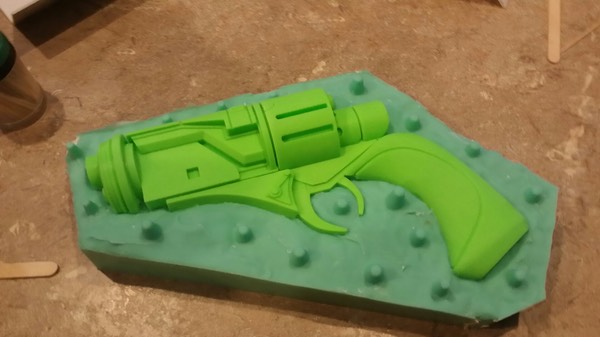
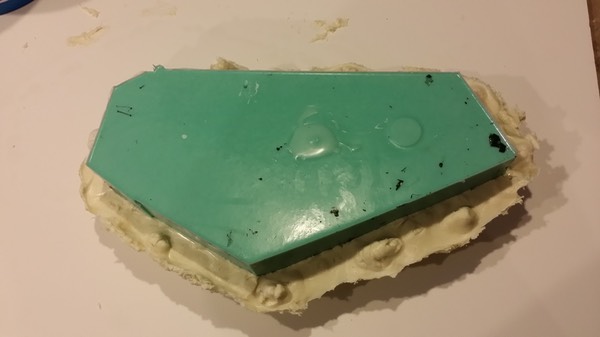
Learning from my mistake with the Rebound 25 half-mold, I decided to do a pentagonal mold shape rather than a square to save silicone. I built up the base layer with plasticine warmed up on the fireplace, and built the walls using ABS sheets.
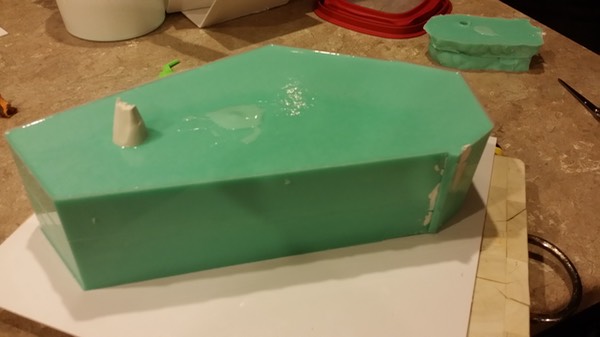
After pouring Mold Star 15, and letting it cure, the first half was done.
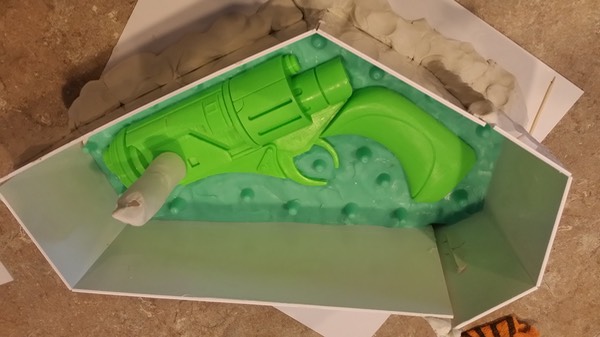
I then replaced the ABS walls, sealed the cracks with plasticine (some people use hot glue, though I found that using plasticine is both quicker, and allows for instant adjustments and quick sealing), and sprayed the inside with mold release to ensure that the two halves of the silicone remained separated. During this step, I picked a low-key spot on the model that would interfere with the detail the least, and created a pouring hole using a stick of rolled plasticine.
I did not think this through very well however, so it proved to be yet another dumb-dumb move...Due to the complex shape of the gun, and the overwhelming number of undercuts, the potential for air becoming trapped is high. I realized the error of placing a pour hole in that spot soon after I poured the silicone. Once it cured, I decided to skip the mother mold step for now, and do a test cast.
Just as I predicted, the casting came out completely ruined on one side as a result of air getting trapped. You just cant cast something like this by having it lie flat on the gound!

So, I filled the pour hole with silicone, and relocated it to the butt of the blaster by cutting into the mold with a utility knife; having the mold standing up with the muzzle being perpendicular to the ground and the pour hole in the hilt would ensure even filling of the mold cavity, which would (in theory) eliminated trapped air. I have no idea why I didn't think of doing it this way first…
Next, I created the mother mold support out of Plasti Paste I. I started by building up a layer of plasticine half way up around the rubber mold, making some deep indents in the clay to act as registration keys. I then slapped the Plasti-Paste on and allowed it to cure. I then turned the thing over, removed the plasticine, sprayed mold release on, and applied Plasti Paste to the other half, creating two separate halves of the mother mold.

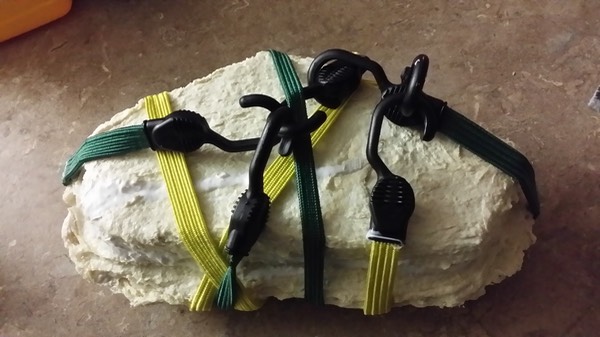
Finally, I was ready to cast! Using a $10 set of elastic straps I bought just for this project, I assembled the two halves together, strapped them up, and poured in my Smooth Cast 65D. Once the resin began to turn white (which I could see through the top of the pour hole), I laid the mold down, and left it to cure.
Demolding revealed a near perfect casting of the Twi'lek blaster! Some air bubbles managed to stick around despite my careful pouring and mixing, but it was nothing that couldn't be fixed up with some Bondo later.
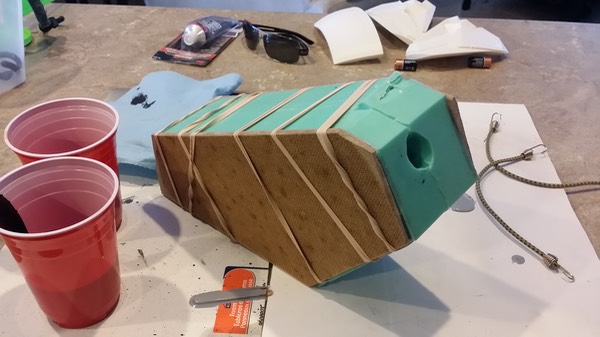
(NOTE: I would eventually go on to replace the Plasti-Paste mother mold halves and elastic straps with simple MDF boards and elastic bands, like in the following photo. The reason for this is that no matter how careful you are, some resin will always leak in between the two Plasti-Pate shells, harden, and cause alignment issues, resulting in ruined casts.)
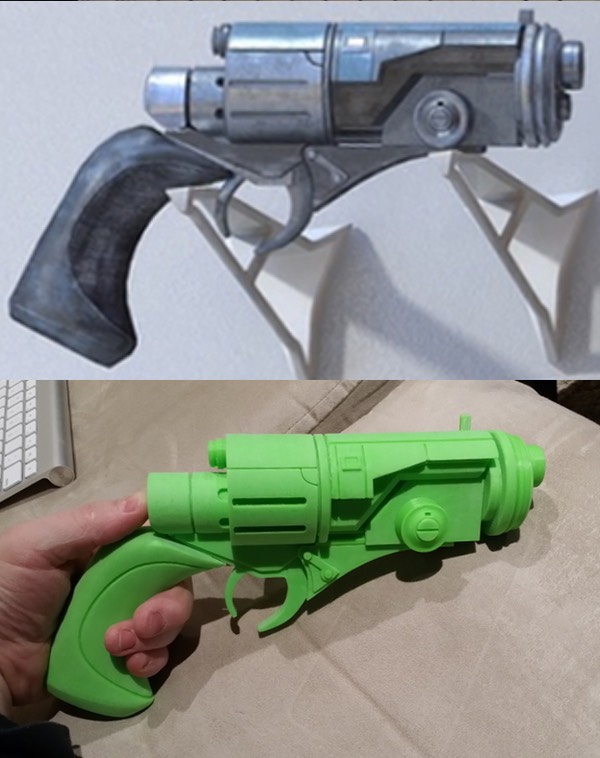
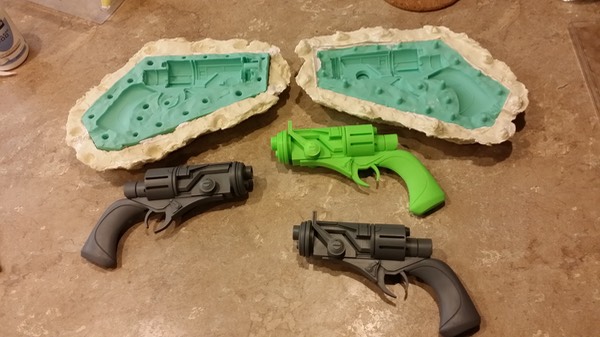
In the next photo: original, 3D printed master on the right, with the resin clone - minus the lever - on the left.
After removing the pour hole excess material, and using Bondo to fix up trouble spots, the blaster was ready for priming!
I printed off two more levers, each of which took 50 minutes; while these prints were going on, I cast the second blaster pistol, and got to work on prepping it for priming. Two hours later, I had both blasters primed and ready for the final paint job!

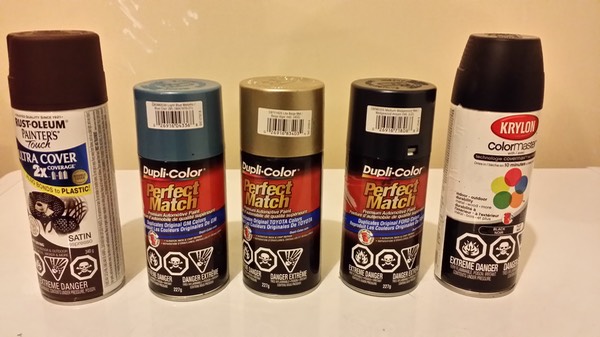
The following day I made a trip to my local Canadian Tire and got myself some rattle cans for the paint job.
(Paint used from left to right: Rust-O-Leum Satin Espressp; Dupli-Color CBGM0539 Light Blue Metallic; Dupli-Color CBTY 1625 Light Beige Met; Dupli-Color CBFM0355 Medium Wedgewood met; Krylon Colormaster Flat Black).
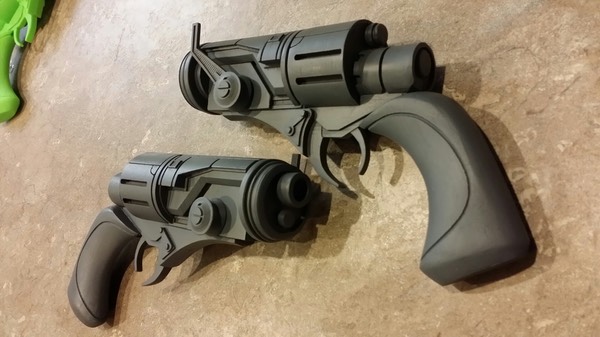
And finally, behold the completed blaster pistols!
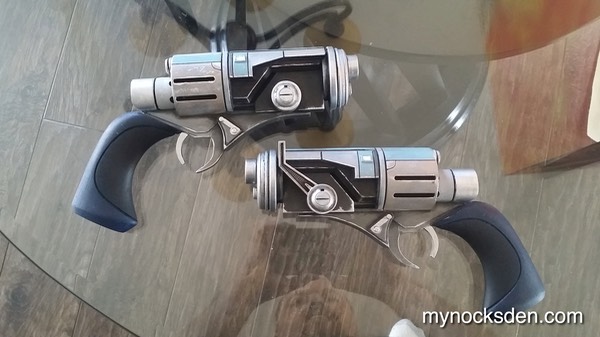
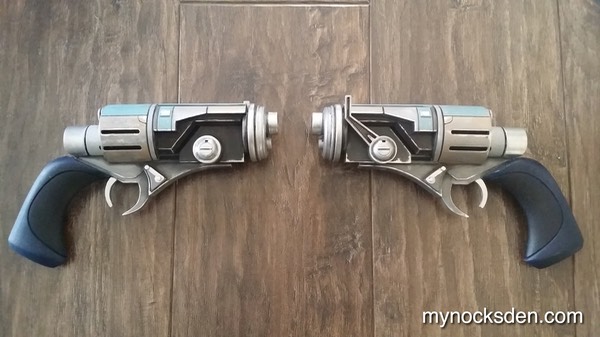
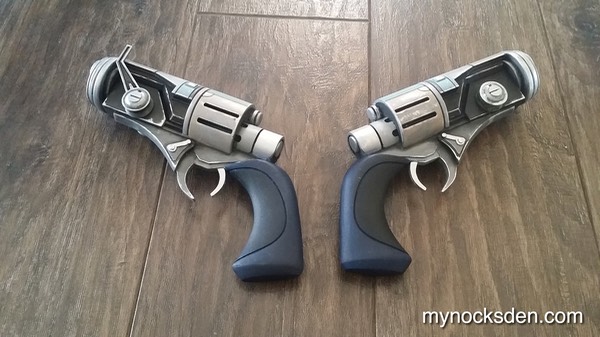
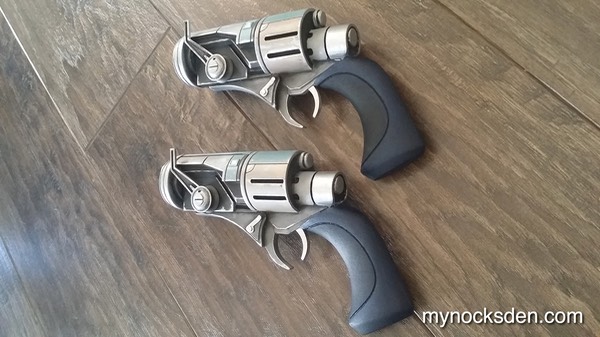
Thanks for looking!
* * * * * * *