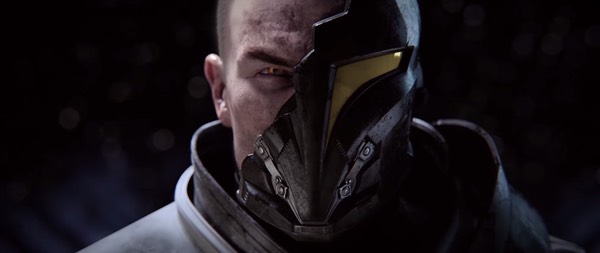
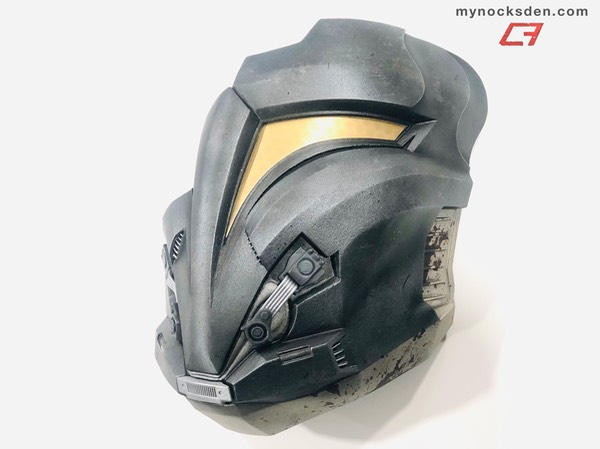
Being the dedicated SWTOR fan that I am, the minute the new trailer “Sacrifice” was announced in June of 2015, I knew I had to make Arcann’s mask.
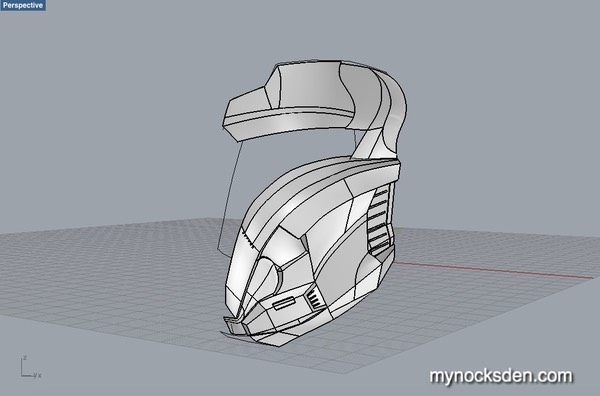
As with everything, it all began in the digital realm with some curves and plain surfaces, fuelled by a lot of energy drinks. The mask is quite complex, so even with great reference material, modelling in Rhino took close to 30 hours.
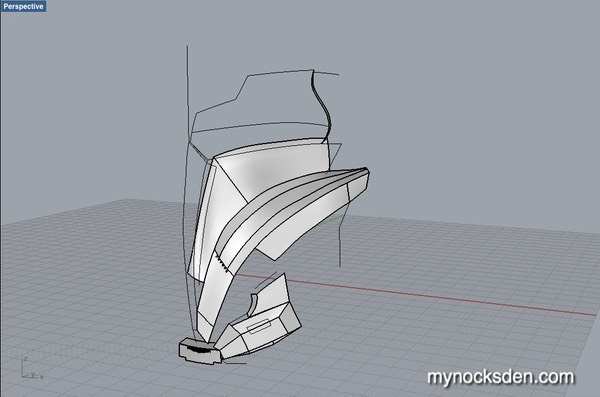
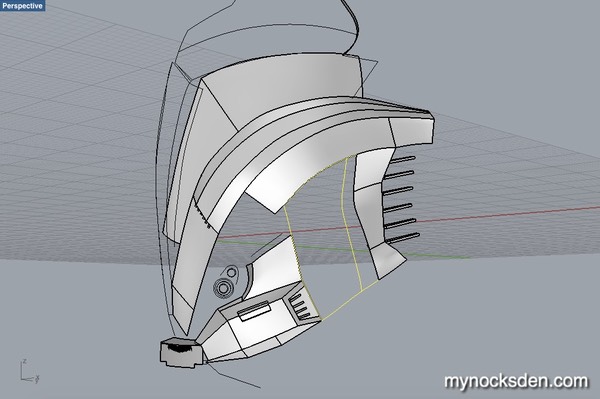
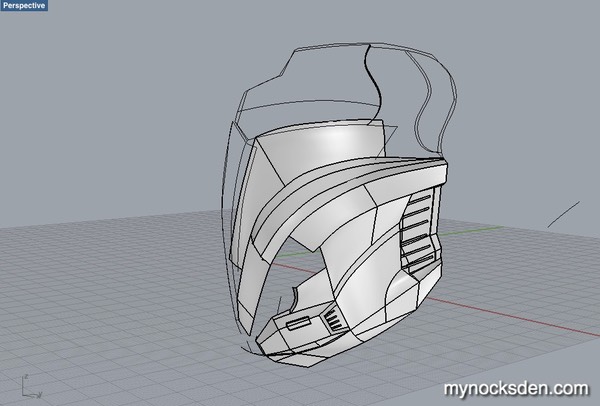
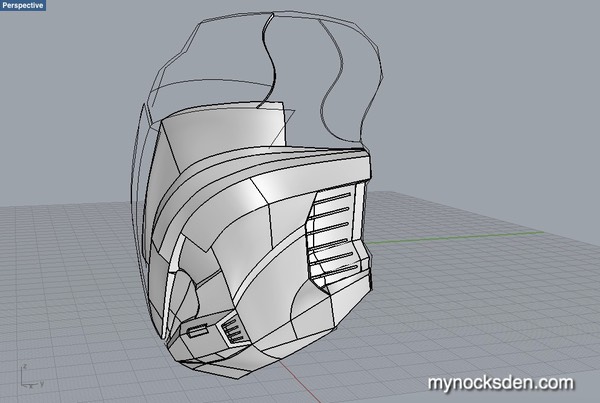

Once the left side was finished, I mirrored everything over, and began chopping down the right side.
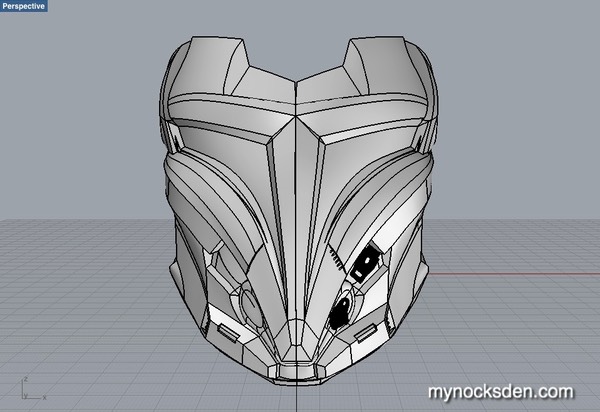
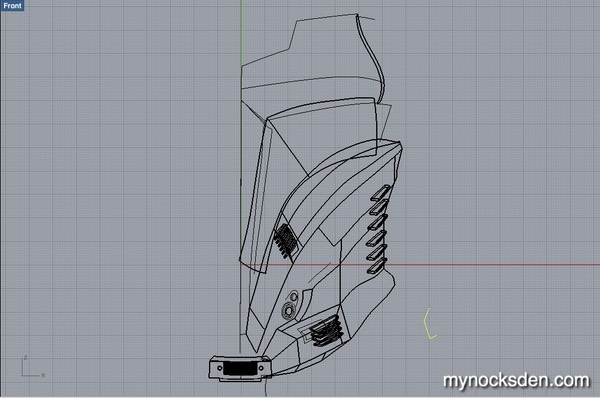
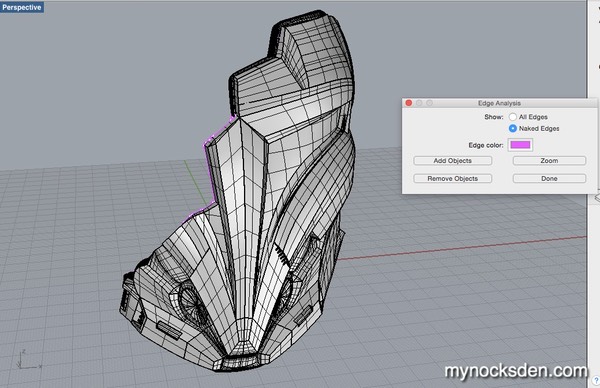
Once this was done and the mask was properly shelled out (giving it thickness), I closed up all the naked edges (or gaps in the model) to make it watertight - an essential step for getting the model 3D printer-ready.
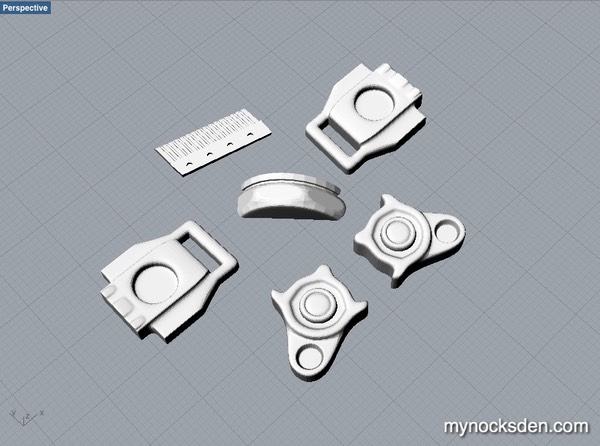
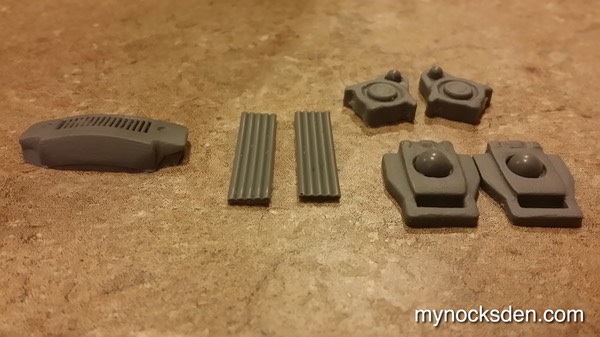
The little greeblies would be printed separately to give the model the maximum possible detail sharpness.
Next, the model was split into multiple sections, exported as STL files, and sliced using ReplicatorG to be printed on my FlashForge Creator 3D printers.
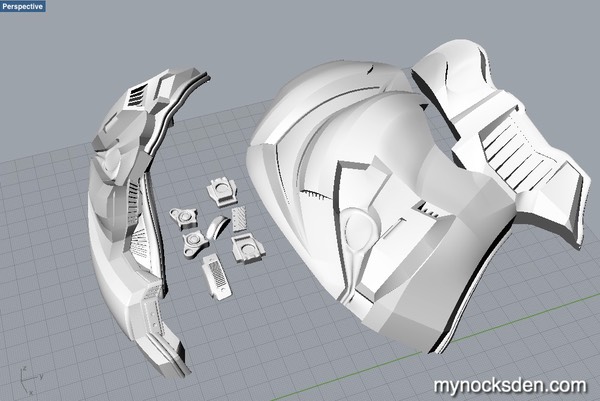
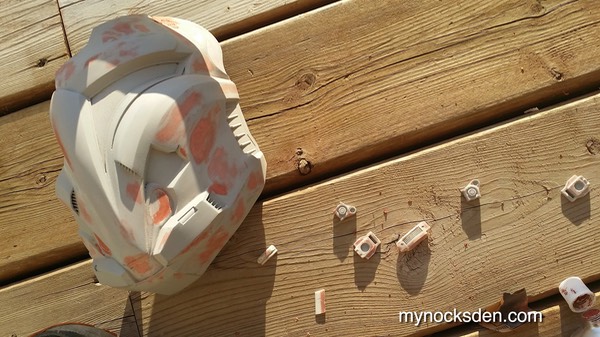
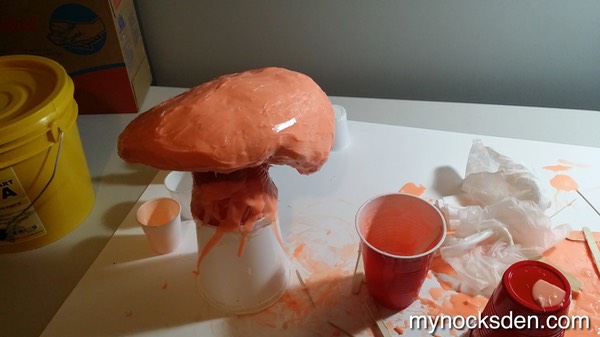
24 hours later, I had my mask pieces. I printed every piece with the exception of the greeblies using supports, which is something I generally try to avoid. But, given the amount of detail, and the complex shape of this mask, I wanted to make sure I had as clean a print with as few seams to fill in as possible.
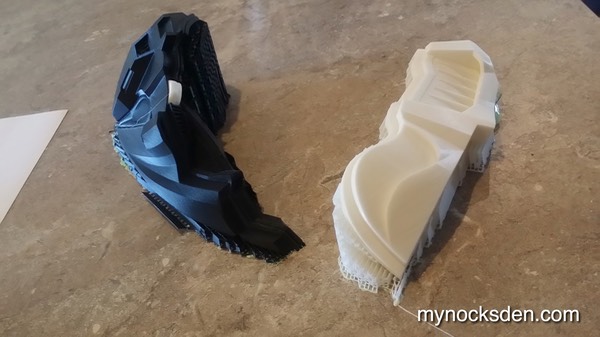

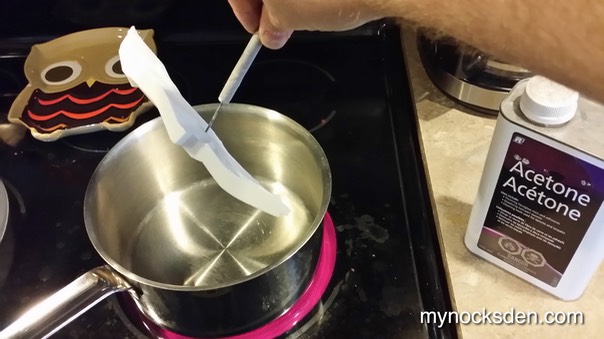
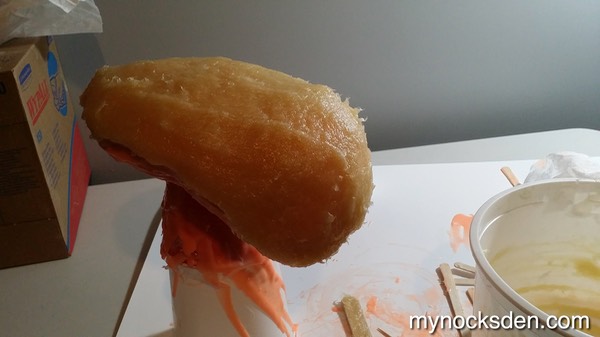
Next, the parts needed to be smoothed to get rid of the striation which is an artifact of 3D printing. I poured some acetone into a pot, put this on an element, and used the acetone vapour (which starts to boil off at 56 degrees C) to coat the parts. For this step, all you have to do is hold the part over the boiling acetone for several seconds until the plastic starts to glisten Once the chemical starts boiling, the acetone produces a vapour that rises, quickly condenses and subsequently falls again, coating both sides of the part. If you attempt this method at home, you absolutely must wear a respirator, and have your fume hood on! Gloves are also a good idea.
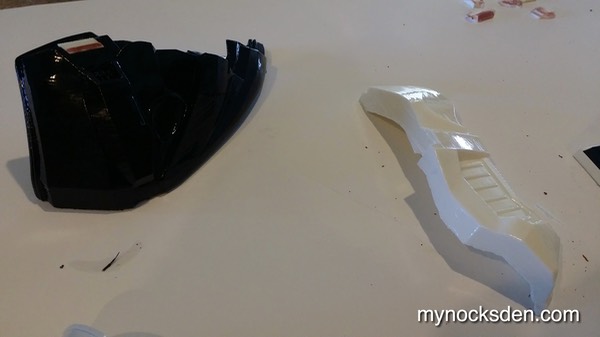
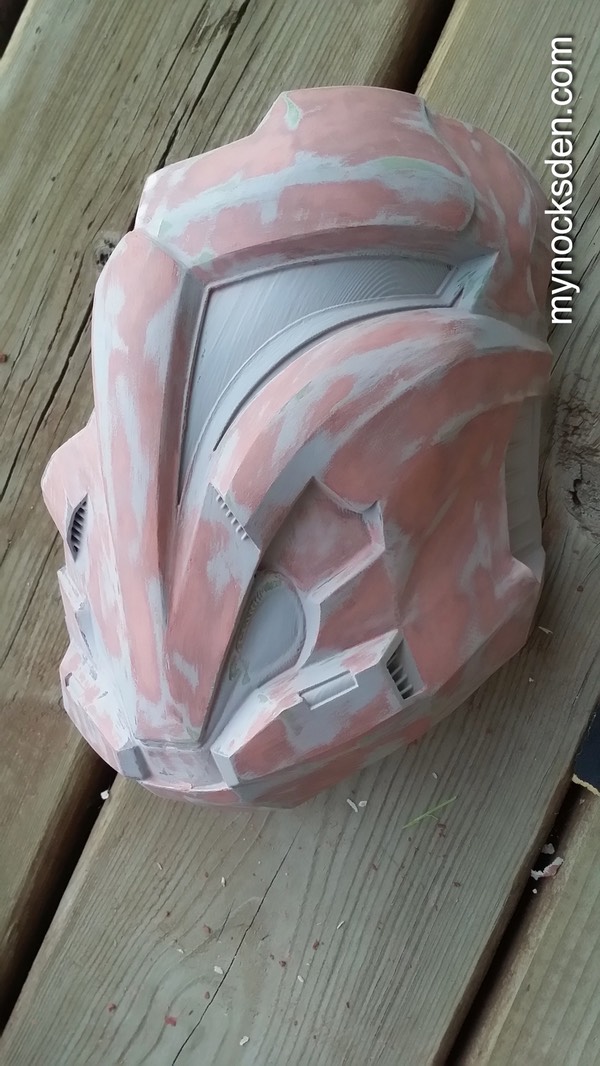
Even with Acetone smoothing, some striation persists, so further smoothing work is necessary. For this I use Bondo Spot putty, which dries quick, and sands extremely well. PlasticWeld epoxy putty was then used to “glue” all the parts together.
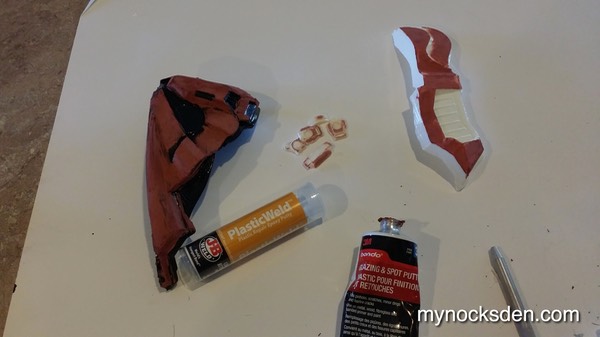
Once the parts were joined, the seams were sanded, and more Bondo putty was used to go over the mask.
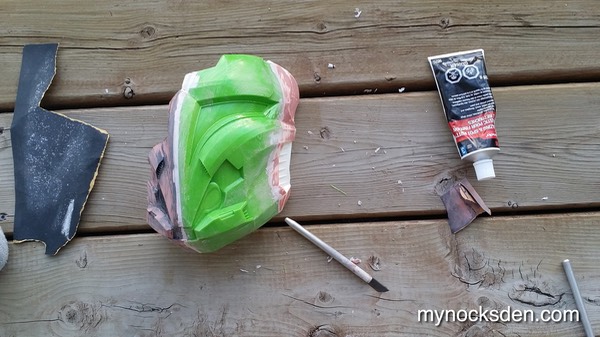
Once the initial coat dried, I used some Dupli-Color self-filling automotive primer to cover the mask, and followed this up with more Bondo spot putty where unevenness was evident.
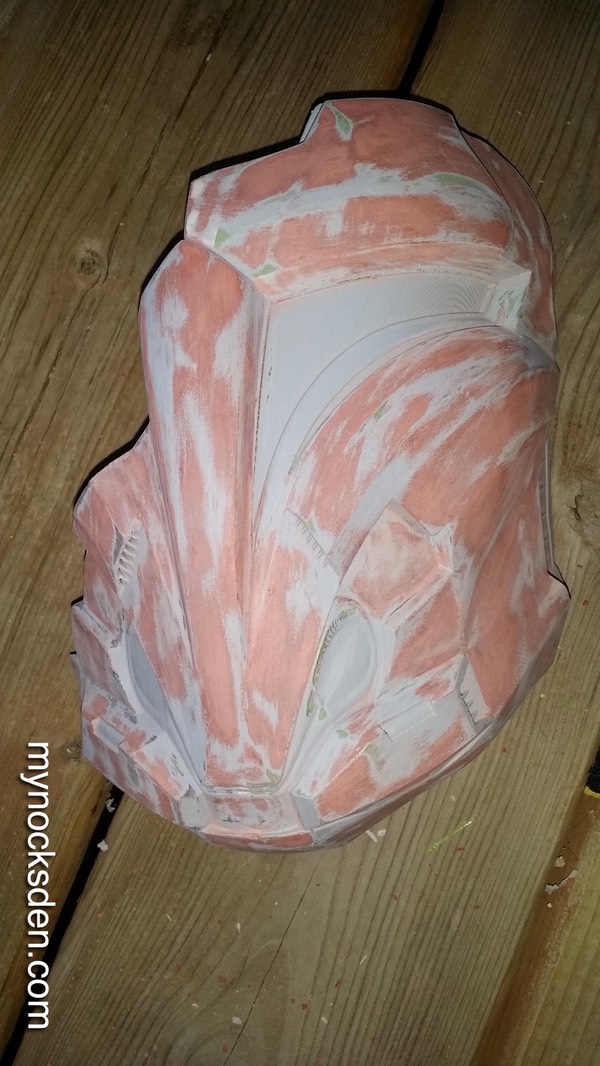
This process of priming, filling, sanding was repeated several times until the surface was free of blemishes. I left the visor area untreated (you can see the striation still present), since my plan was to cut this area out from the final cast (later step) and tackle it separately.
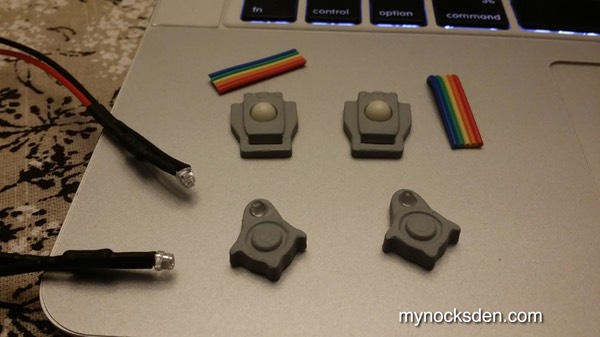
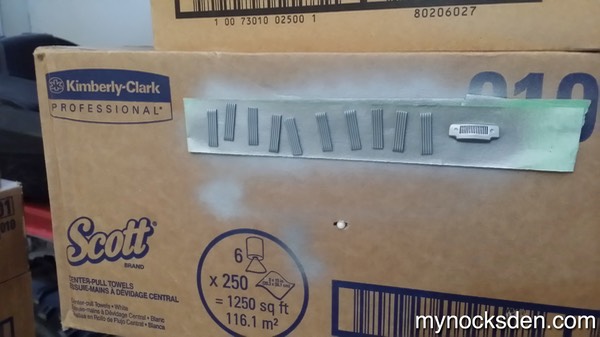
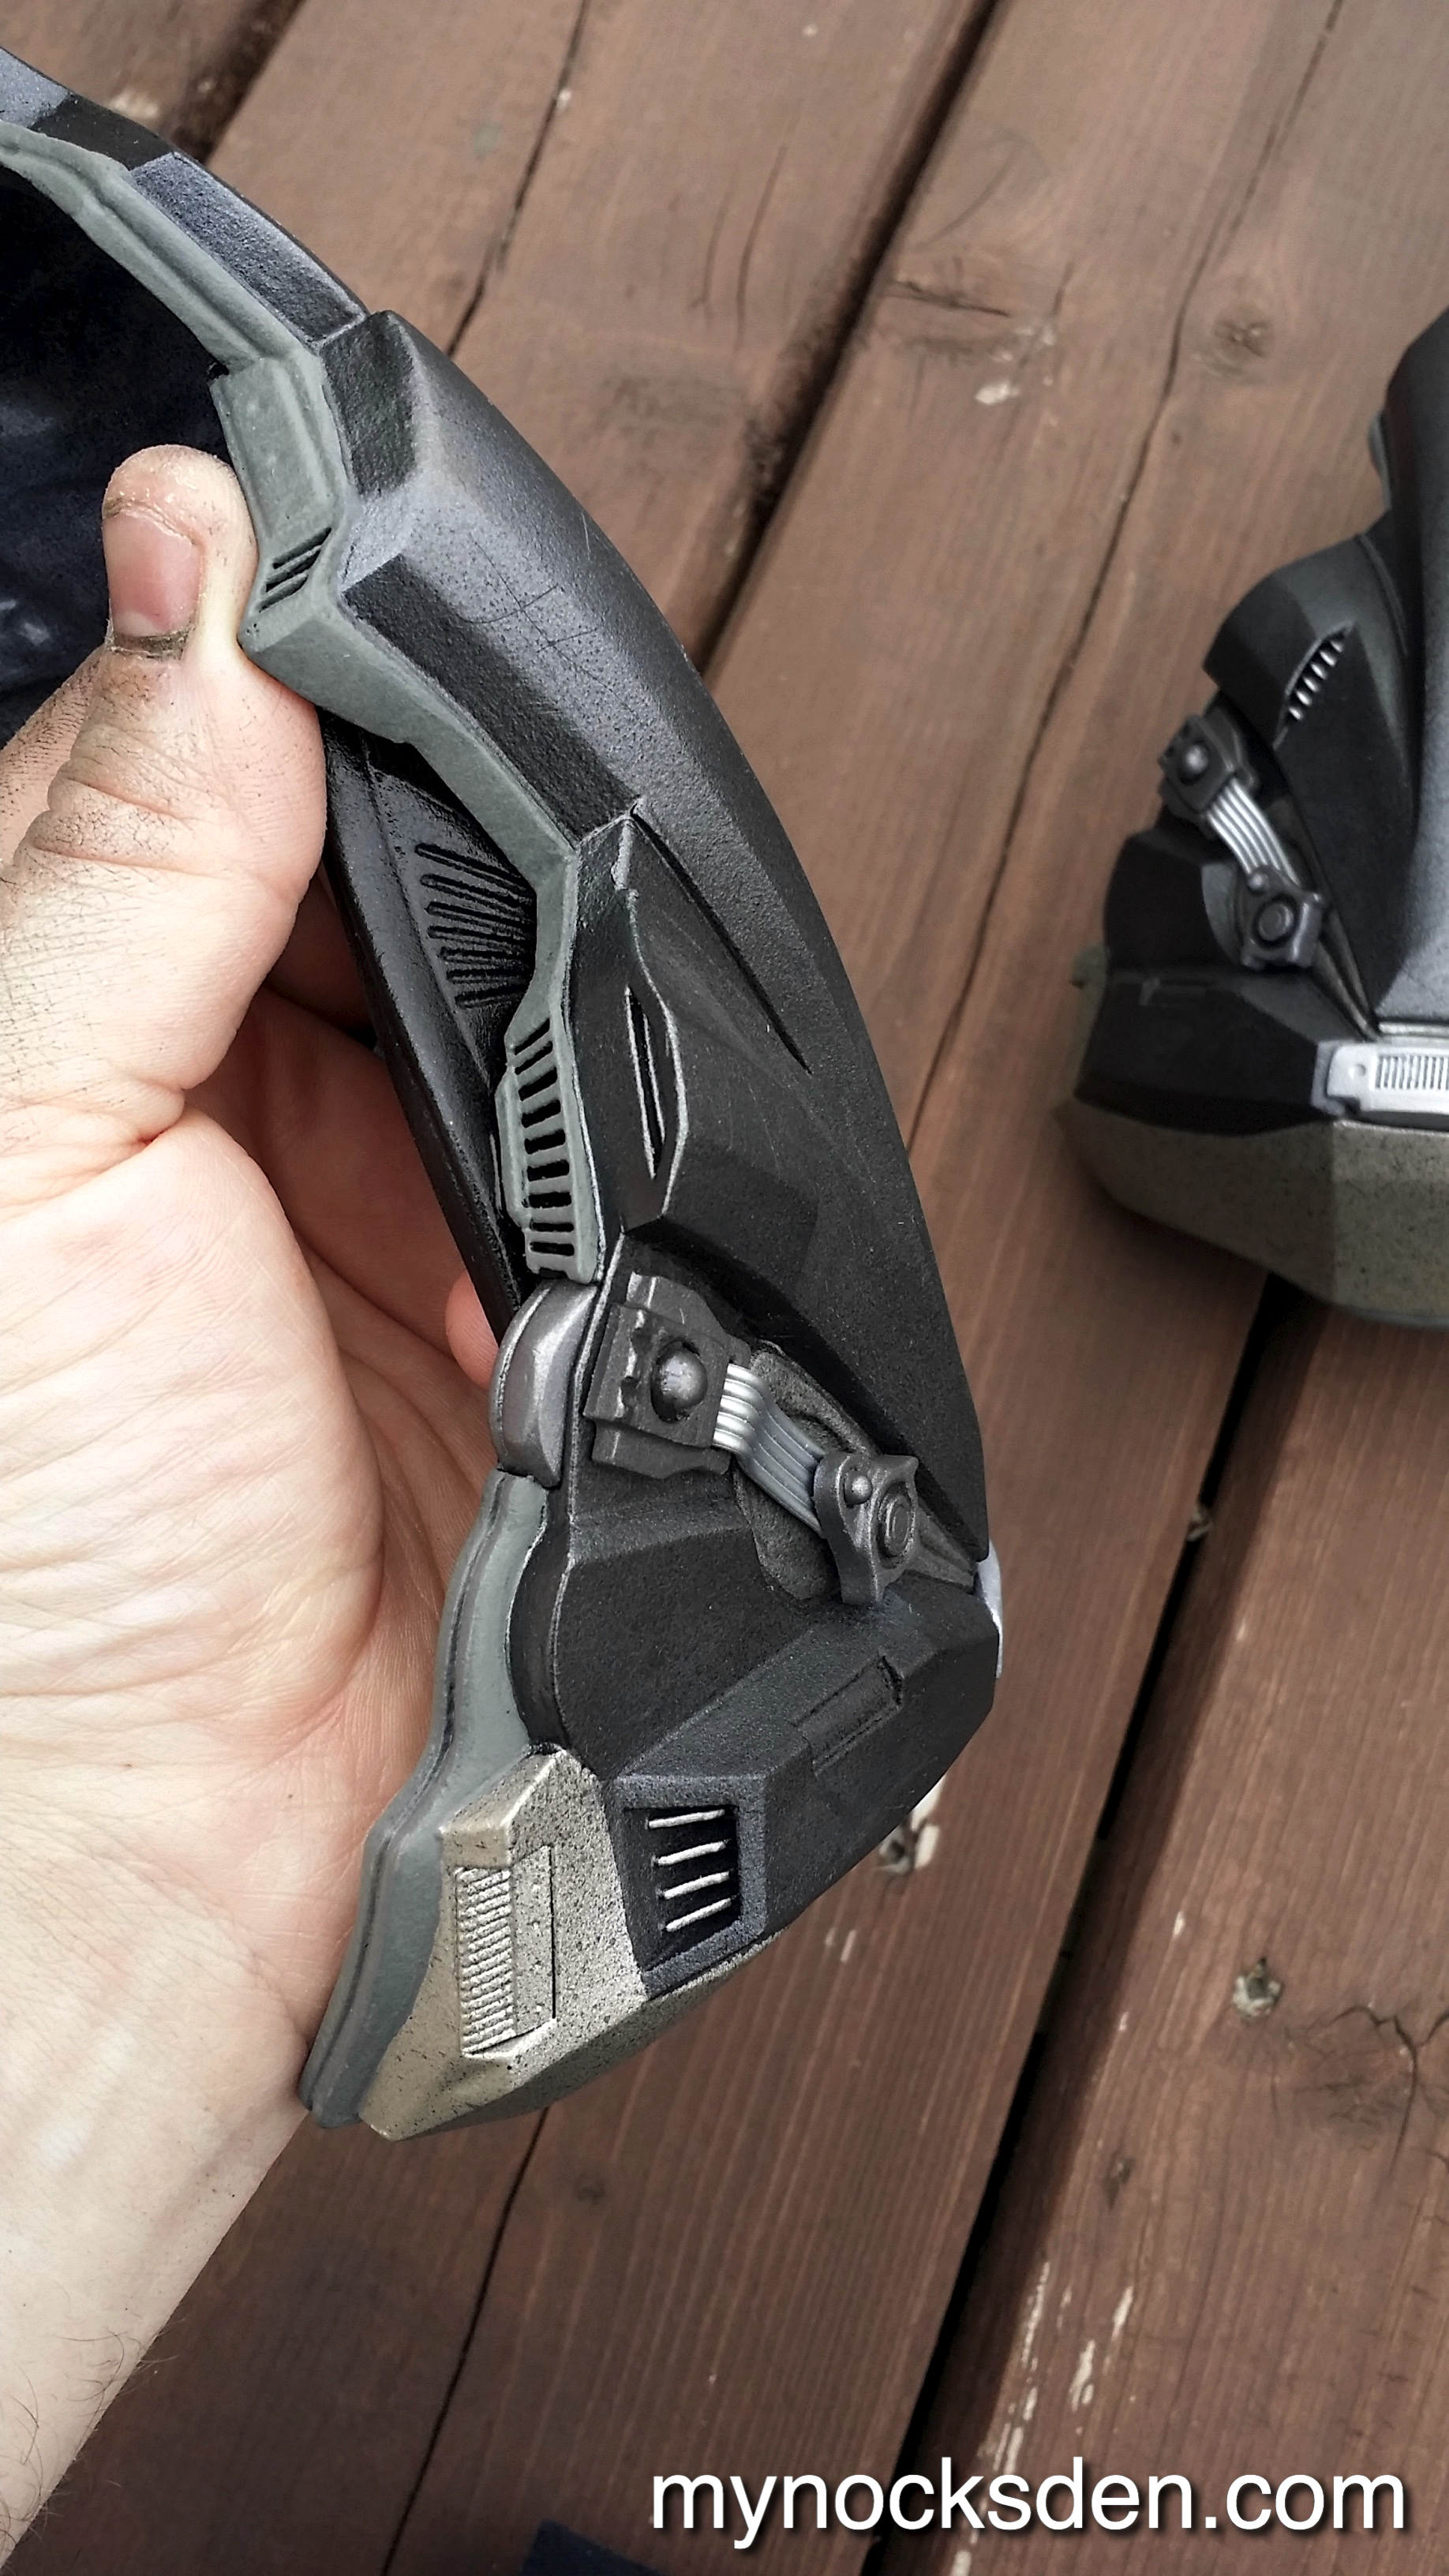
To complete the greeblies, I used sections of computer jumper cables, some 6mm airsoft bb’s, as well as the cutoff tips of 3mm led lightbulbs.
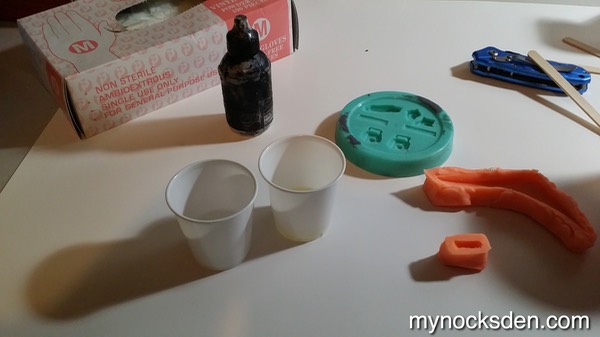
To mold these, I glued them down to a plastic dish, and mixed up some Mold Star 15 silicone.
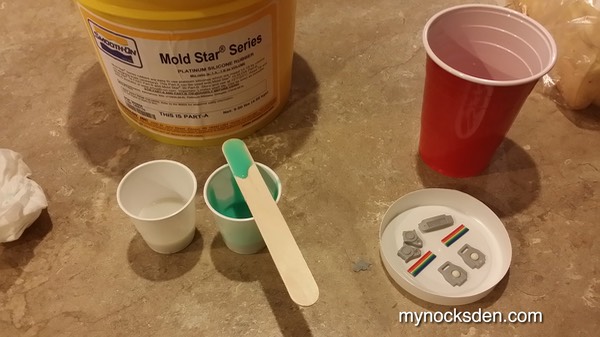
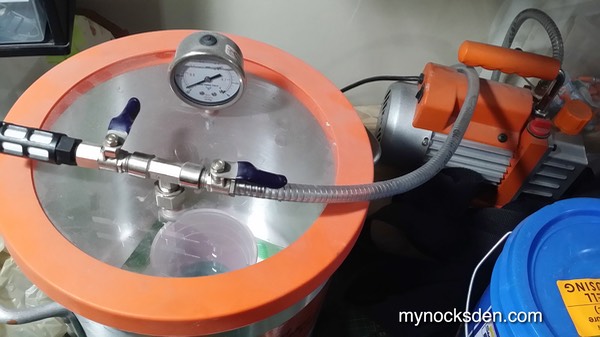
I then degassed the silicone using my vacuum chamber, and poured it inside the dish.
Once this cured, I whipped up some 65D resin pigmented with black So-Strong pigment, and poured it into the mold.
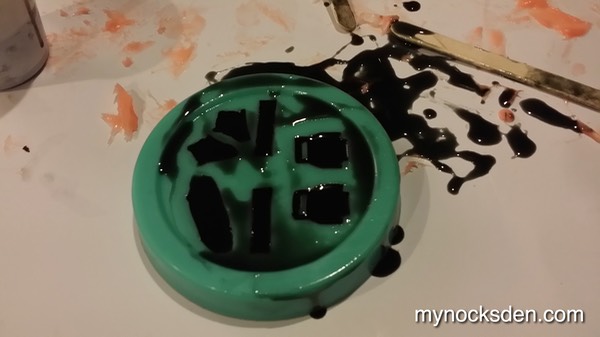
The detail was perfectly captured in the final casts.
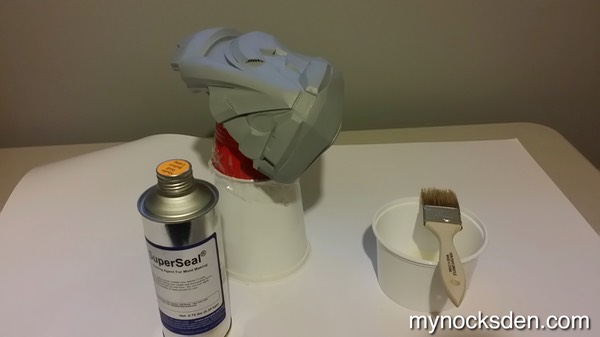
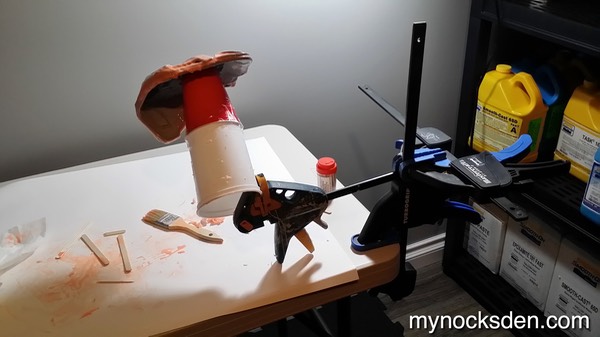
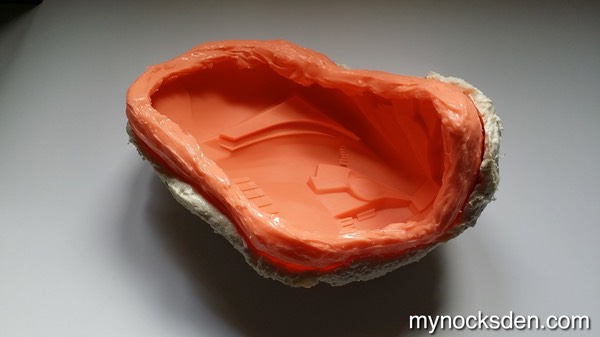
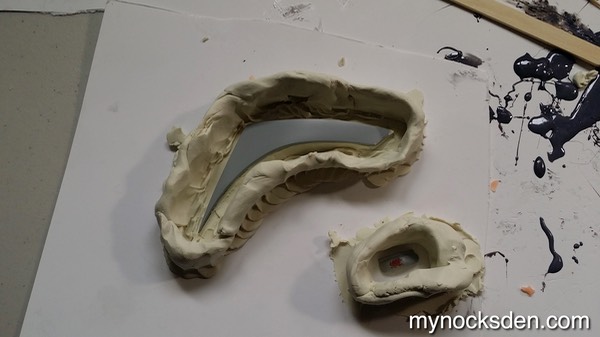
Next came molding the mask itself. I prepared the master by coating it with SuperSeal (to fill in any pores, and cover any Bondo putty areas that may not have been properly coated by the primer), and prepared a batch of Rebound 25 silicone.
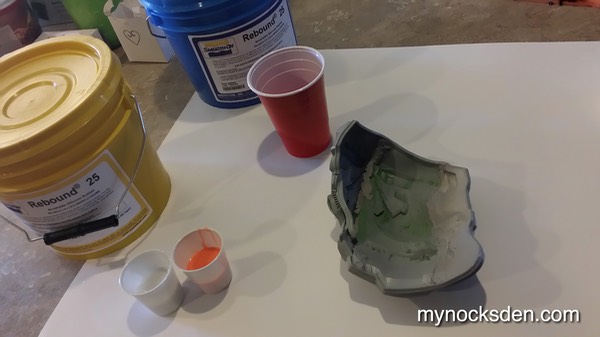
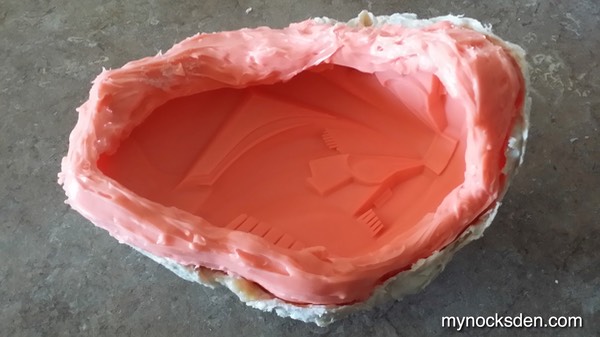
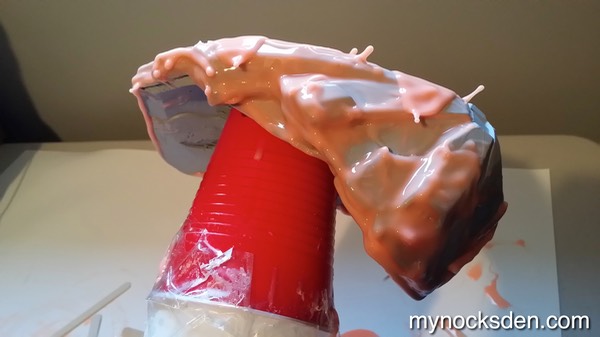
I applied Rebound 25 in several coats, making sure to get it into every nook and cranny to capture all the detail, especially along the edge of the mask.
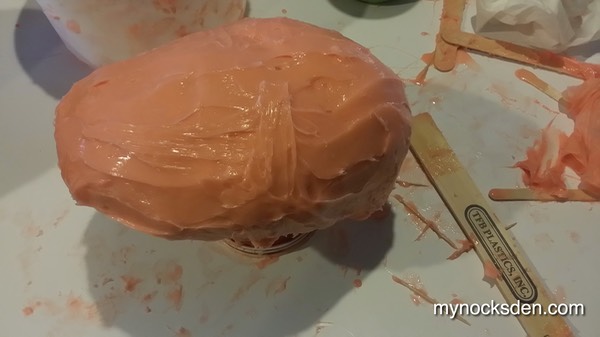
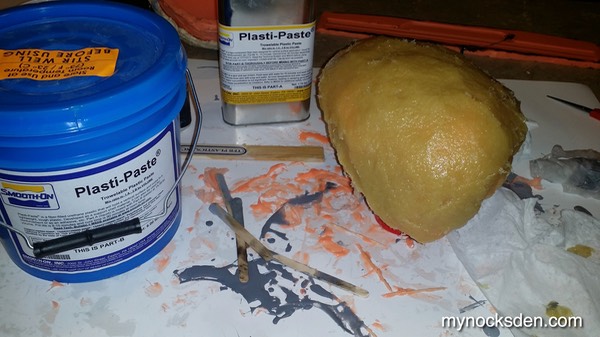
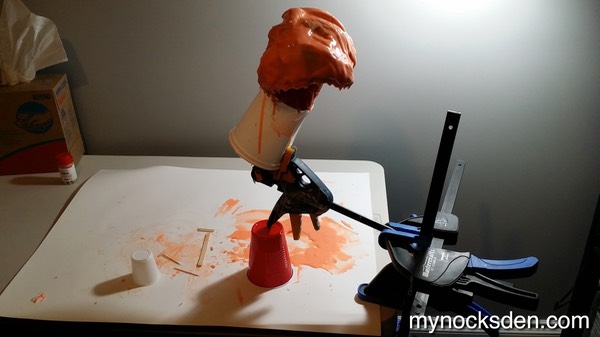
A total of four layers of silicone were applied, with the last two being thickened with Thi-Vex to build up the mold thickness. Once the silicone was fully cured, I used Plasti-Paste to create a rigid shell, which would help the mold hold its shape during casting,
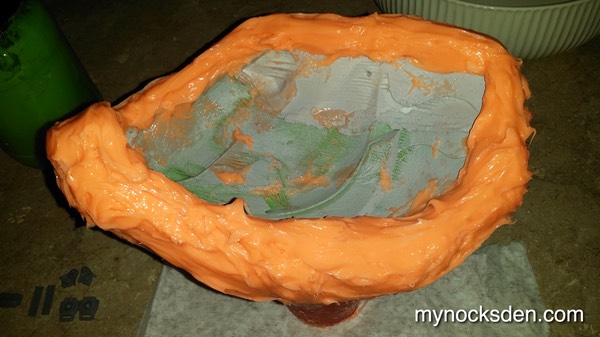
Once everything cured, demolding revealed a nice, thick mold, with a good print coat (detail layer). There were a few bubbles and imperfections in the surface of the silicone, but it was nothing that couldn’t be fixed later.
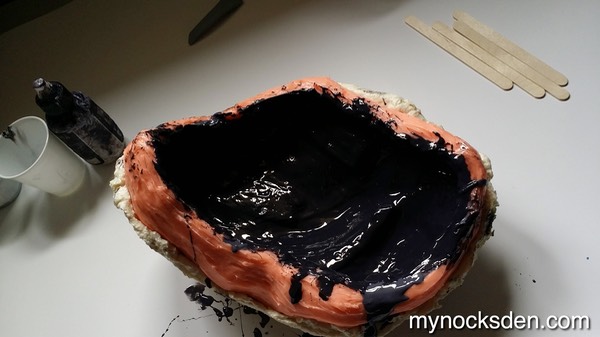
Sometimes molds with thick walls and lip can make it very difficult to remove the casts by locking them in, so I was a little worried that that would be the case here. However, I was able to cast the mask without an issue using pigmented 65D resin.

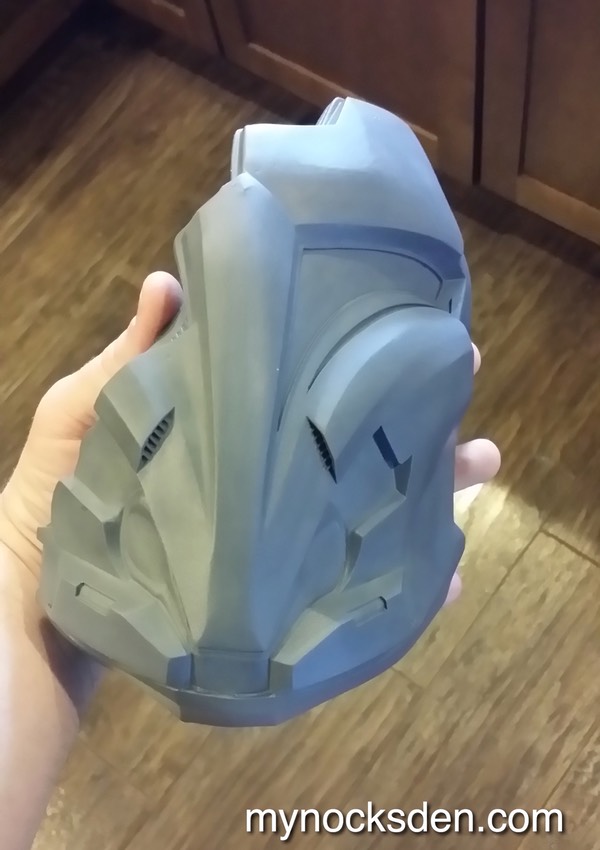
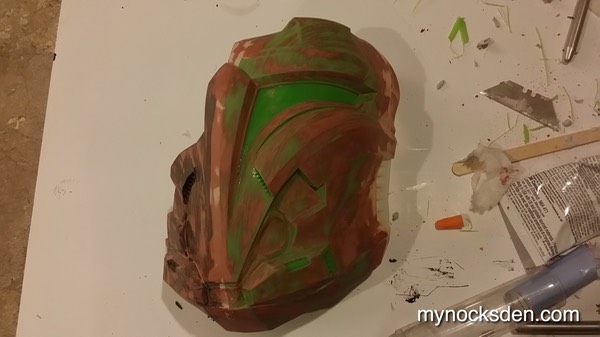
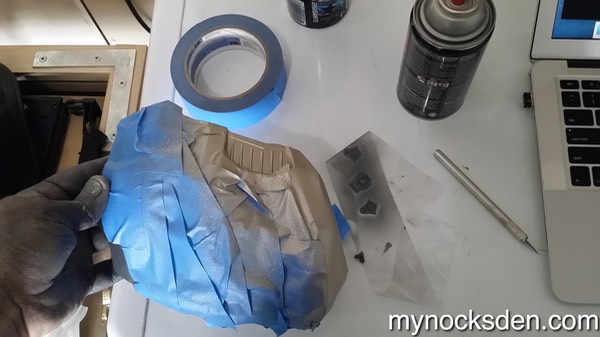
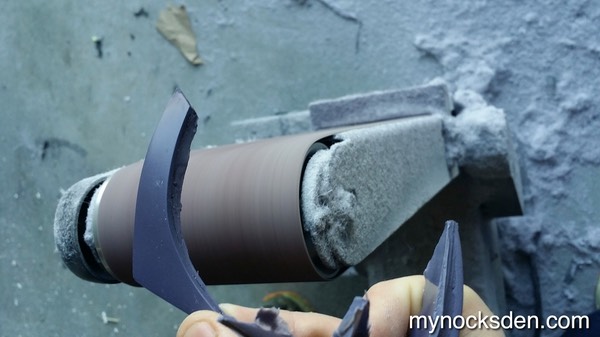
After cleaning the cast with mineral spirits to remove any release agent (which I spray into the mold prior to casting, which helps with removing the cast and prolongs the life of the mold), I trimmed the mask around the edges using a belt sander, and spray painted the mask black.
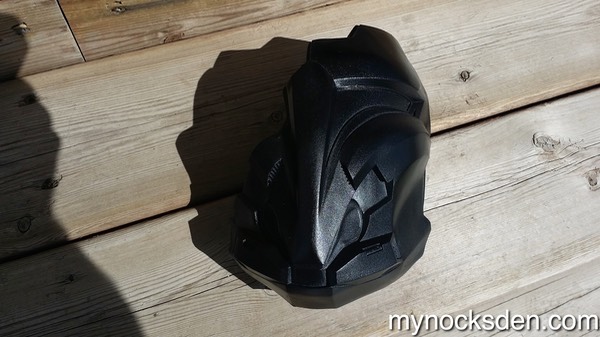
Using blue painter’s tape to mask off the appropriate areas, I used some Duple-Colour spray paints to paint the mask.
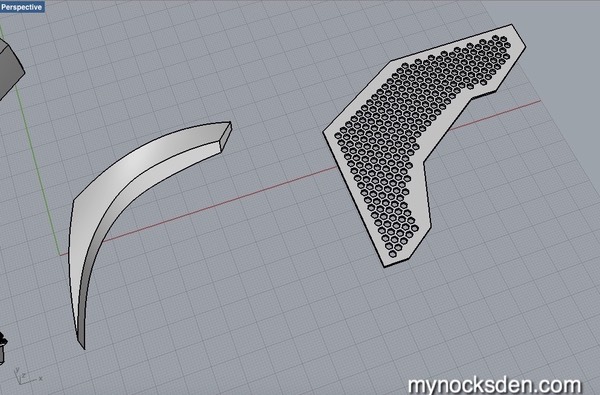
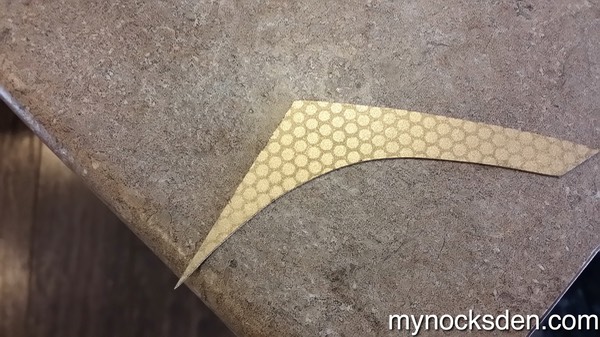
To tackle the visor, I 3D printed the visor profile, and CAD modelled a honeycomb pattern to use as a stencil for the pattern.
Next, I traced the 3D printed visor profile onto a piece of .04 ABS plastic...
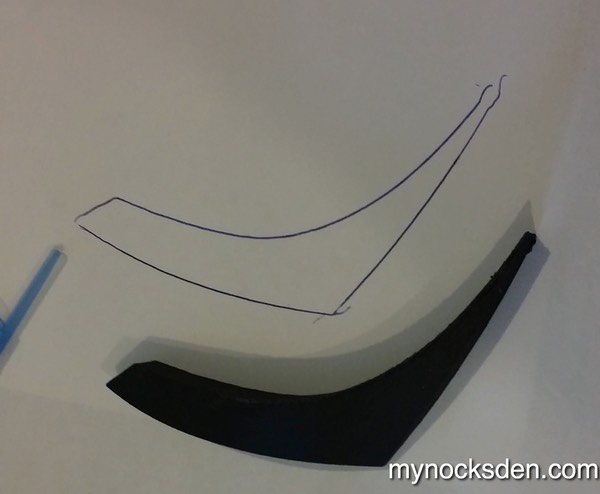
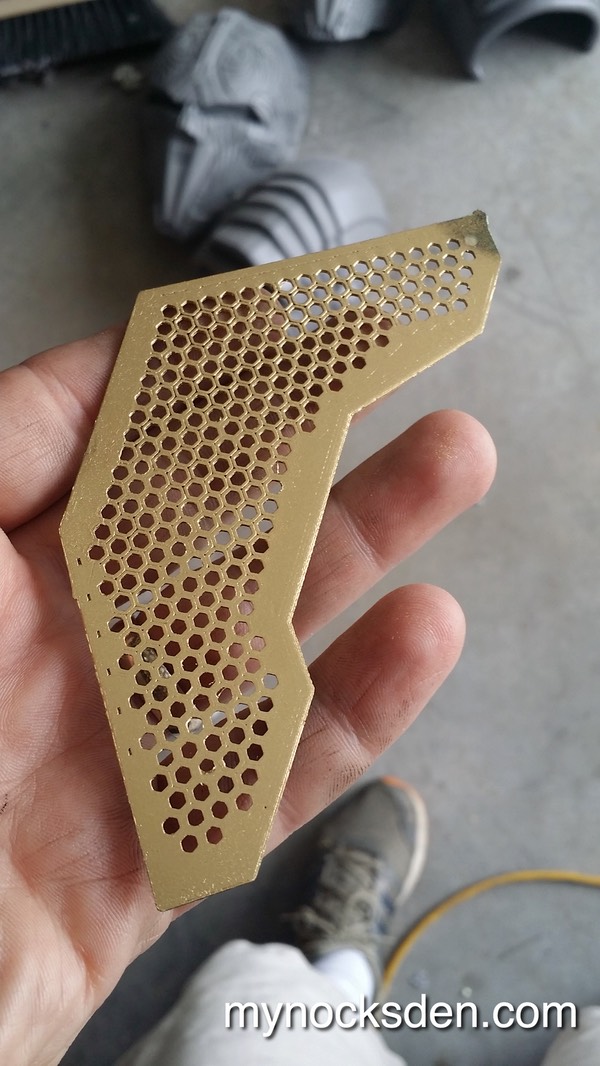
…which I then cut out, and spray painted gold. I then misted this with black paint using my airbrush to darken the colour, put the 3D printed stencil over the visor, and once again spray painted it gold. This created a nice subtle honeycomb pattern on the visor that can be seen in the reference material.
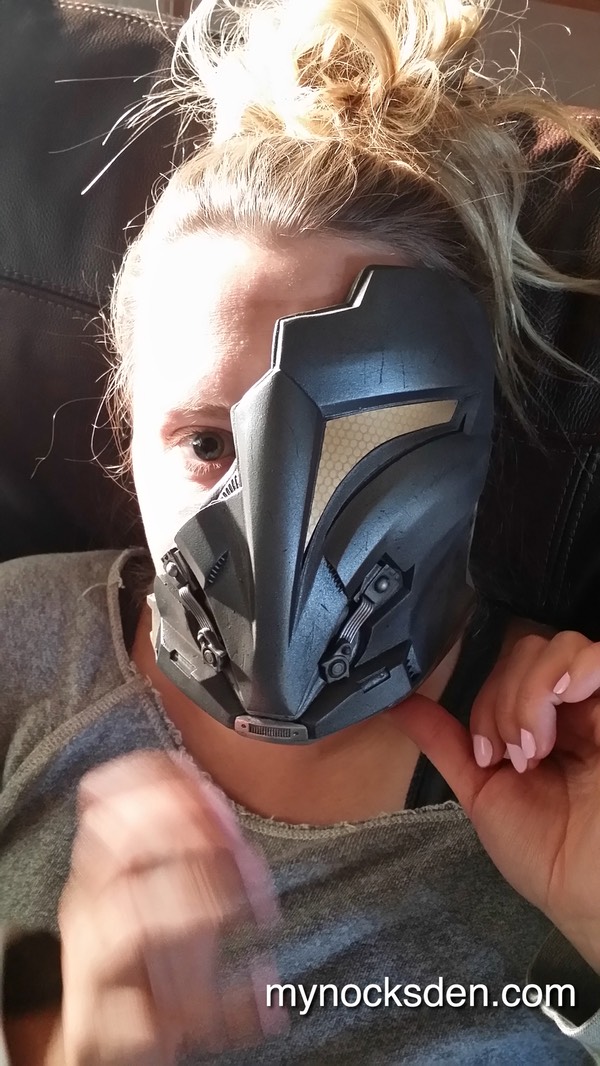
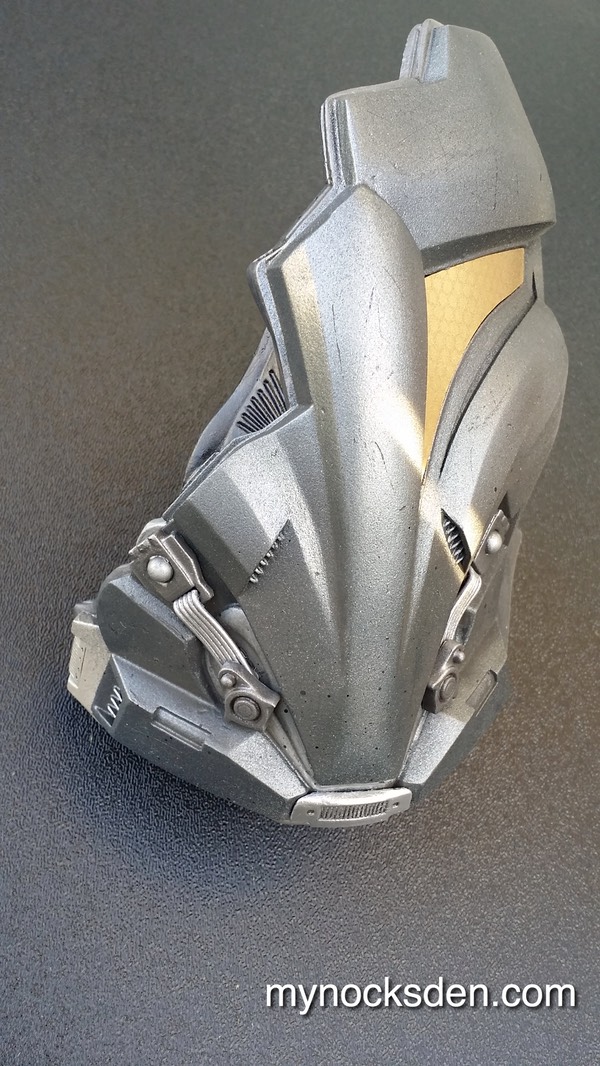
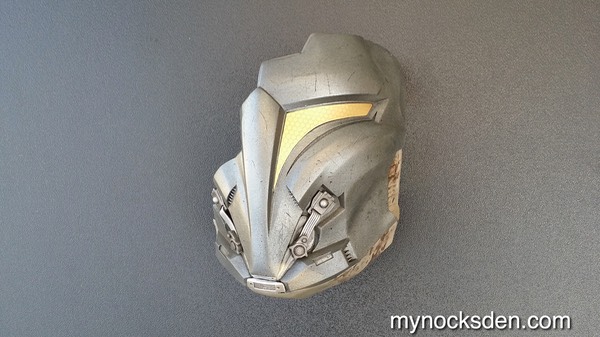
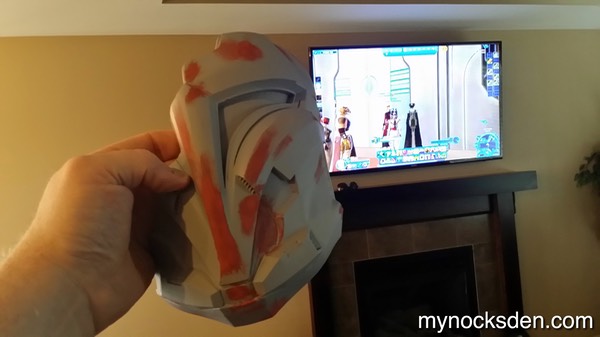
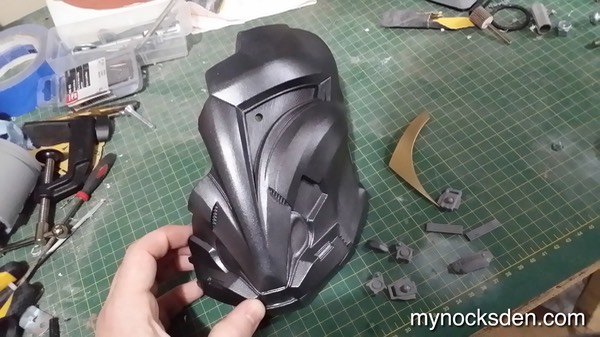
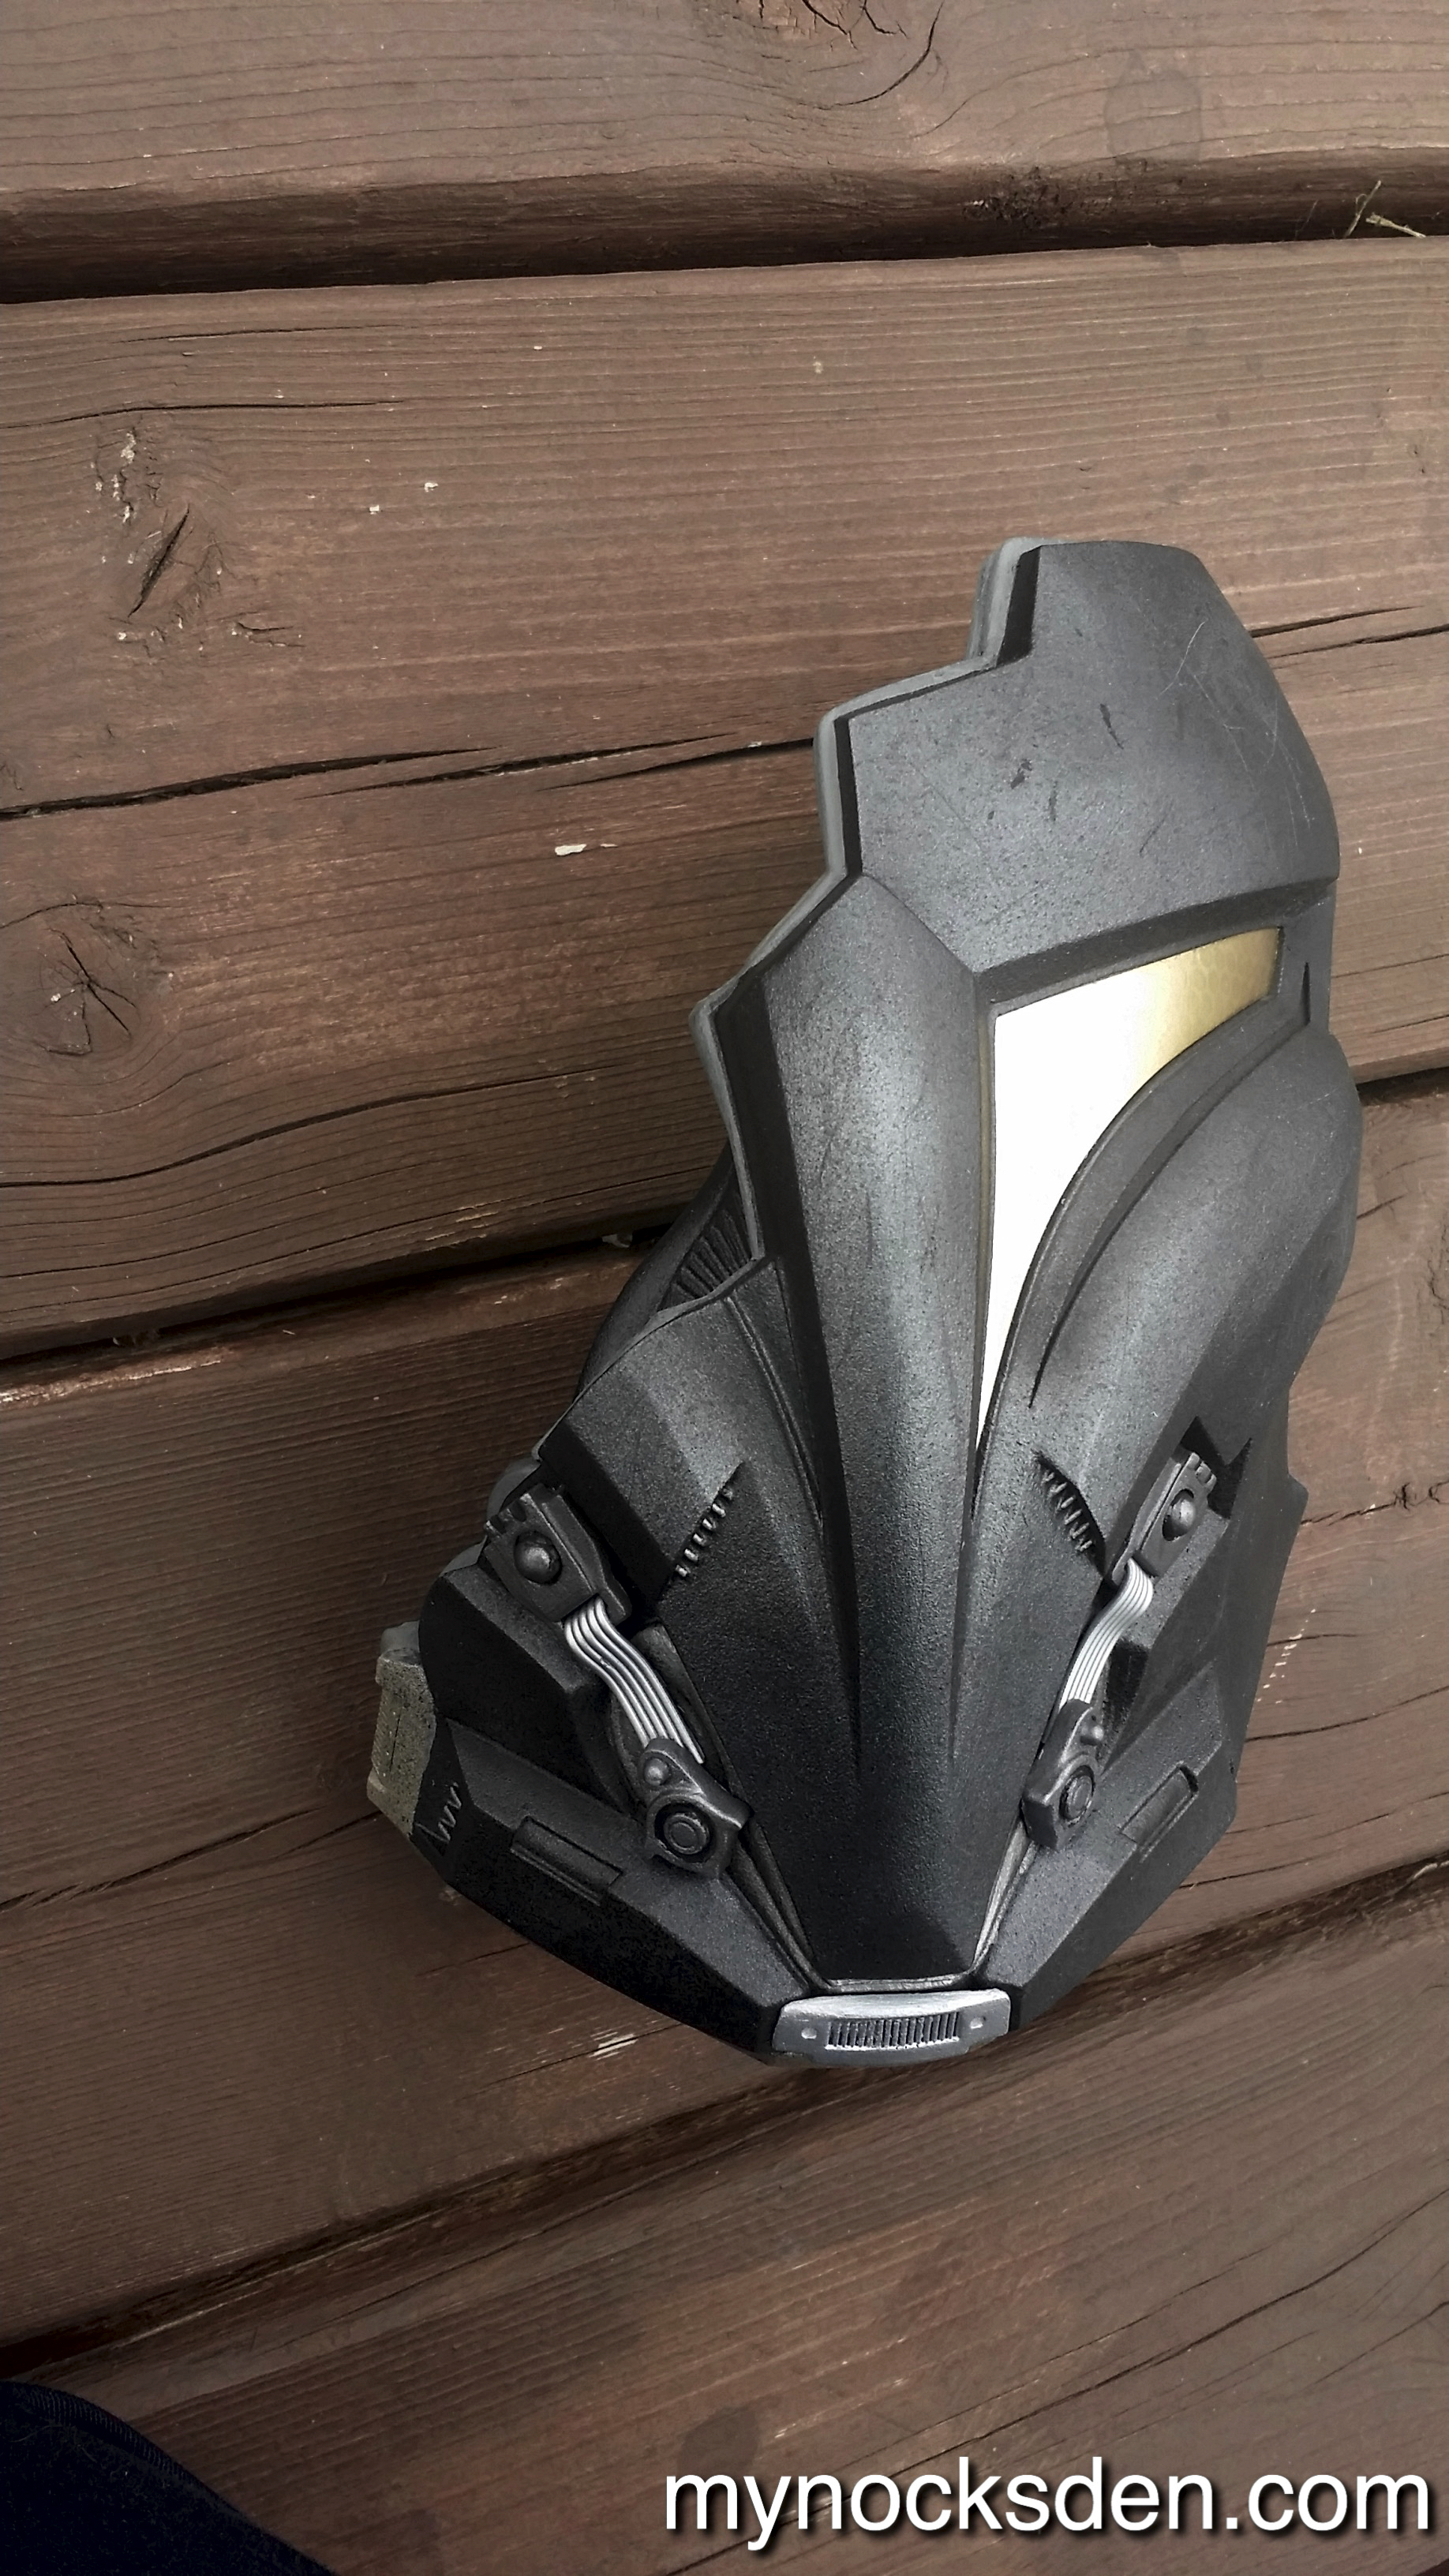
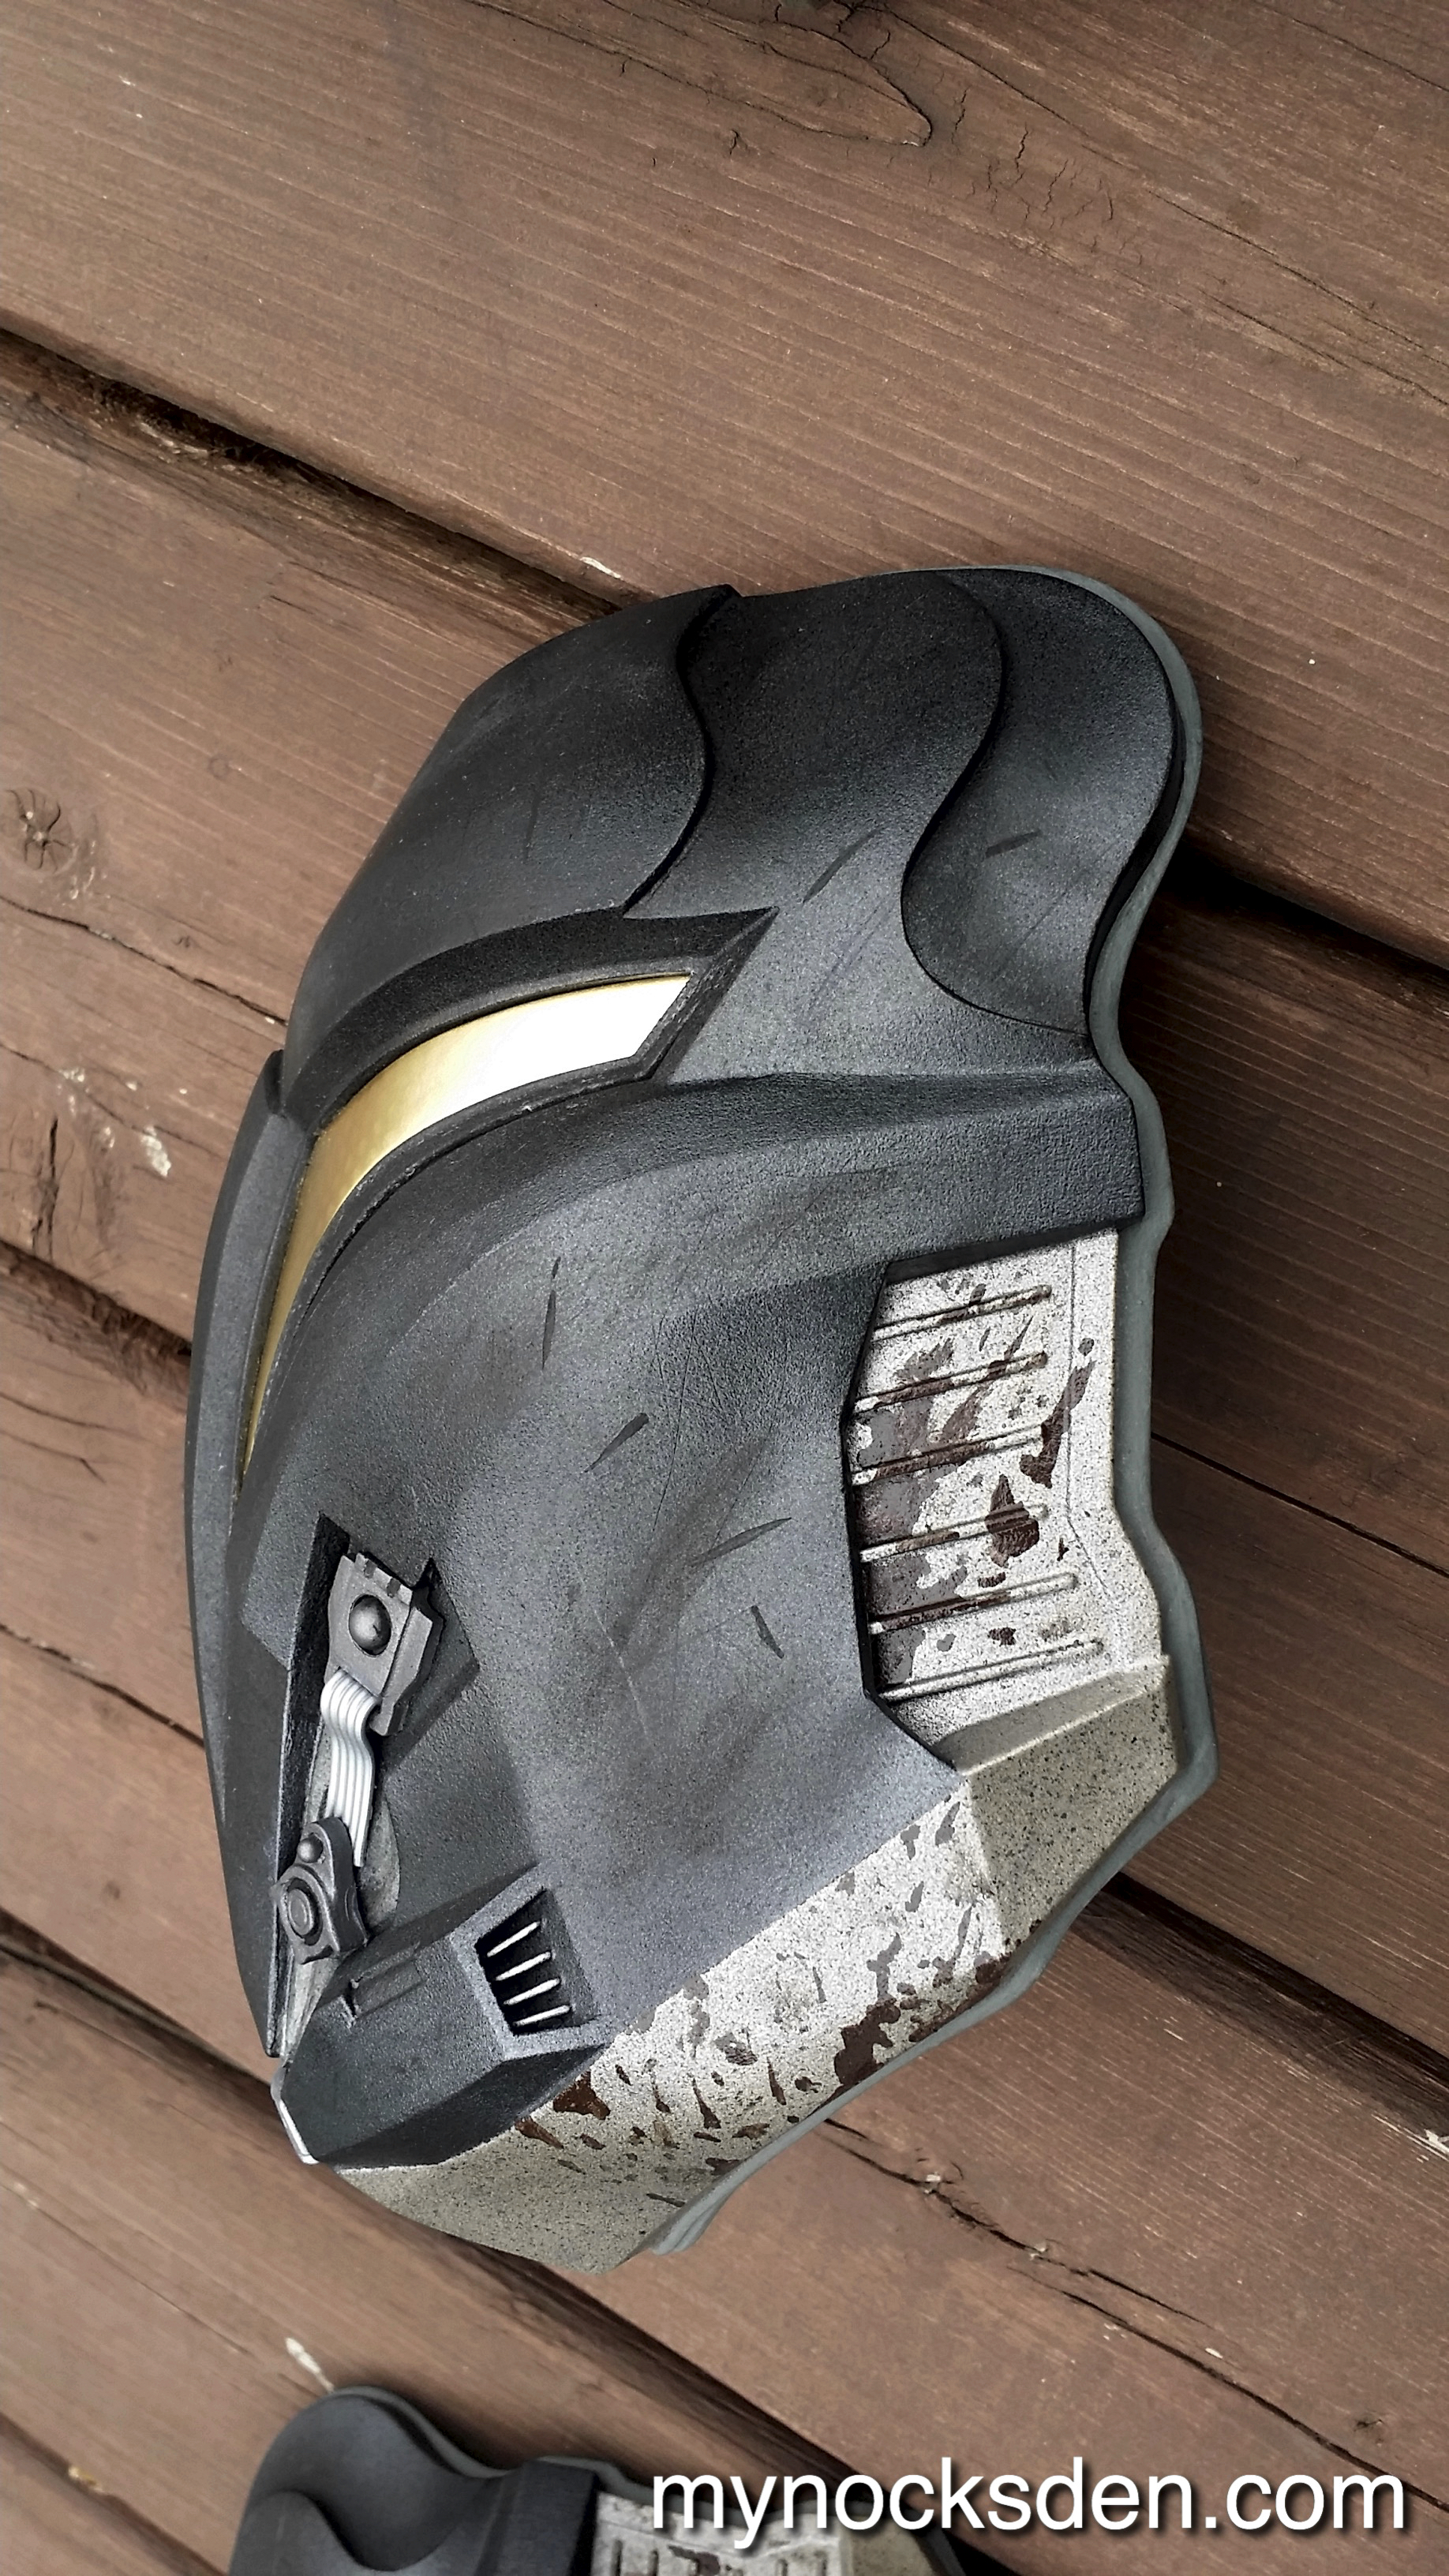
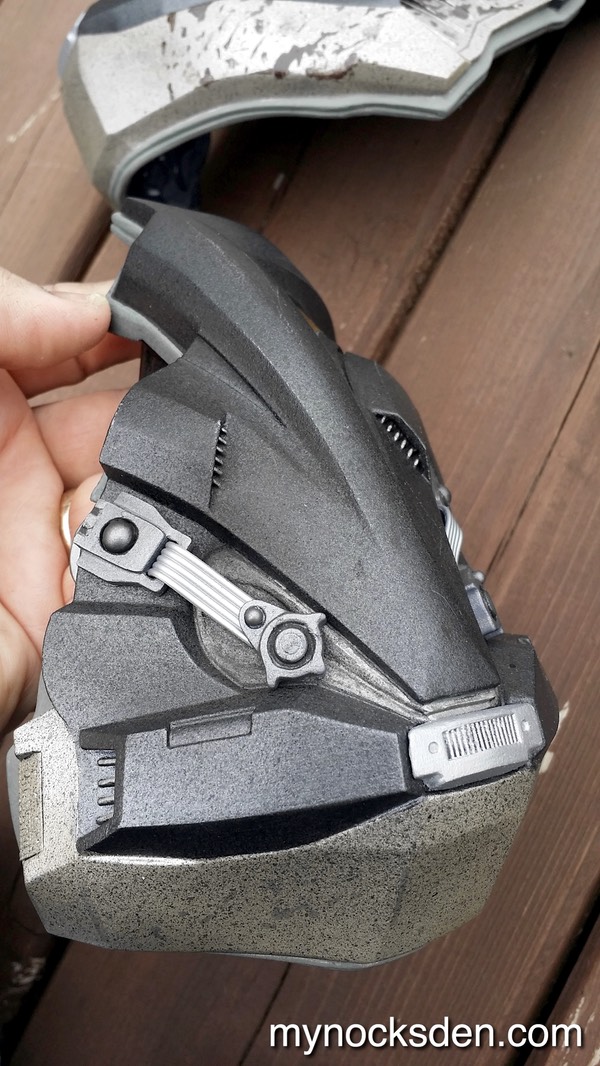
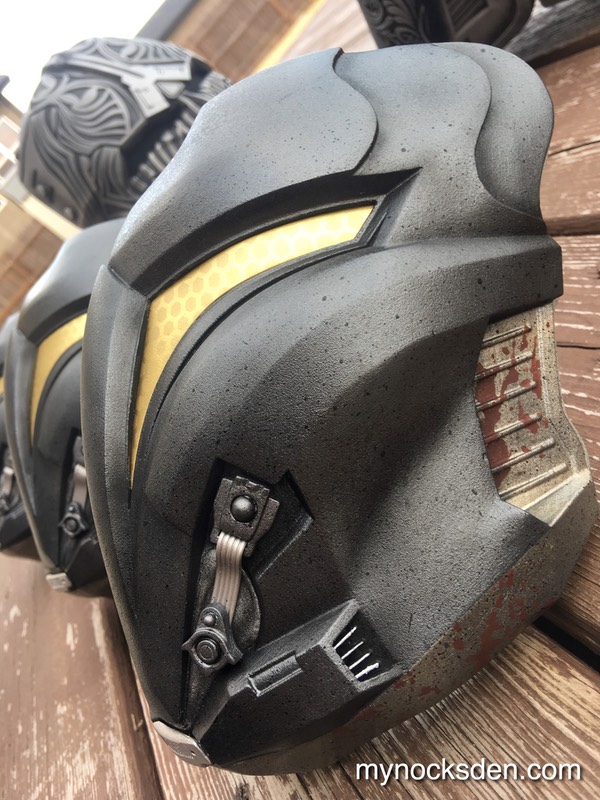
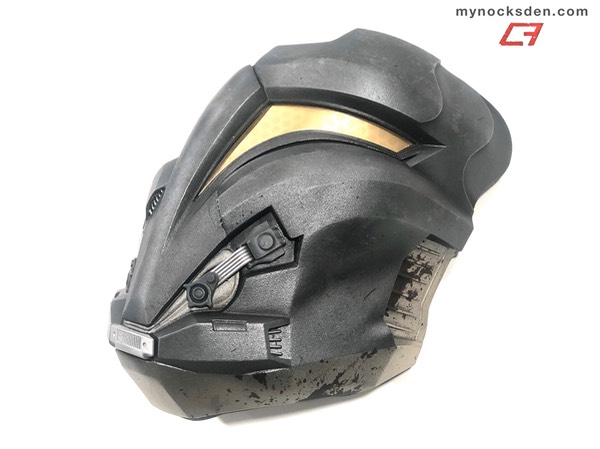
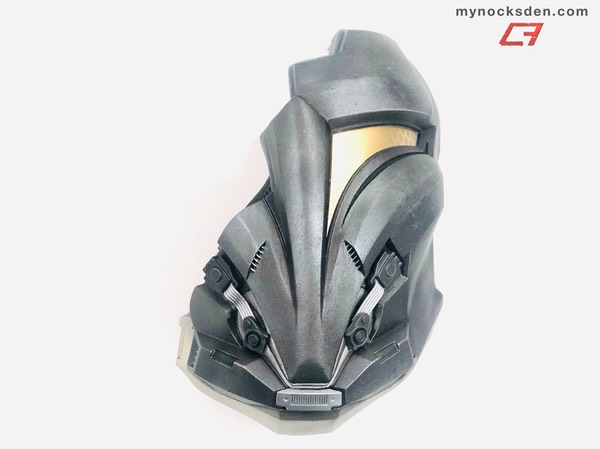
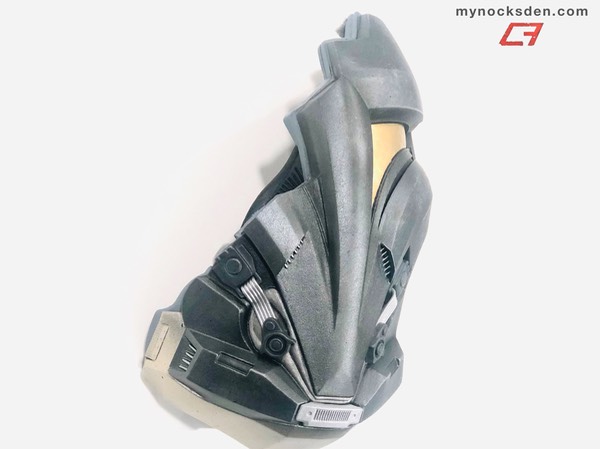
After painting and gluing the greeblies and visor on, and weathering the paint job, the mask was finally completed!
I will most likely go on to do the rest of the Arcann costume, though that will very likely be later in the year.
A month later…
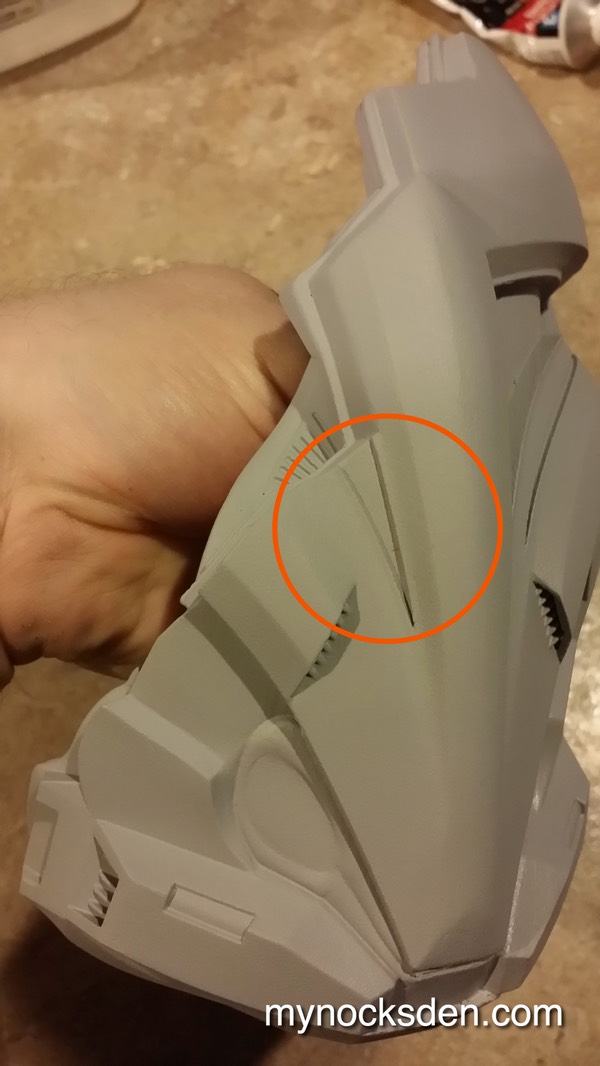
Taking a closer look at the reference material, I realized a missed something - a detail so small that most people would likely not even notice. I however, did notice, and was so bothered by my failure to incorporate it the first time around that I remade the entire master. We’re talking adjusting the CAD model, re-3D printing all the pieces, assembling, smoothing, etc, etc! Everything from scratch!
The detail in question is a small yet definite offset of the inner visor surface on the right side of the mask.
“Uh…what?” you ask.
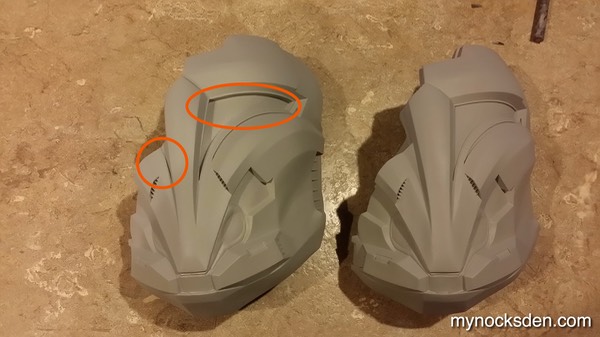
The photo below shows my second version of the Arcann master, with the right visor area indented into the mask.
Below you see the completed V2 master next to the original V1 which is missing the said indentation. You can also see that I made the visor inset a little deeper on the V2, which would make installing a visor (which I decided to cast separately) easier.
The steps involved in making my V2 master are virtually the same as for V1, so I’ll just show you some progress photos from 3D print to final casting but skip the narration.
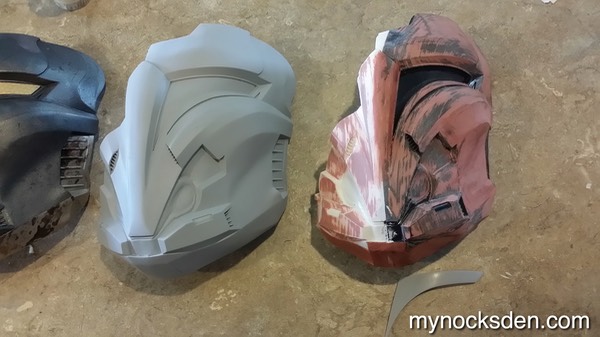
(Photo below from left to right: completed original V1 mask; V1 master; V2 master in progress).
I 3D printed the visor separately, and smoothed it out as best I could using both acetone vapour and Bondo spot putty. I primed this with automotive primer, sanded with a fine grit sand paper, and buffed some plain candle wax onto the surface to make it even smoother.
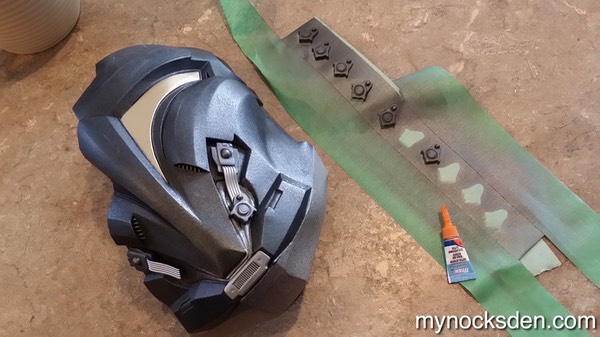
I walled this (along with the little dial wheel that is found along the edge of the mask, which I also decided to cast separately) with plasticine, and poured in some Rebound 25 to mold the pieces.
I cast the visor in the same 65D resin I used to cast the main mask body, and belt sanded it to around a 3mm thickness.
After trimming the main mask body and all the smaller pieces in a similar fashion, I airbrush-painted everything using various acrylic paints, using slightly different colours than I initially chose for my V1.
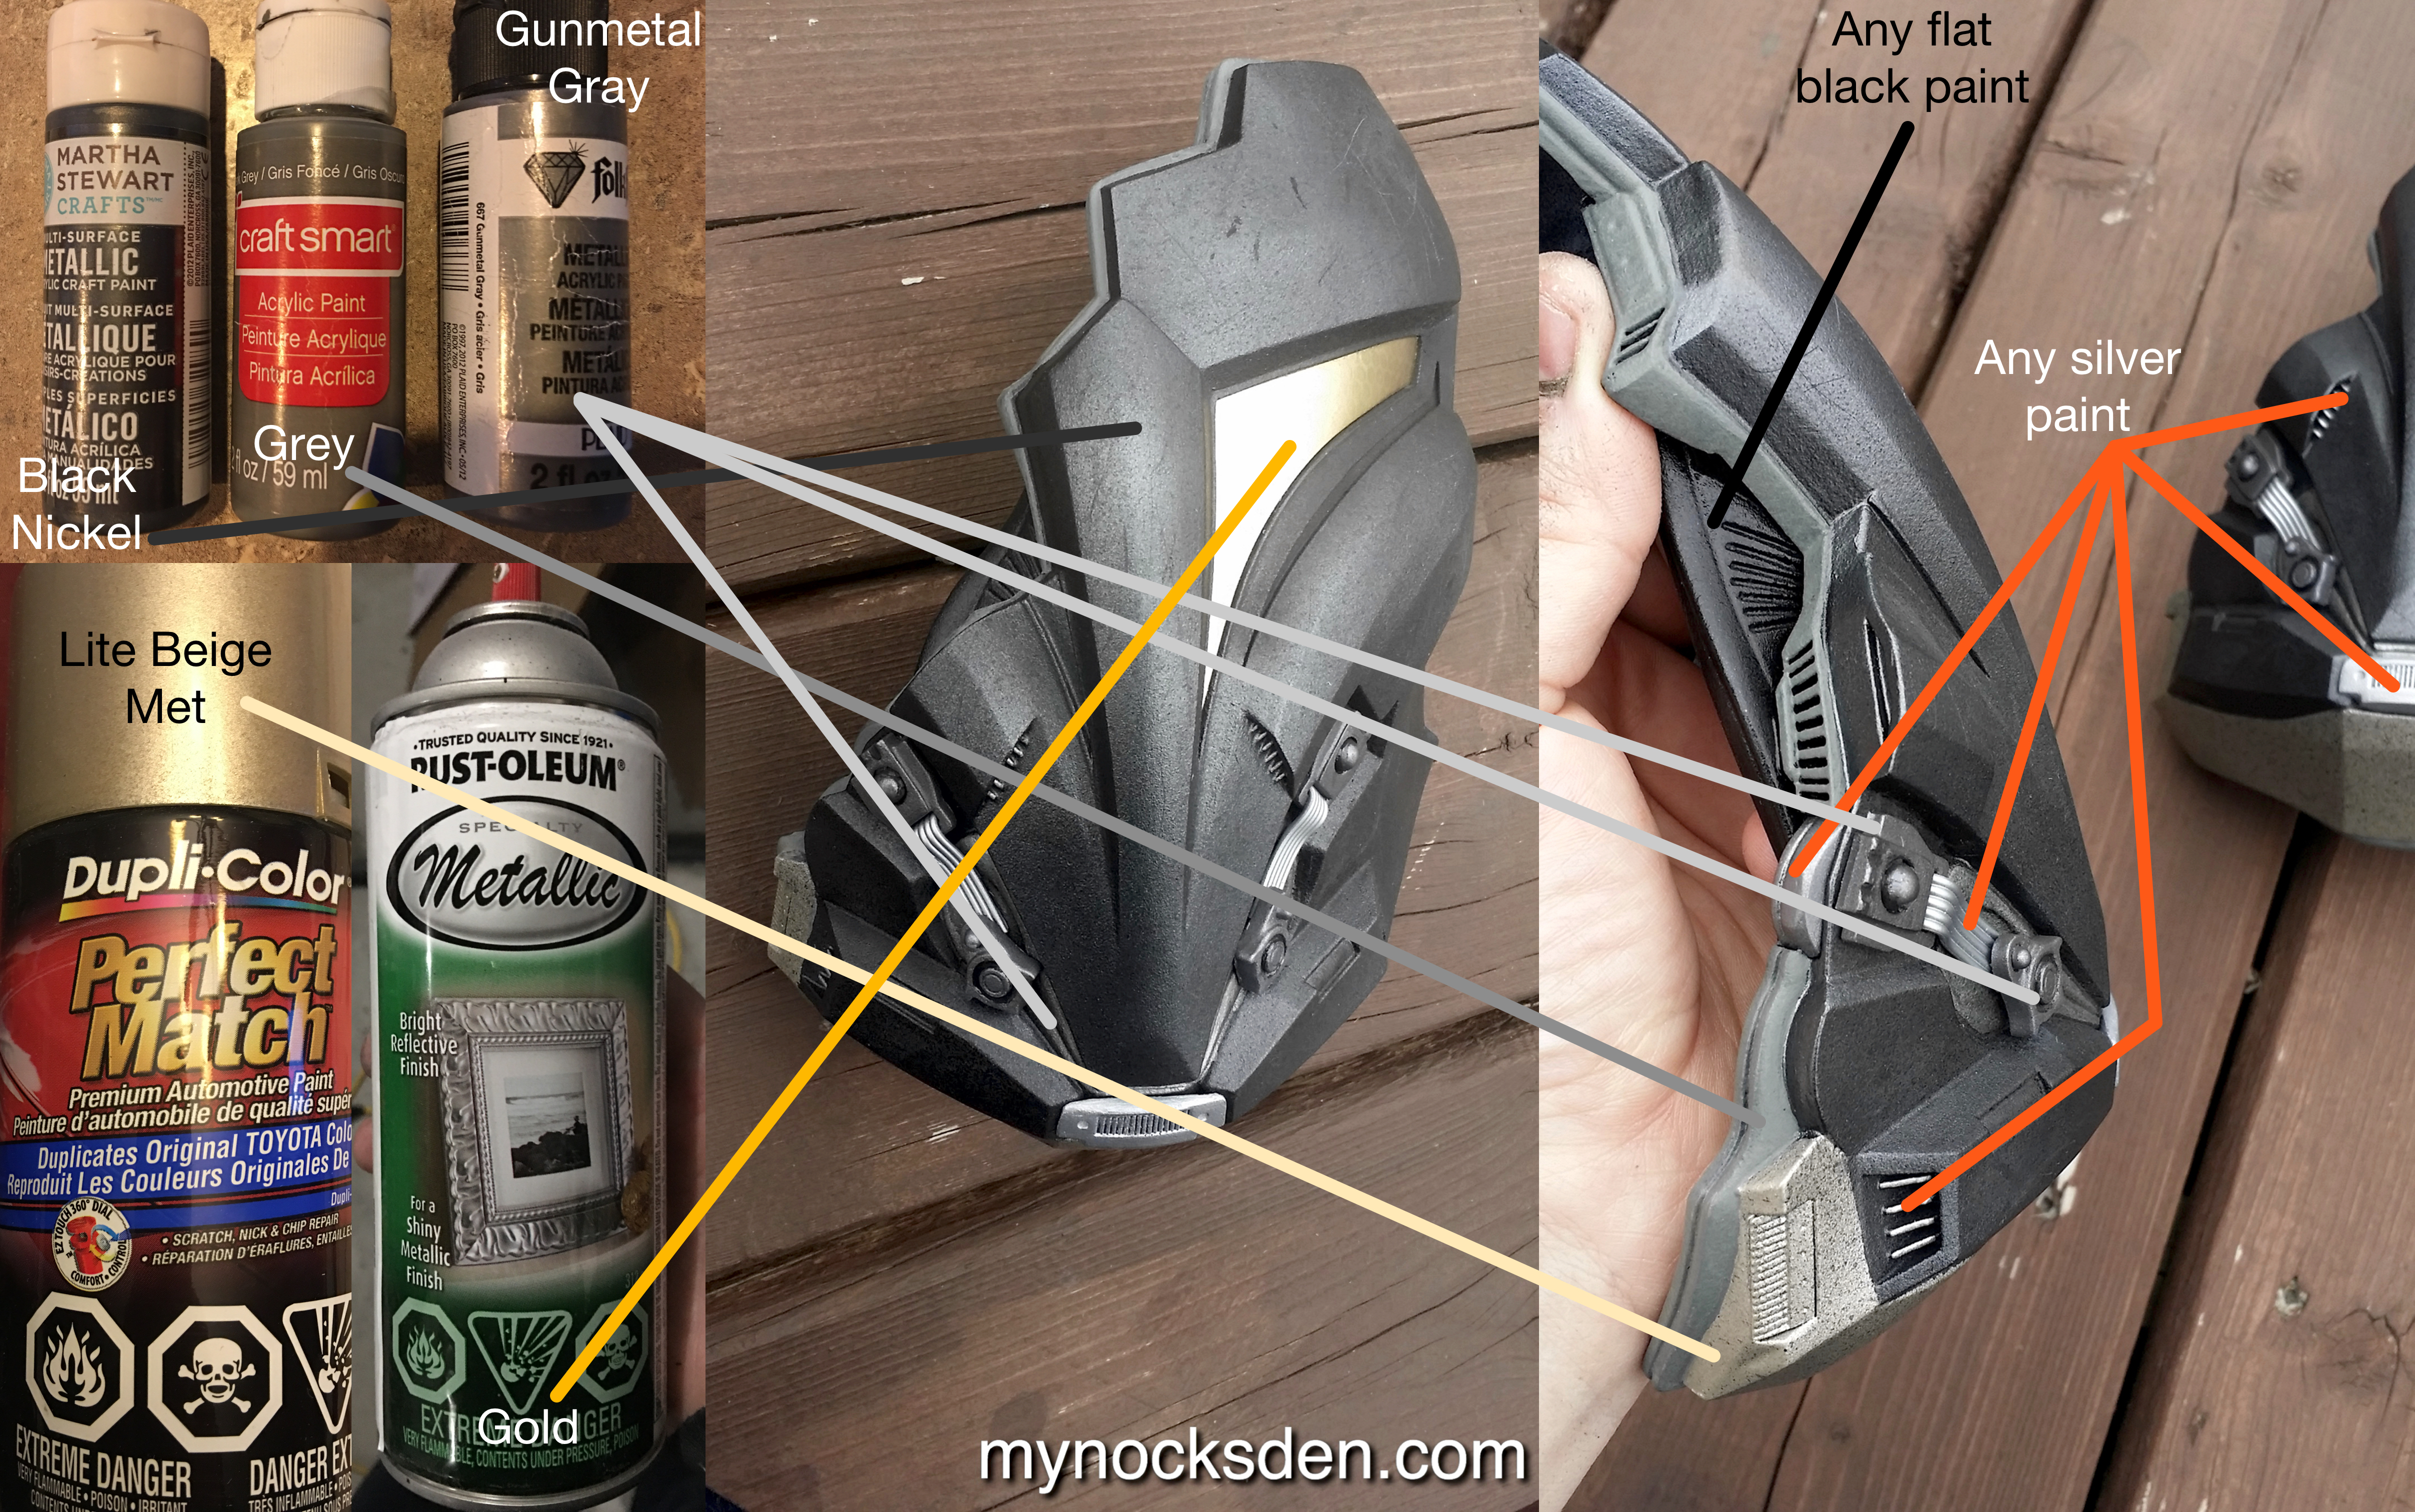
For the visor I chose Gold Rust-O-Leum spray paint.

I used my favourite Dollar Store-kind superglue to attach all the little bits...
… added some more scrapes and scratches and general weathering, which completed the new Arcann mask!
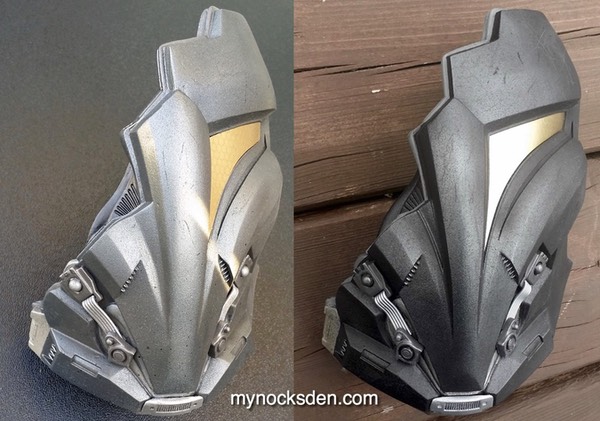
Here is a comparison shot between the V1 Arcann mask on the left, and the V2 Arcann mask on the right.
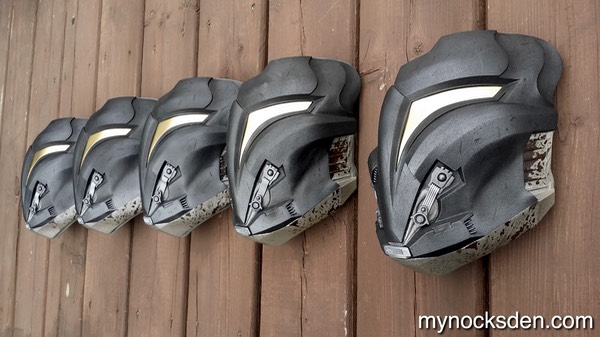
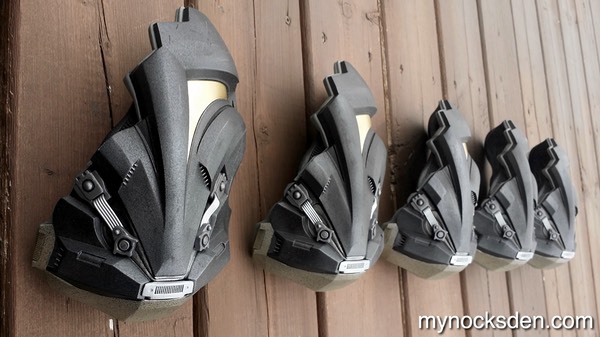
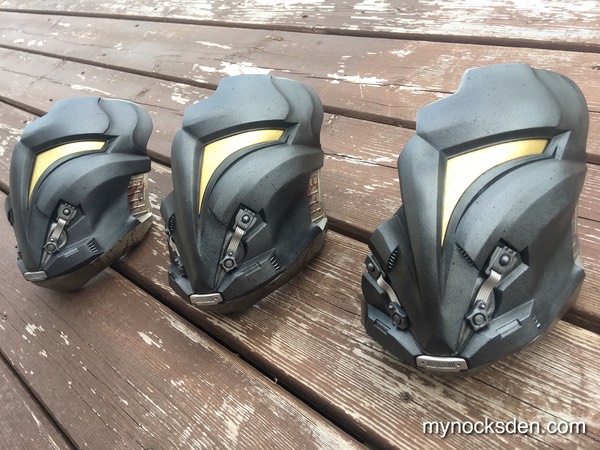
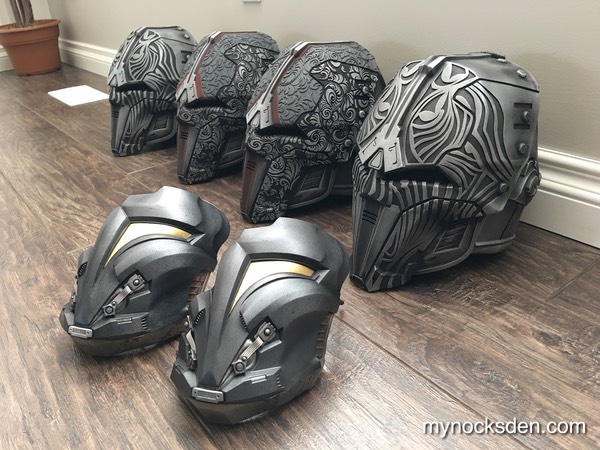
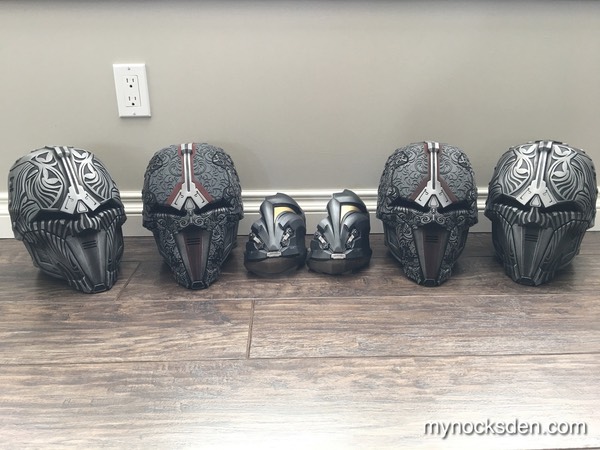
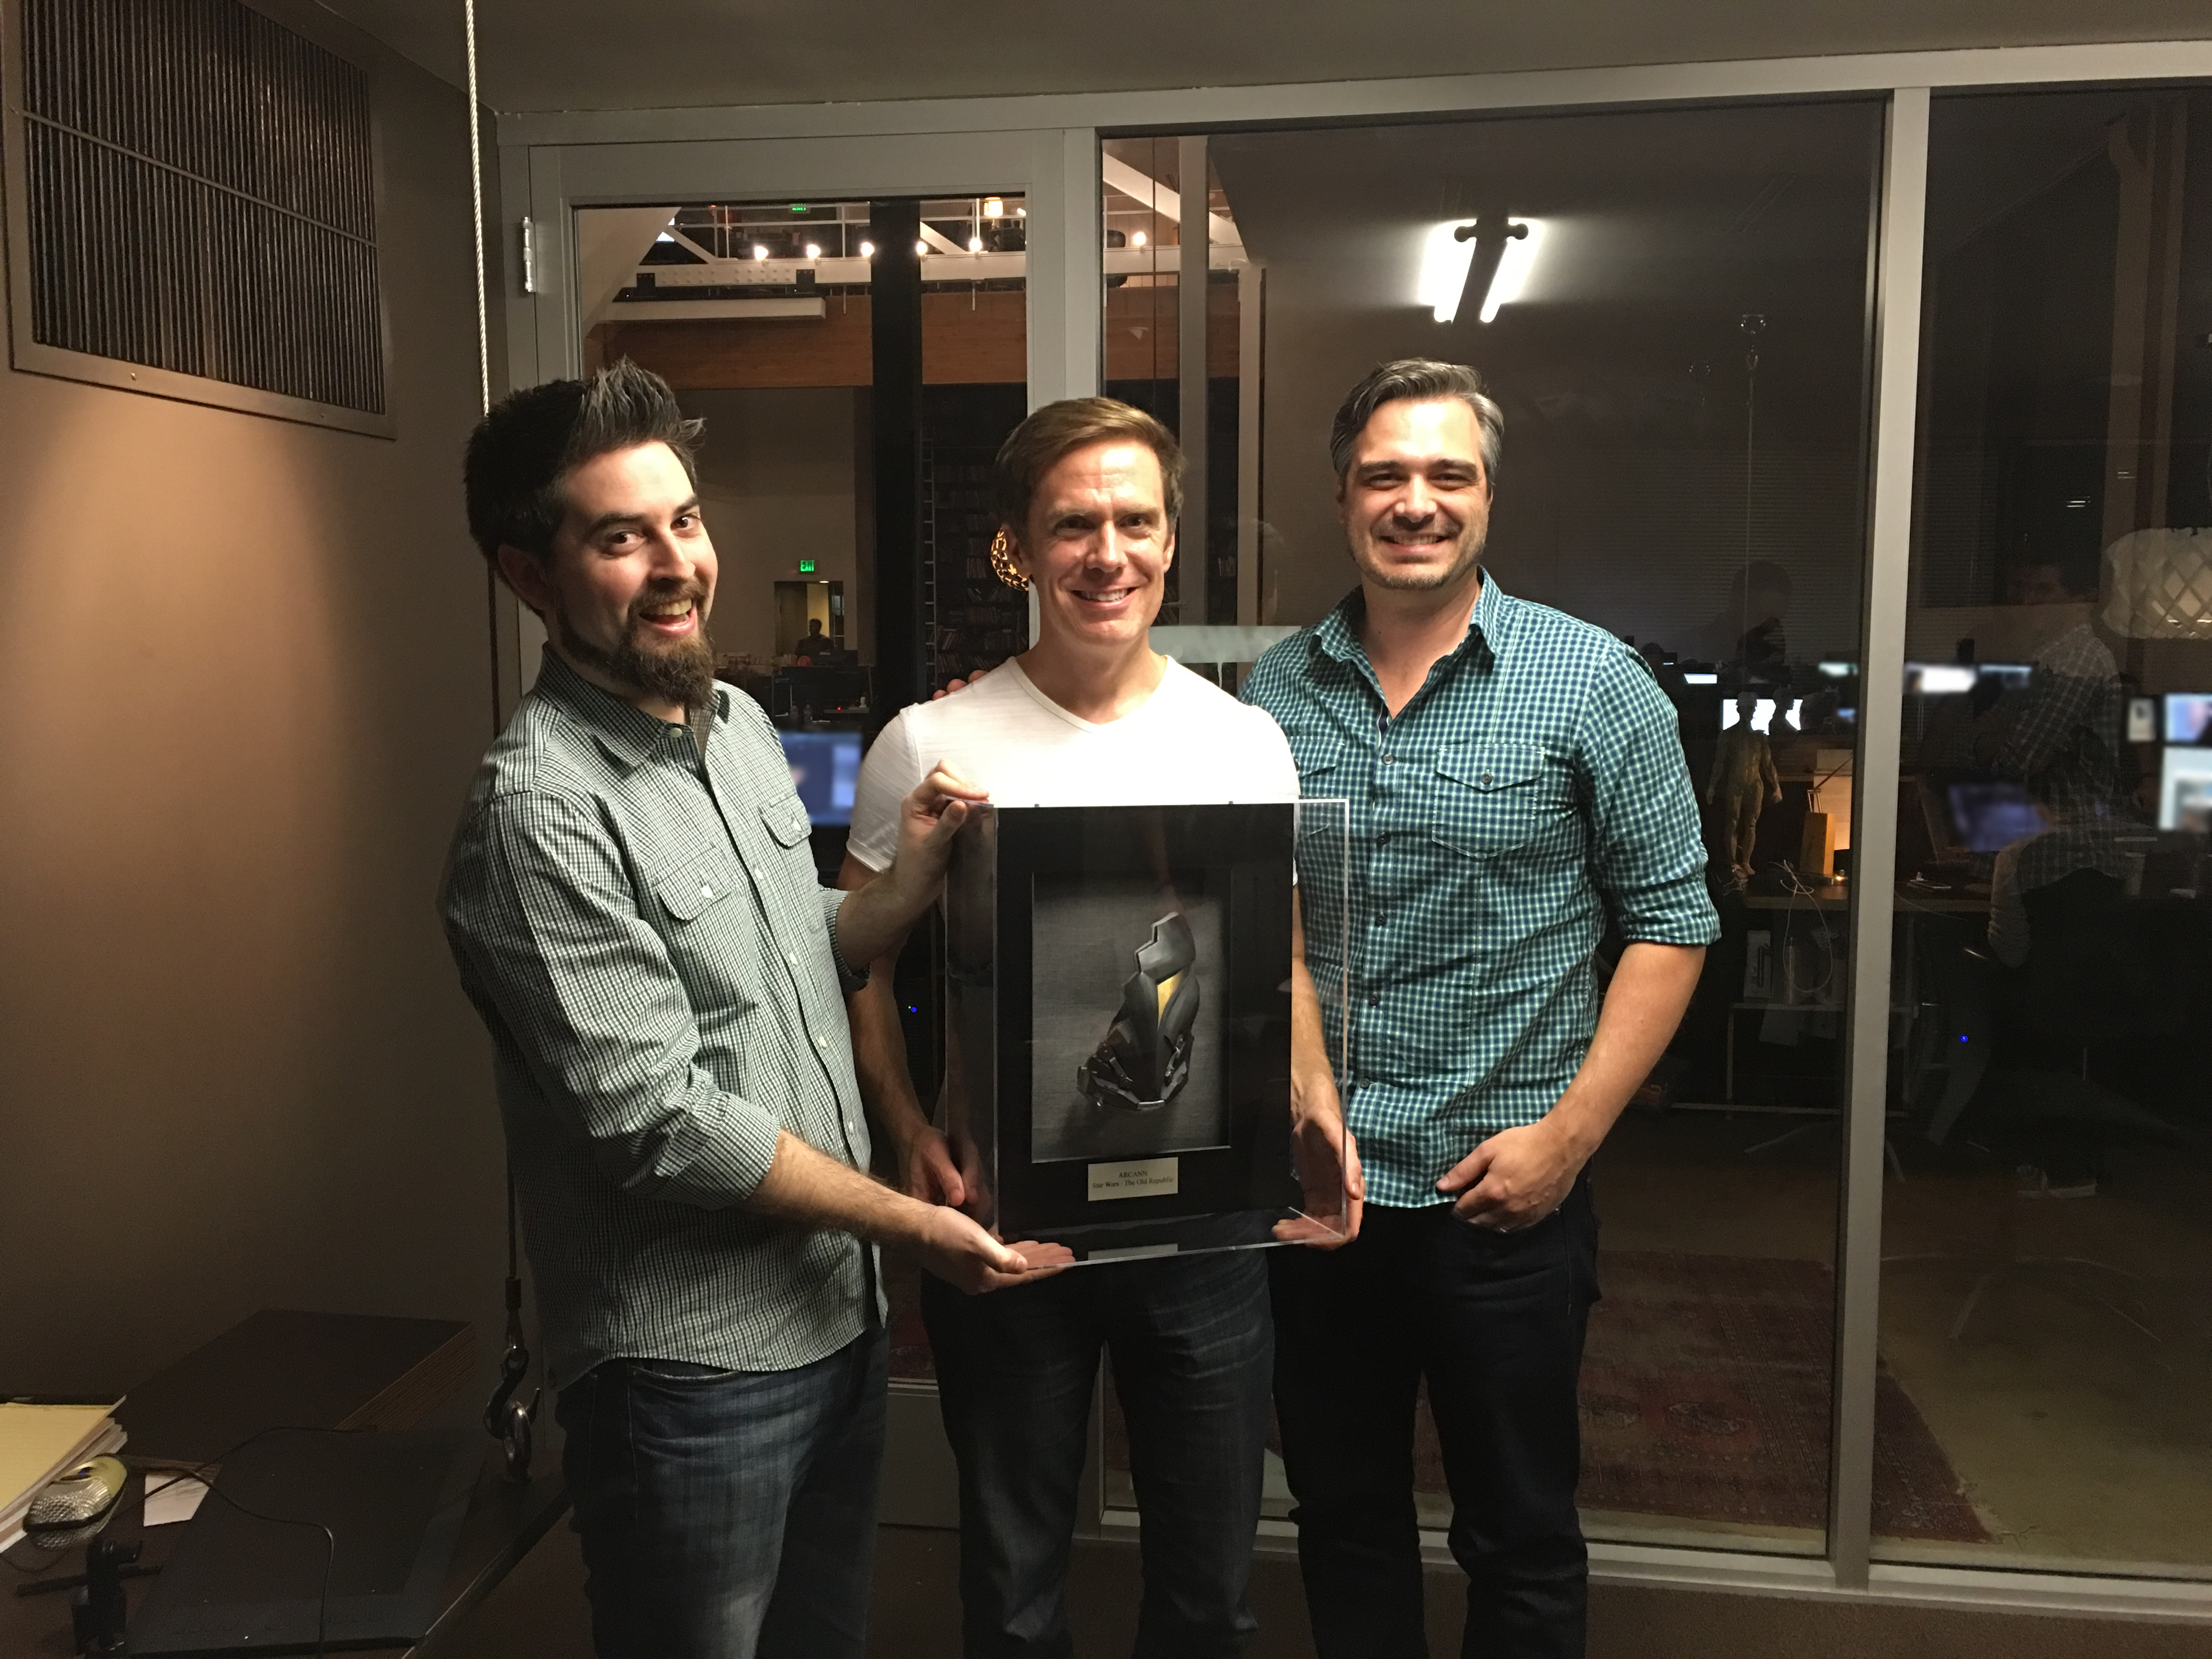
And here are a few Prince Arcann masks that I completed that ended up going to Blur studio, the creators of the amazing cinematic that featured Arcann.

And in the next photo, we have one of the Mynock's Den ARCANN masks from the above photo framed and gifted to the BioWare SWTOR team by Blur Studio. In the photo from left to right: Charles Boyd - lead writer/creative designer; James Ohlen - BioWare design director, and Ben Irving - lead producer for SWTOR. Photo was taken at Blur Studio, was provided to me courtesy of Dave Wilson - Artistic Director at Blur.
Thanks for looking!