Ok, let me start off by saying that if you would love to vacuum form your own toys, but the only thing holding you back is that you are not sure of how to go about the proper setup, this section will change your life… well, hopefully!
You can spend $7,000 on a professional machine, or if you are a hobbyist with a limited supply of the Benjamins, you can build your own setup for about $300. This includes a shop vac, heat source, plywood, glue, beer, and everything else you will need. If you are like me and have an assortment of weird screws and parts in the garage, the cost will be significantly lower!
And the end result of DIY vacuum forming? Check it out.
Tools for the Job
To build your own vacuum forming setup you will need to have some very basic tools handy, most of which you probably already have. What you don't have, you can probably borrow from a friend. You will also need some supplies. Here's a very basic list.
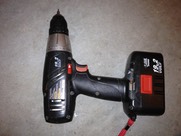
Drill and bits for both, drilling holes and driving screws. You will be drilling a whole pile of suction holes in the platen (vacuum forming table top), making pilot holes for all the screws going into your vac table and heat box, and driving all them screws into the wood. You will also need a door knob jig for cutting out a large hole at the bottom of the table for the vacuum hose.
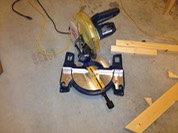
You will need some kind of saw for cutting wooden planks to the correct length (table walls, legs and support frame). There are many different kinds of saws out there, and any one that makes right angle cuts will do.
(NOTE: unless you have a good table saw, for the vac table top and bottom, as well as the heat box walls, it's best to have your hardware store cut the plywood sheets for you. Most places will do it for free with your order, which will cut down on the amount of work you will have to do yourself.)
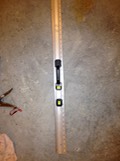
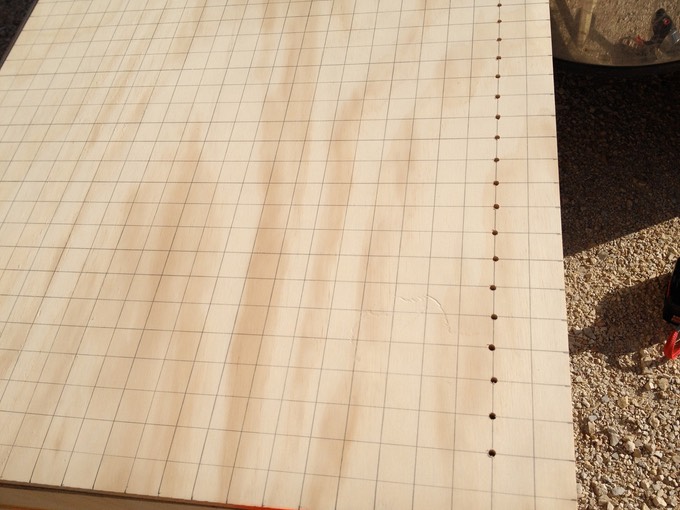
A long ruler for measuring "stuff" and drawing a grid on the platen.

A pencil for marking "stuff" and drawing all those lines on the table using said ruler.
Sanding block with sandpaper for smoothing things out.
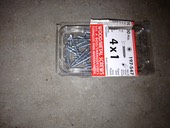
Screws. Any kind of screws will do. I used drywall screws left over from my basement renovations for the entire project. If you have spare screws, use them.
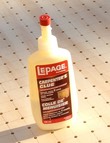
Wood glue for sealing the vacuum forming table "box" joints.

Wood varnish for sealing and protecting the platen.
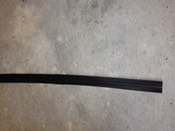
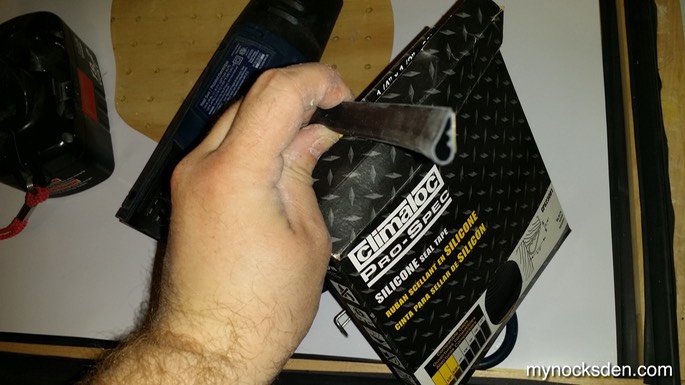
Rubber weather stripping for creating the necessary seals on the platen and frame. I found the $/foot stuff to be the cheapest option.
For the heating box, you will need some tin foil to line the inner walls, and some electrical tape to tape it to the edges.
And that should do it!
* * * * * * *
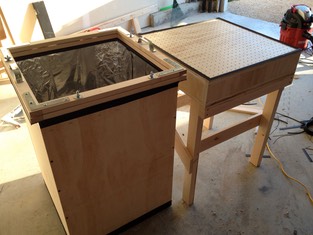
Building the Vacuum Forming Table (Platen)
Because it's a lot more fun to look at pictures than read a bunch of dull stuff, with minimal commentary (since most of this is self-explanatory), here is the table production diary. It should however be said that I decided to do a table that was 24"x24" wide, with a usable surface of about 18-22" so I could form larger objects (like armour chest plates).
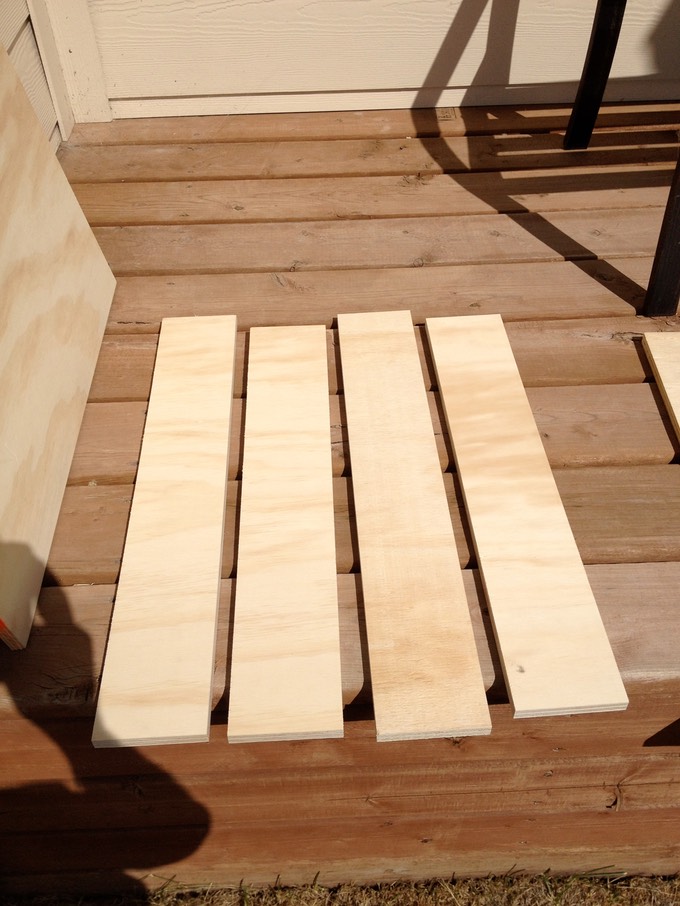
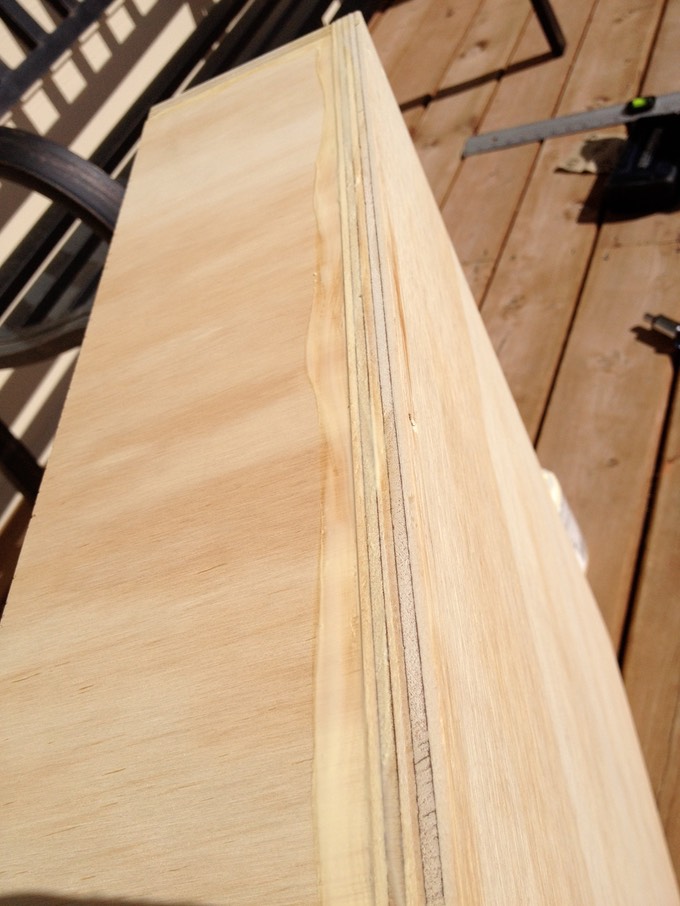
24x24" top and bottom of table, with two 4"-wide side pieces (to be cut) - 3/4" thick plywood.
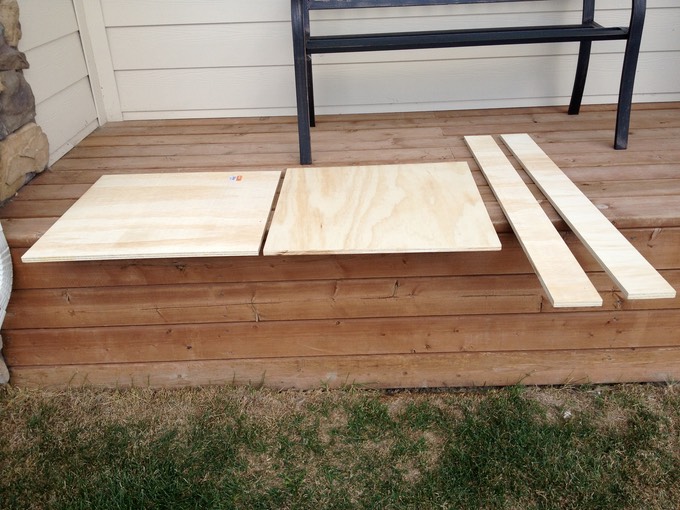
Sides of table cut in half-ish (since the table needs to be a square, two of these are 24" long, and two are 22.5" long)
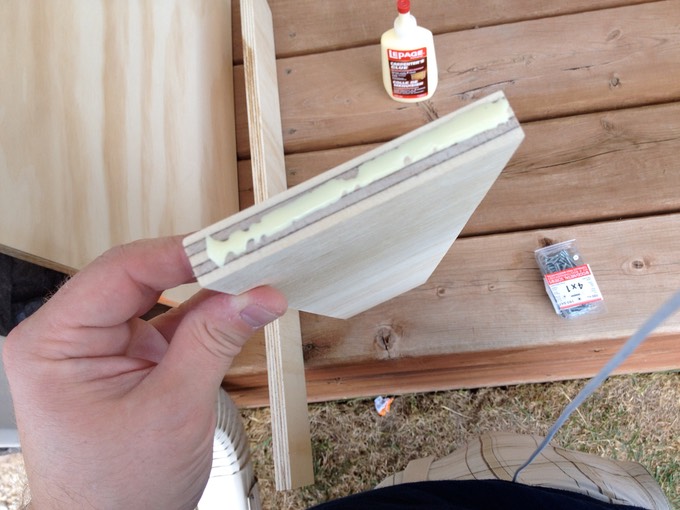
Using wood glue to create a good seal between all wooden pieces of the "hollow box" part of the table.
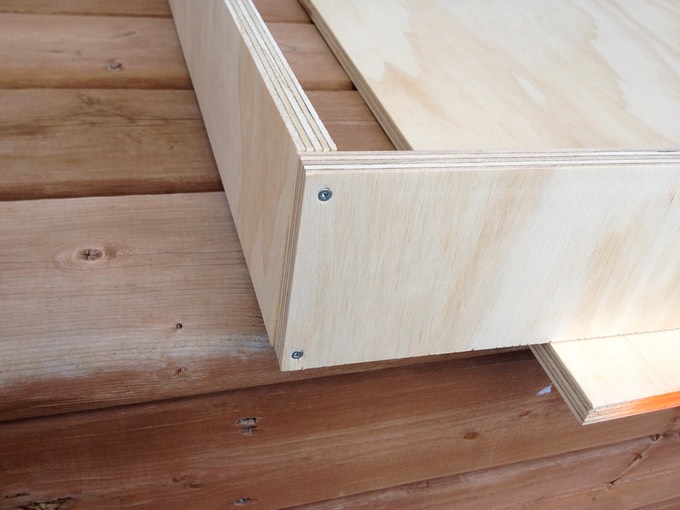
For added strength, i drilled some pilot holes, and put two screws at each end like this.
Next, I glued and screwed down the bottom of the table to the side framework….,
… and smeared some glue along the joint to seal everything better.
Next, I used some 2x4s to create the base and legs.
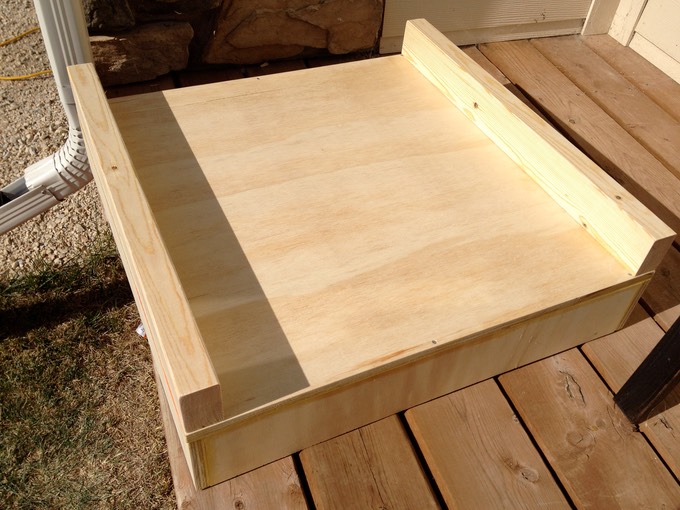
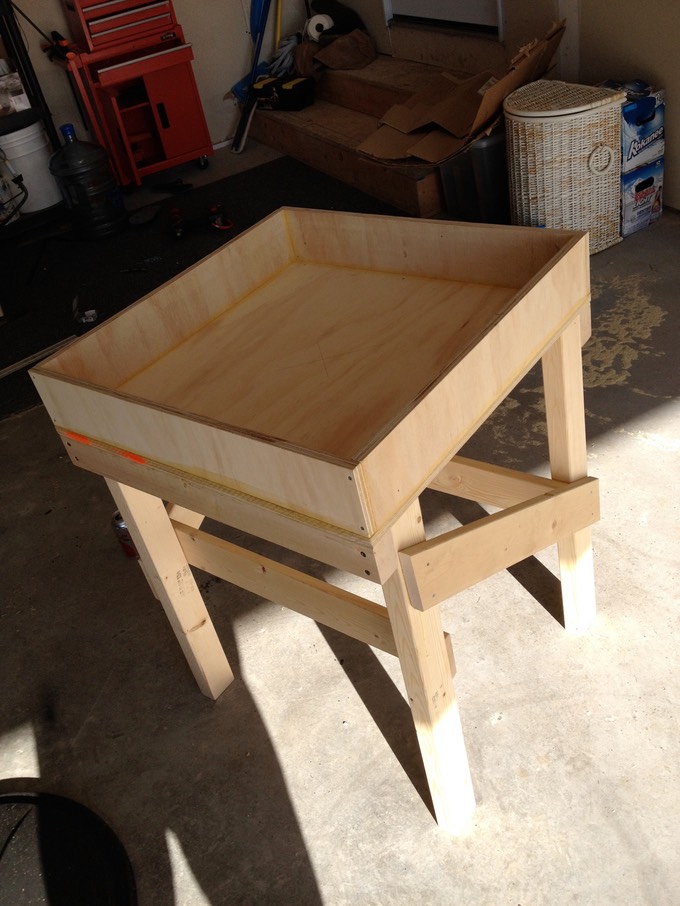
I drilled a hole dead center of the bottom of the table, which is where the vacuum hose would be attached. To do this I used the largest round door knob drill jig I had (which coincidently happened to be the EXACT size of my vacuum hose attachment! Win!)
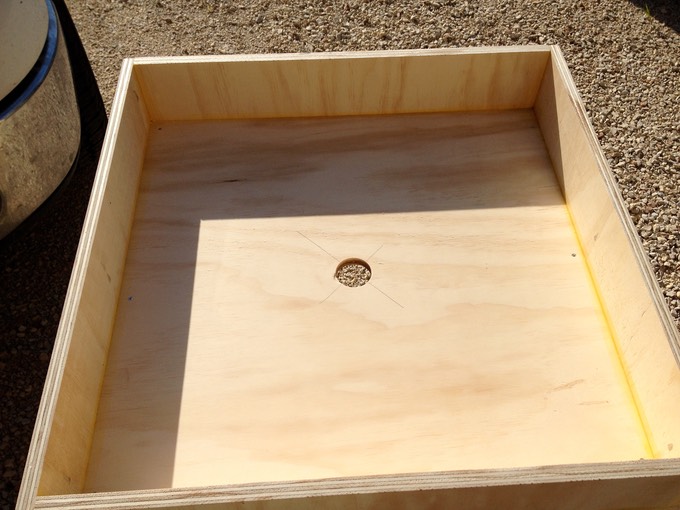
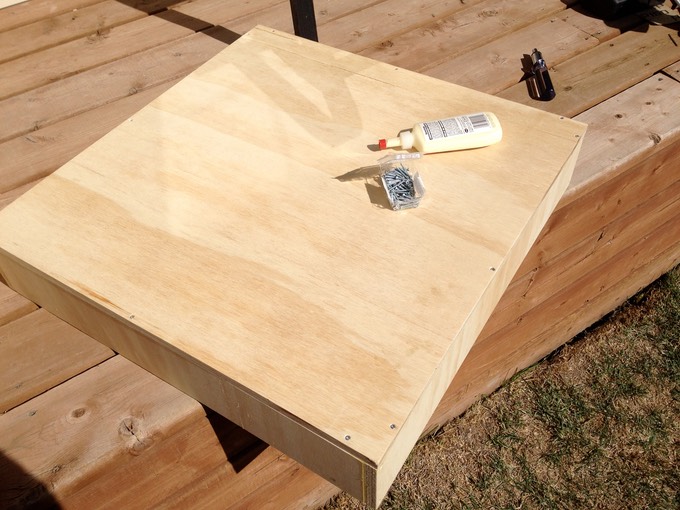
Next came the fun part. I drew a grid of lines, 1" apart on the top plywood piece of the table, and drilled and deburred 529 holes …. by hand. This sucked pretty hard, murdered my arm, and killed my cordless battery twice. Had to be done though.
Then, I glued and screwed the top piece to the table, and went crazy some more on covering the seams with glue.
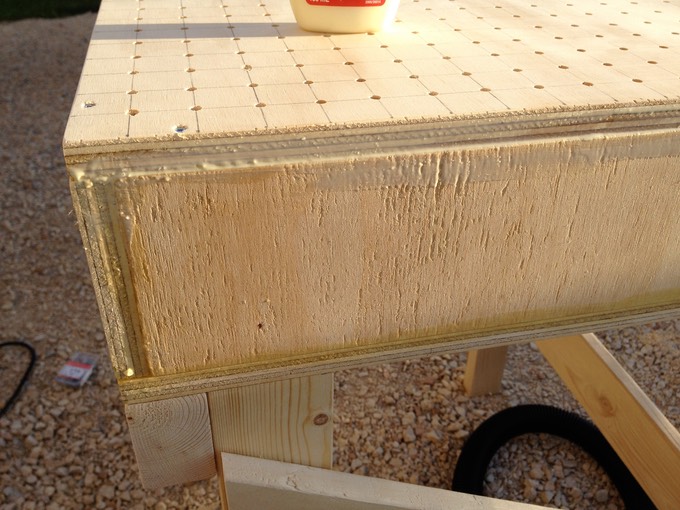
I then varnished the top to seal and protect the surface.

Next, I hooked up my shop vac, and to demonstrate that this setup works, made a short video which can be found at the bottom of this page.
To complete the table, I glued some $1/foot rubber garage door weather stripping along the perimeter of the platen to help seal the frame that will be coming into contact with the table surface. A good seal between the frame and table is paramount in ensuring a good pull.

* * * * * * *
Vacuum
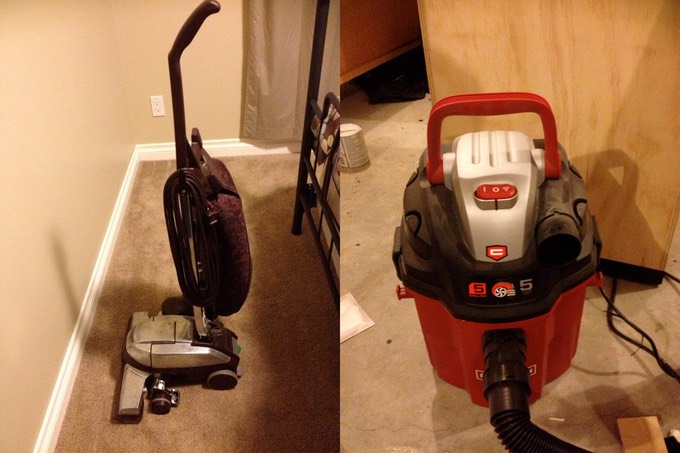
If you are normal, you will already have a vacuum cleaner with an attachable hose that you use for sucking up dog hair from your carpet. If you are too lazy to drag your home vacuum outside to clean your car, and for that reason have a shop vac in the garage, you are awesome like I am. Whatever the case, either one of these types of vacuums will do. Seriously.
Once you have everything set up, you will be able to lift the whole vacuum forming table off the ground by the suction power of your dinky, $60 Walmart vacuum.
Here is a little video demonstrating just how well a simple shop vac does the job.
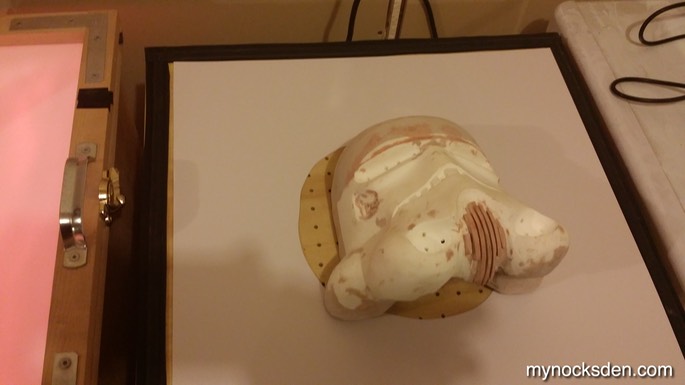
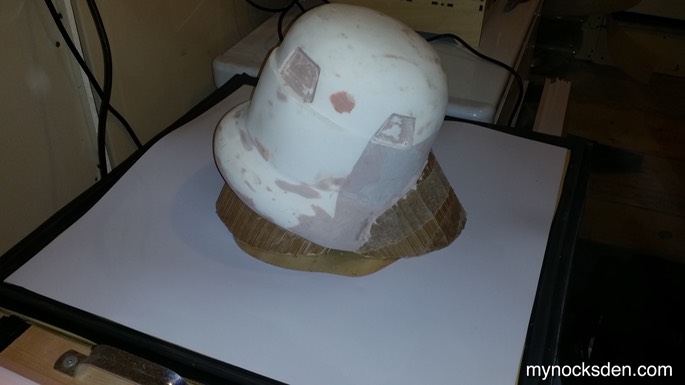
After two years of running this setup, I began to experience soft pulls; I noticed the problem when attempting to complete my nephew’s baby Stormtrooper helmet, and narrowed the problem down to a loss of suction. The rubber trim on the bottom of the frame warped and partially melted from constant heating and needed to be replaced. I used some rubber trim from Home Depot to redo the seal.
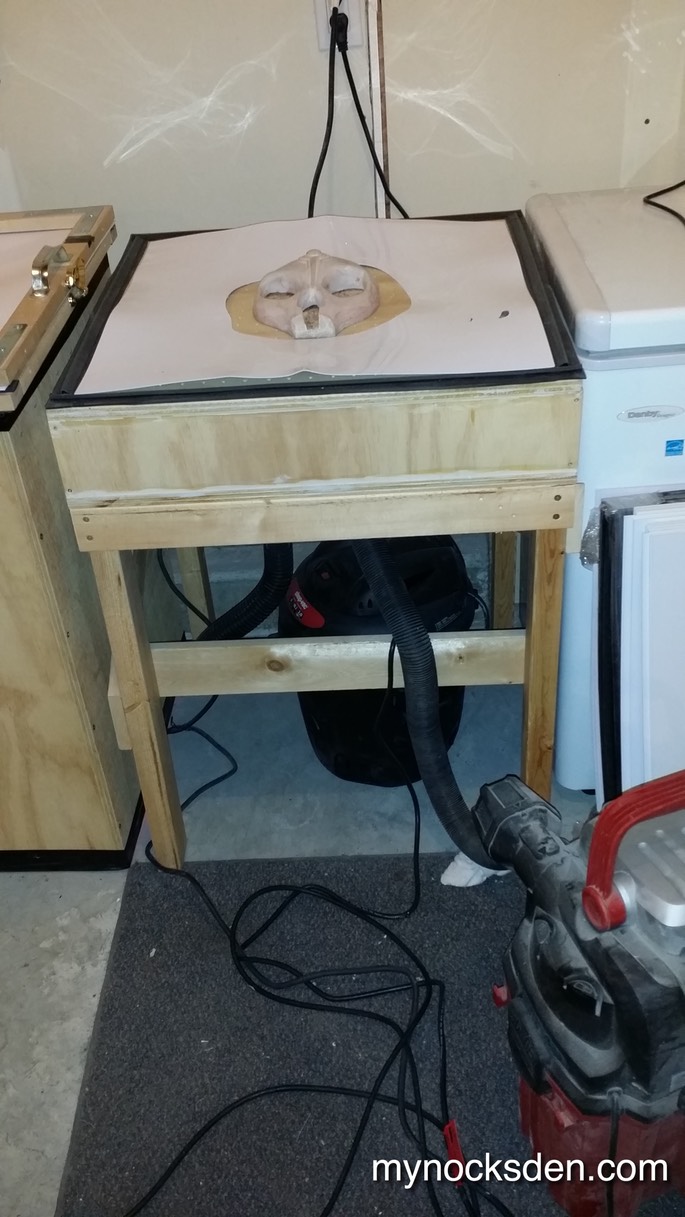
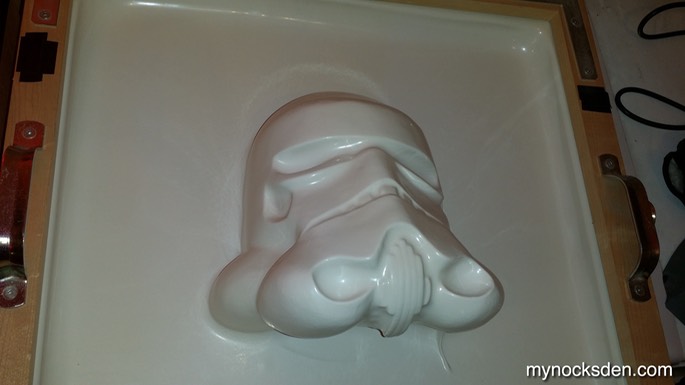
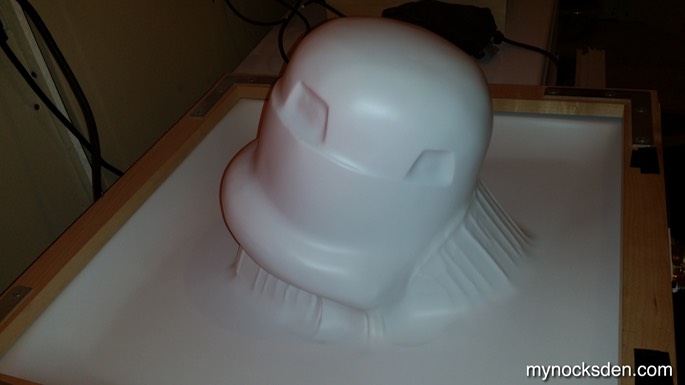
Then, to increase the suction further, I took an ABS sheet, cut a large-ish hole in the middle, and placed this onto the platen (table top). The ABS sheet covers the holes in areas where suction is not needed, which increases suction around the mold (my old Darth Nihilus mask in the following photo), resulting in sharper pulls.
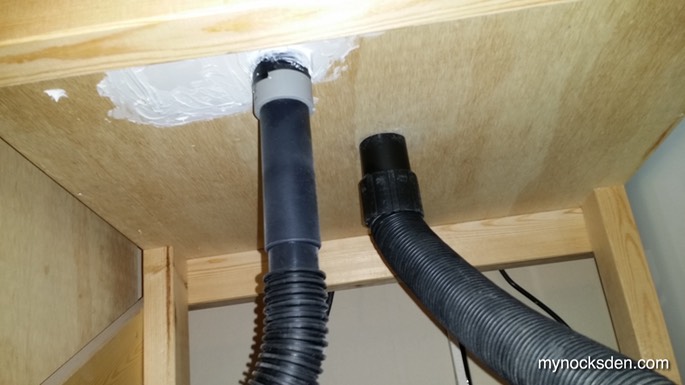
I also invested in another shop vac (on sale for $60 at a local Canadian Tire), used a jig to cut another hole in the bottom of the table, and connected the shop vac to it. The second vac makes a HUGE difference! The pulls on this set up are now perfect!
Here are some examples of the pulls I’m now getting with this setup.
Thanks for looking!
* * * * * * *
Heat Source
I contemplated several different methods for heating up plastic, but in the end opted for the patio heater method. I bought two 1200W heaters on summer clearance at Canadian Tire ($40 per heater) specifically to use in this project.
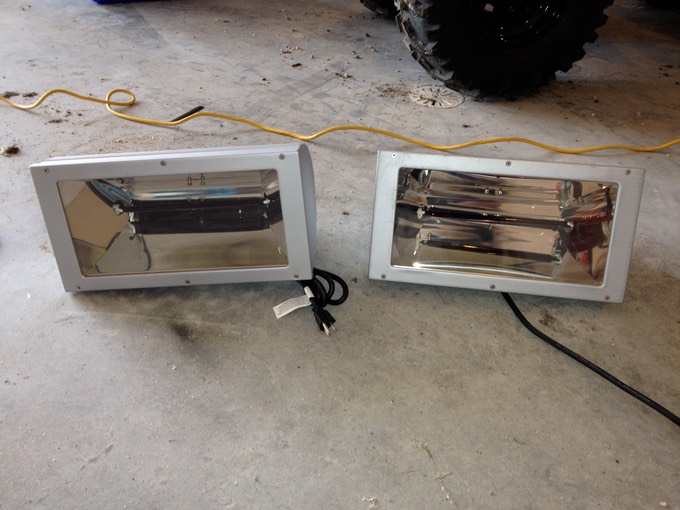
The heaters came with metal brackets for mounting on a wall; I used these to make a little frame to mount them side by side, like so:
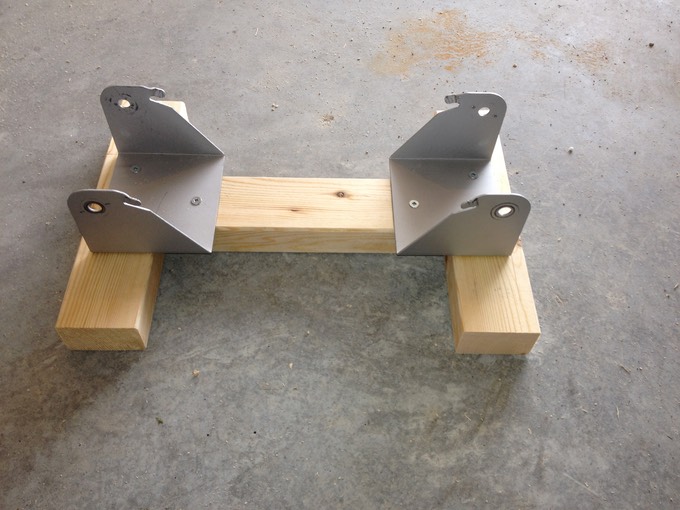
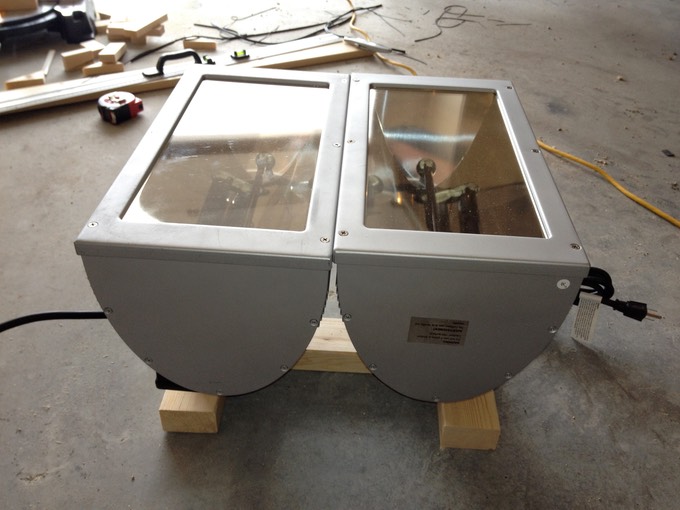
The downside with this setup is that these puppies pull too much juice for one circuit to handle; so, I have to plug them into two separate circuits if I want to run them at the same time, which I do, because one heater by itself isn't powerful enough to heat the plastic; two together, however heat up a 24x24" black .06 hair-cell ABS sheet enough to be formed in less than a minute.
* * * * * * *
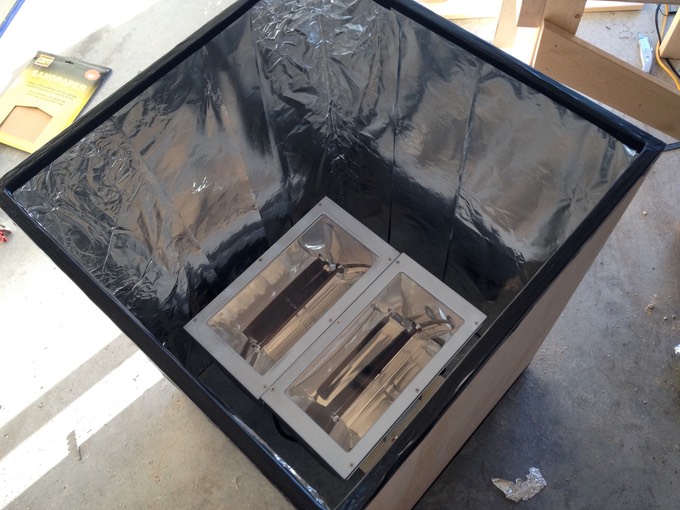
Heating Box
The heating box is essentially a big plywood box lined with tin foil. It traps the radiant heat given off by the heaters and funnels it up into the plastic sheet you're trying to soften. There really isn't much to say about it, except that the box has to be large enough to accommodate the heat source, and lined with a reflective material.
Radiant heat is wonderful in that unlike convection (using an oven element, for example), it heats up whatever it shines on without really heating the air in between. When the box is lined with a thin reflective material (in my case tinfoil), the heat bounces off the foil without heating up the wood underneath. I've kept the thing on for 10 minutes once (cooking some very thick white plastic), and the wooden box remained cool to the touch!
Interestingly enough, after keeping it on for 10 minutes, I turned the heaters off, removed the cooked plastic, stuck my hand into the space between the heaters and the floor, and discovered that the air here was only a few degrees above ambient temperature. Why? Because heat rises. Brilliant!
Really, using a radiant heater is by far the best solution for home/garage vacuum forming in my humble opinion. Way better than throwing plastic into the same oven you cook lasagna in. Just be smart, don't turn it on and leave it unattended.
Anyway, here is the box lined with tin foil, which is wrapped around the edges and held in place using electrical tape.
Also, it's worth noting that after this photo was taken, I have elevated the heaters by about 8" (by placing them on top of empty 1 gal paint cans). I've also angled them away from each other so that they are not pointing straight up as seen here. I found that if facing straight up, the plastic heats up quicker in the middle where the arcs of reflection intersect. Angling the heaters a few degrees away from each other heats the plastic more uniformly, which is the desired result.
To see the entire vacuum forming setup in action, check out the video at the top of this page.
* * * * * * *
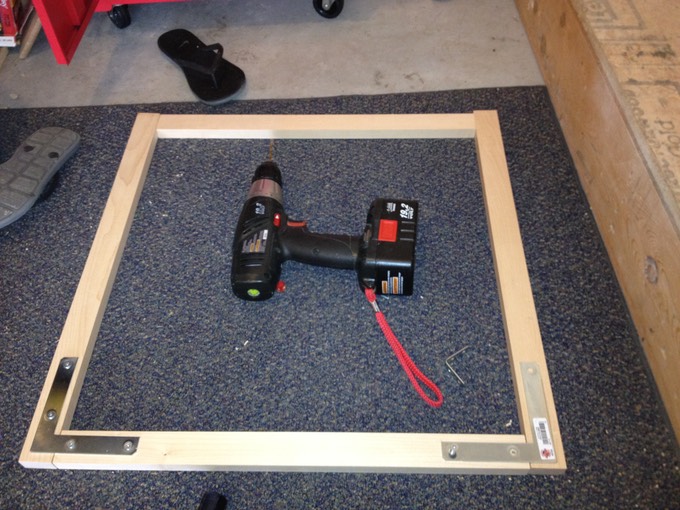
Frame
The frame to hold the plastic sheet was constructed from some wooden planks I had kicking around the garage. Four pieces were cut to form a 24x24" square to fit perfectly onto the table; because of this, the usable area inside the frame is around 22x22". L-brackets were used to add strength to the frame, the individual planks of which were also glued and screwed together from the ends.
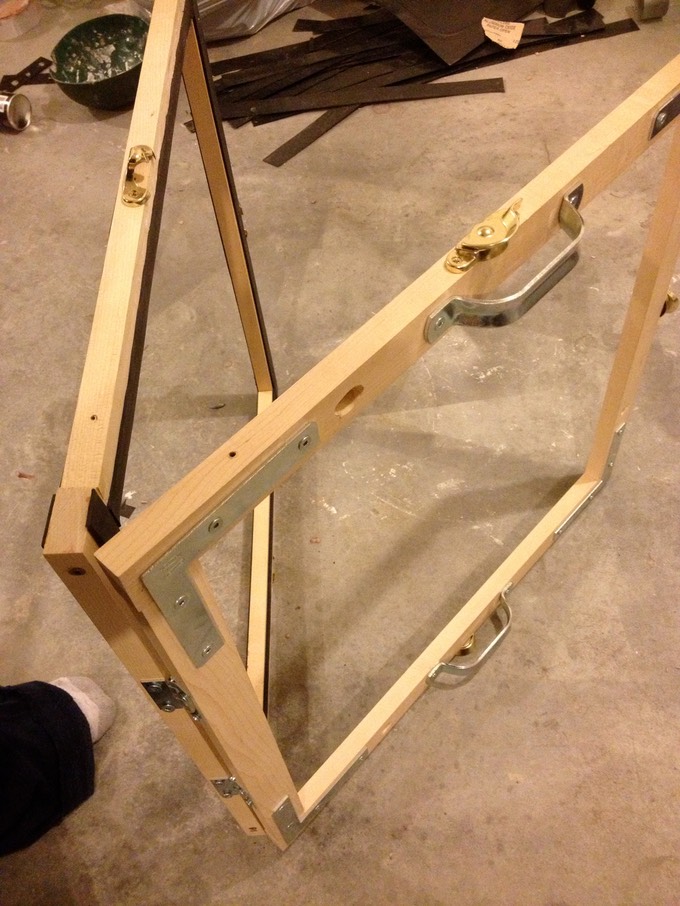
The L-brackets can go onto only one of the two frames (the upper frame); the underside of the upper frame comes in contact with the top side of the plastic sheet and must be flat. Likewise, the both sides of the lower frame must be as flat as possible; the top comes into contact with the underside of the plastic sheet, while the bottom part of the frame comes into contact with the table (platen).
It is crucial to the entire process that there be a tight seal between the plastic sheet and the frame, and the frame and the platen! Without a proper seal, the system will lose suction, and the pull will be ruined.
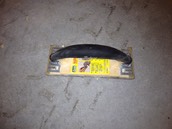
In this next photo, you can see the black rubber weather stripping lining the inside of the frame. This (or similar type of material) must line the inside of the frames, as well as the side the comes into contact with the table.
In this photo, you can also see:
1) golden release clamps (which make it very easy and quick to tightly secure the plastic sheet inside the frame);
2) metal hinges for easily opening and closing the frame;
3) metal handles, which allow one to pick the frame up from the heating box, and easily position it on the table over the mold; and,
4) my socked foot on cold cement.
* * * * * * *
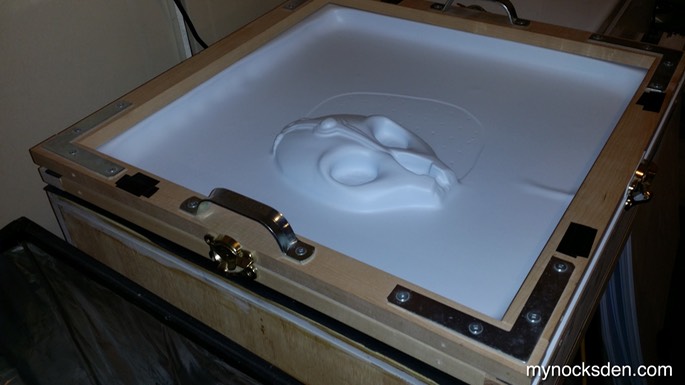
With this type of setup, you can form some pretty neat, intricate parts, and with some practice, larger/taller, more complex objects. Below are just some examples of what I have been able to do with my home-made vacuumformer. Click on the photos to go to each item’s respective build page (pages open in new window).
Knights of the Old Republic II Darth Nihilus mask:

Children’s Stormtrooper Helmet (on the left, next to Authentic Props Stormtrooper Helmet):

SWTOR Shae Vizla lower bracer (on the right):

Three years later, I decided to revisit my vacuum-former and beef up some of its components, thereby creating a more powerful and versatile machine. Stay tuned for the results!
* * * * * * *